
At the Pure//Accelerate conference this year, my colleague Barkz and I gave a session on data mobility–how the FlashArray enables you to put your data where you want it. The session video can be found here:
In short, the session was a collection of demos of moving data between virtual environments (Hyper-V and ESXi), between FlashArrays, and between on-premises and public using FlashArray features.
Barkz and I decided to put a blog post series together–mostly on his site, but with this post on mine, as it is VVol-related.
His kickoff post is here:
https://www.purepowershellguy.com/?p=18473
This is part 1.
Introduction
Virtual Volumes has many benefits, and you can explore my blog posts on the topic here:
https://www.codyhosterman.com/pure-storage-vmware-overview/virtual-volumes/
One of the overarching benefits of VVols is somewhat uncoupled from VMware environments in fact. This is the whole idea that VVols themselves are not really “virtual disks” in the traditional sense–they are instead standard block volumes on the array. Much like a raw device mapping (RDM) or a volume presented to a physical server. The only difference is really a logical one–they are controlled via the VVol management layer.
VMware does not, however, change how they are written to. They do not format them. They do not encapsulate the data inside of a VMDK file. Each “virtual disk” you add to a VM in a VVol configuration is its own separate volume on the array. Each volume is only formatted the guest OS, so it has NTFS on it, or XFS or whatever.
The fringe benefit of VVols is actually a HUGE benefit. This means it is now easy to share data from VMware environments to anything else (physical, virtual, public, etc). If the target OS (or container) can read a block volume, it can read a VVol–without any kind of conversion, resignaturing, or reformatting.
So this basically limits your data to go to wherever your array can surface its storage.
See an example in this post:
VVol Data Mobility: Data from Virtual to Physical
Or from this recent post from Alastair Cooke:
http://demitasse.co.nz/2018/06/enhanced-vm-data-mobility/
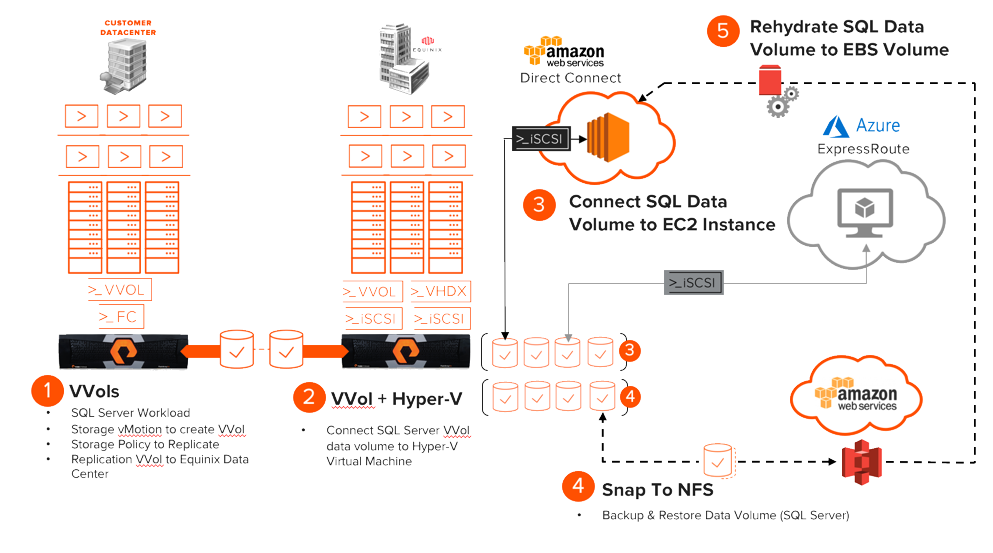
In this part of the demo, I will:
- Storage vMotion a VM from VMFS to VVols
- Assign a replication policy to the virtual disk (VVol) I want
Pretty simple.
VVol Portion
So first I start with a Windows 2016 VM running SQL. I do a select statement to show the rows in my DB.

My database is on my D: drive in my VM which is its own virtual disk.
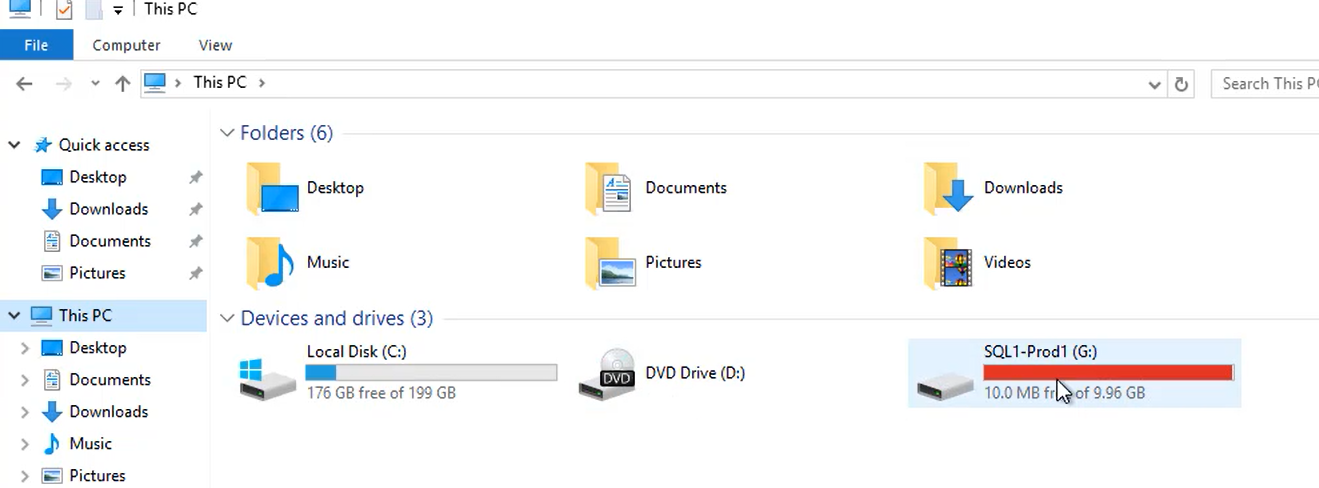
The VM is currently sitting on VMFS, so I need to move it to VVols.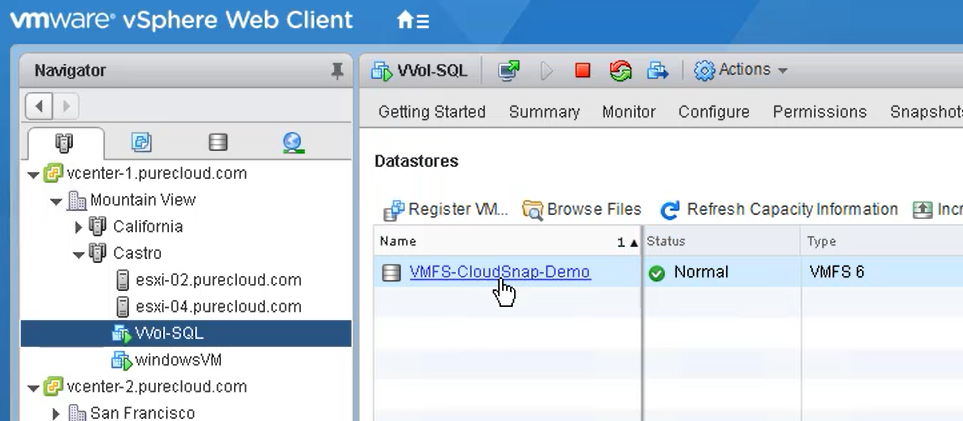
Luckily this conversion is super easy and online. Good ol’ Storage vMotion. Some other other helpful things about this are:
- VMware uses XCOPY to offload the copy process from VMFS to VVols, so it is fast and efficient.
- The FlashArray just moves metadata pointers, so no swing space is required for the move.
When moving a VM to VVols (or creating a new one, or reconfiguring an existing one) you choose a VM Storage Policy which are created in vCenter. VM Storage Policies can contain different features that an array offers–those features are entirely up to the array. Replication, snapshots, etc.
Below is an example replication policy:
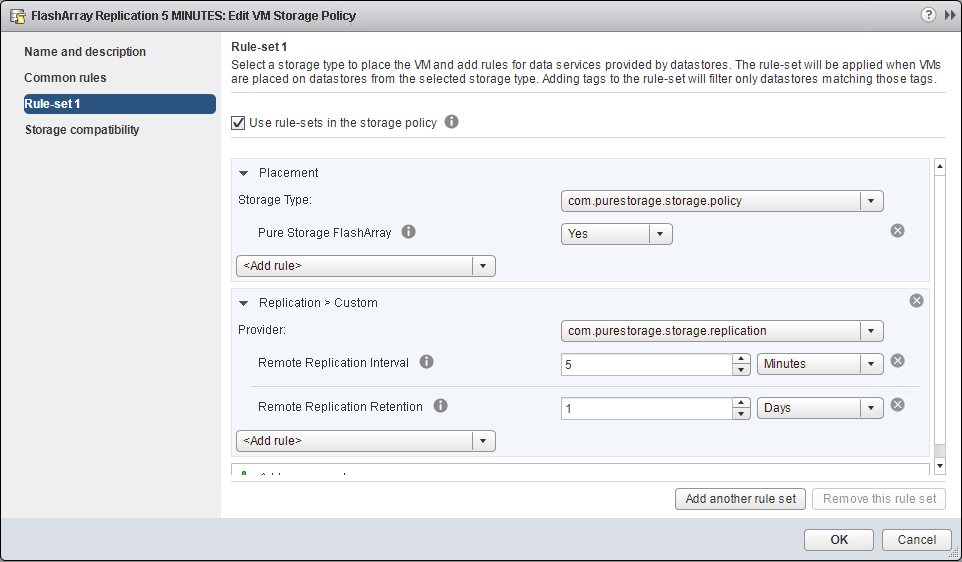
For this initial migration though, I will choose the default VVol policy, which basically just says “make this VM and it storage use vanilla VVols–no features”.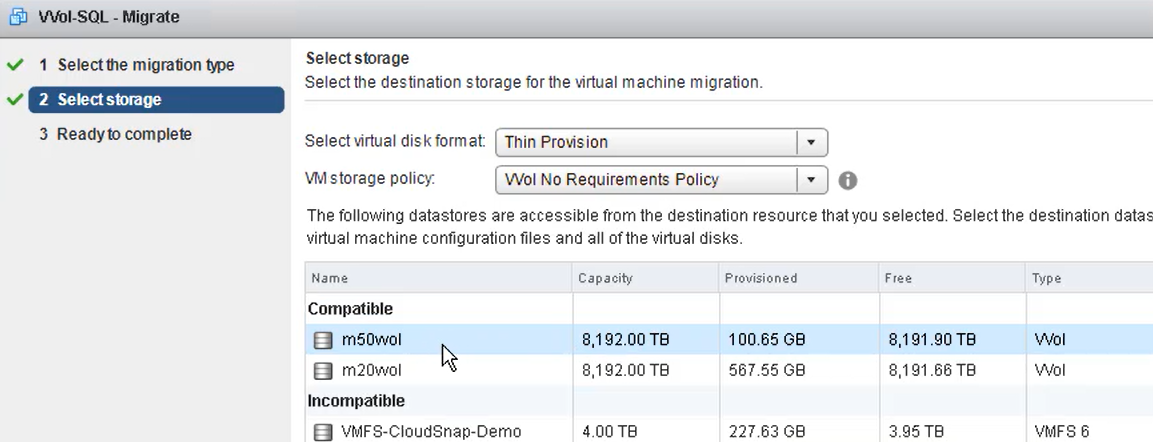
When you choose the policy, vCenter will filter out incompatible datastores. In this case, datastores that are not of type VVol (remember VVol datastores are not file systems, they are just capacity quotas).
I choose my VVol datastore and finish the wizard. This will move the VM and its VMDKs from VMFS to VVols.
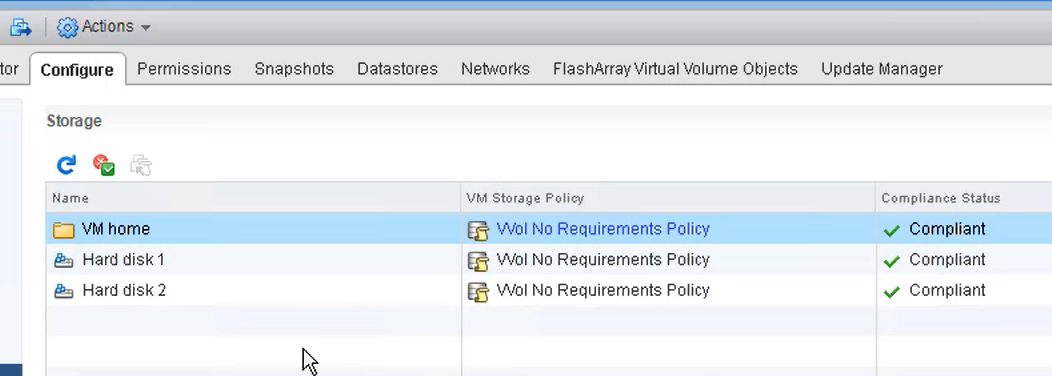
Once complete, the VM now consists of VVols:
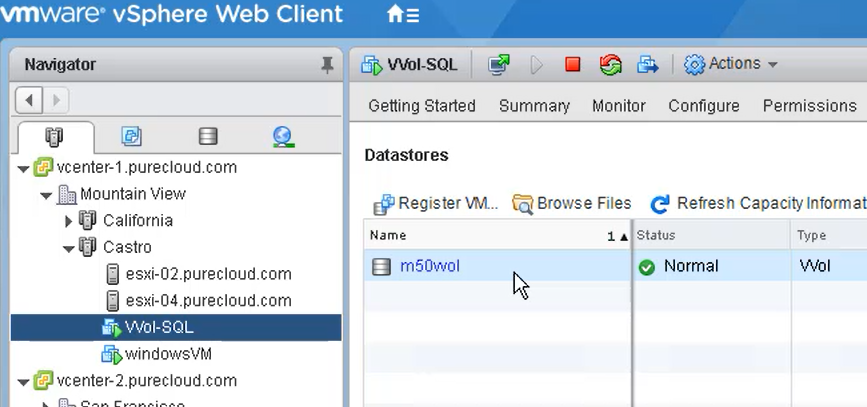
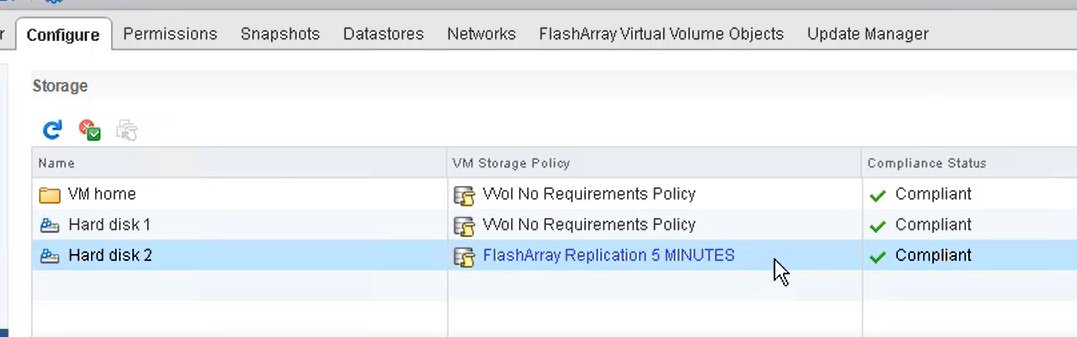
The VM and its two virtual disks are properly configured according to the policy.
Now I want to replicate my secondary hard disk (VVol/virtual disk) to my coworker Barkz’ array so he can continue the demo. I could go to the array and find the volume and replicate it, but why not just use a VM storage policy inside of vCenter?
You can use the vSphere Client to do this, or PowerCLI or really anything that can control vCenter. In my case I will use the Pure Storage vRealize Orchestrator Plugin which has a bunch of VVol workflows.
You can find info on that here:
https://www.codyhosterman.com/2018/03/vrealize-orchestrator-vvol-workflow-package/
One of the workflows allows you to assign policies to a VM or its disks. I will assign a replication type policy to the second virtual disk (you can assign it to the whole VM and its disks, or individual virtual disks).
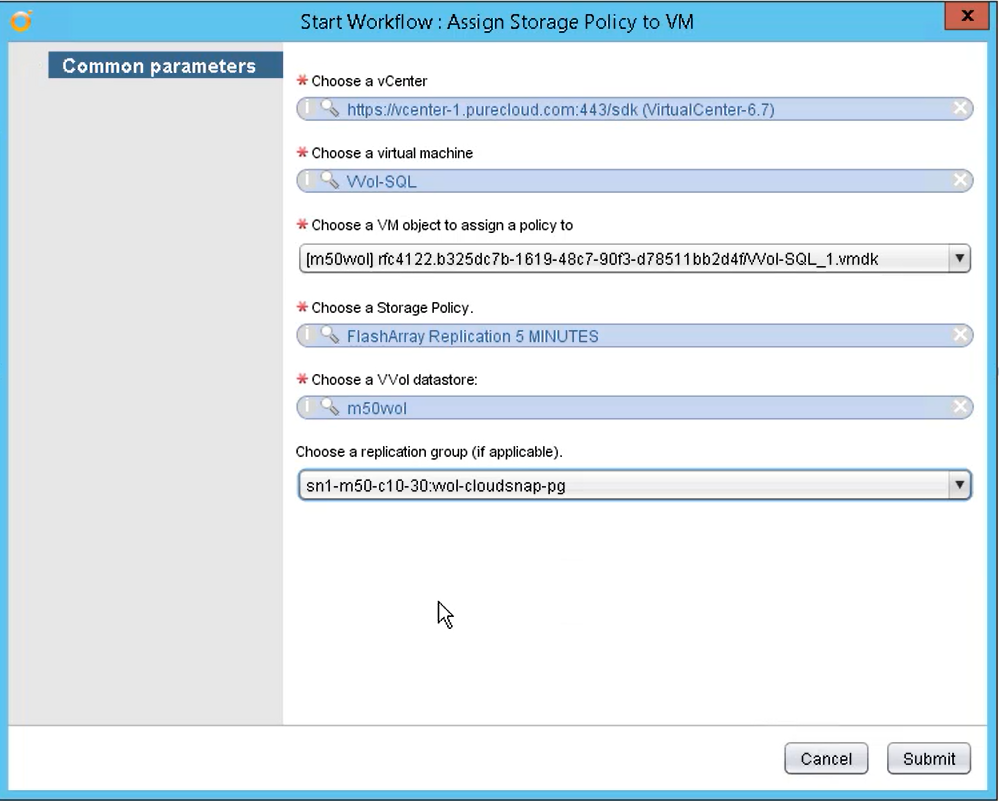
This will assign the storage policy “FlashArray Replication 5 Minutes” to the second virtual disk. It will put it in the replication group on the array called “vvol-cloudsnap-pg”.
Once the workflow is run, we can see in the vSphere Client that the policy has been assigned to the virtual disk.
Lastly, we can see that the volume is indeed in the FlashArray protection group and being replicated to the other array.

To see the next step in the demo, jump on over to purepowershell. When he posts the next one I will put the direct link.