
The first of two long anticipated VMware Site Recovery Manager updates is finally here! (the second being discussed here). A SRM appliance!
Since the dawn of time SRM was a Windows-based application. Requiring you to install, configure, and maintain Windows server and then install SRM on it. Certainly adding to the complexity of getting SRM up and running. Everything else VMware offers is an appliance why not this?
Well a couple reasons–but a primary one though is the ecosystem. SRM, unlike many other offerings relies vary heavily on ecosystem partner’s plugins. With essentially the single exception of vSphere Replication, SRM is useless without those vendor plugins, called Storage Replication Adapters (SRAs).
These SRAs are installed on the SRM server (well both SRM servers) and are what SRM uses to control the vendors replication. SRM uses a standardized API to talk to the SRA and the SRA does what it needs to control the replication. So in order for VMware to be able to move SRM to an appliance, they need their partners to make major updates to their SRAs. There were a lot of Windows dependencies and a ton of vendors that supported SRM. So no simple task.
But we are finally here. Starting with SRM 8.2, SRM is offered up as a Photon-based appliance that can be easily deployed into vCenter (yes, it is still available in a Windows form).
The SRAs are also obviously no longer Windows-based .exe’s. Instead, they are now containers–this provides the vendor with the flexibility on including requirements and reduces the need for dependencies from the Photon OS layer.
Deploying SRM
The first step is to download:
Don’t forget the release notes:
https://docs.vmware.com/en/Site-Recovery-Manager/8.2/rn/srm-releasenotes-8-2.html
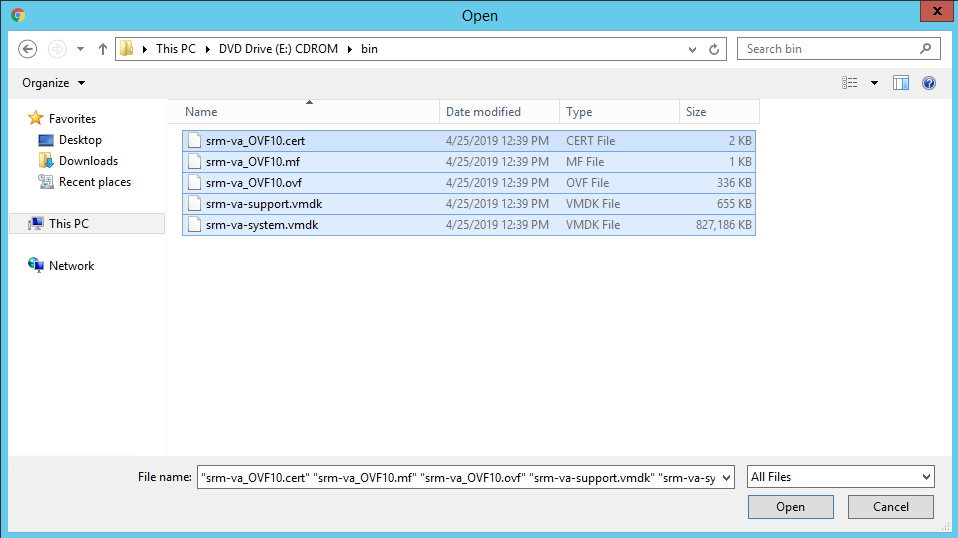
SRM is downloaded as an ISO, which you can then mount. Now move over to vCenter and choose “Deploy OVF Template”:
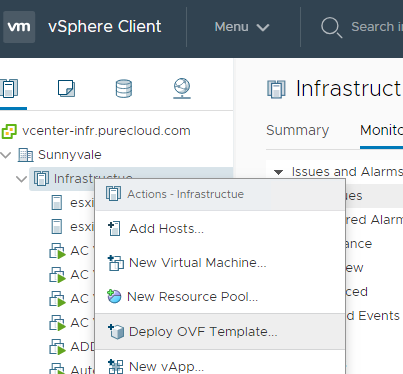
I found it a bit strange that it is an OVF and files and not an OVA, but it’s still quite simple to deploy. Choose all of the files in the bin directory.
Choose your option:
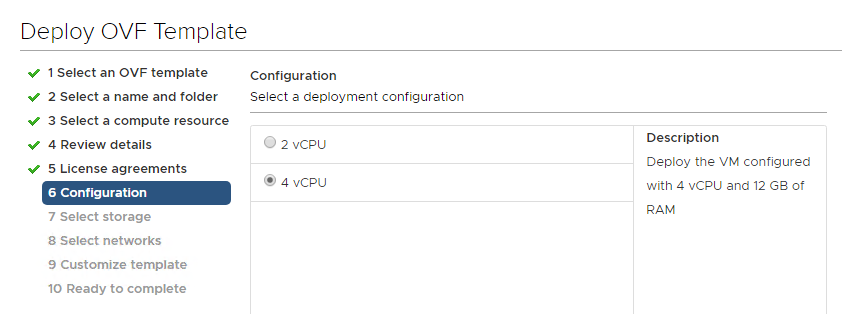
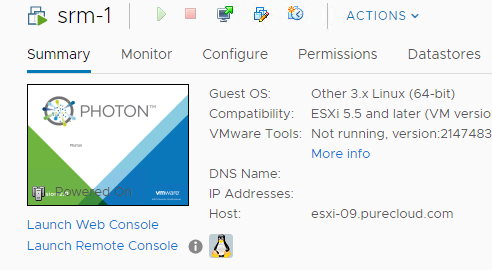
Fill in your network stuff and finish–it deploys pretty quickly. Go power it on.
Login to the appliance management screen, by either going to the address of the appliance http://<FQDN/IP> or directly at https://<FQDN/IP>:5480
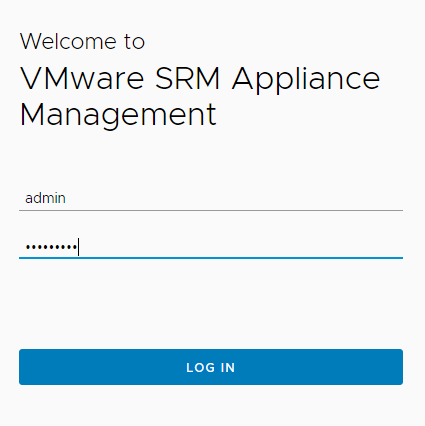
Use the admin account and password you configured when deploying the appliance.
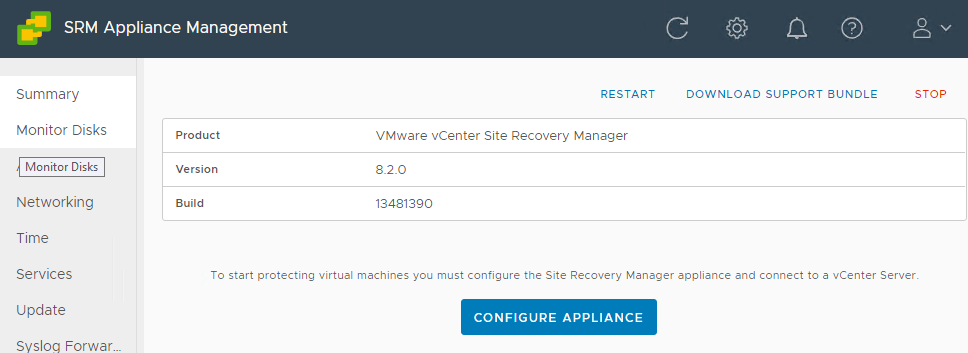
Once logged in, click Configure Appliance.
First step is to add the PSC (or if embedded, then your vCenter)
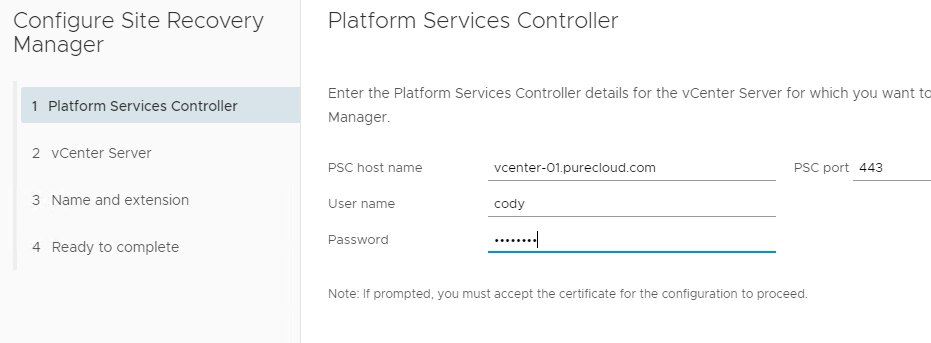
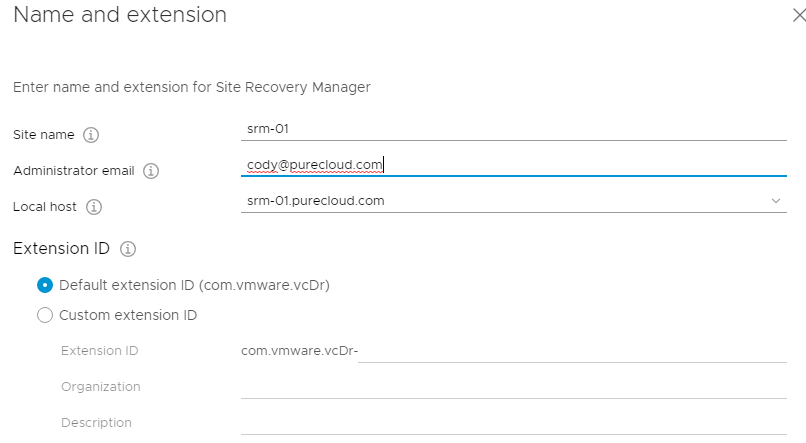
The enter in your site info, you really only need to change the extension stuff if you plan on doing more than one SRM pair. I will keep default.
Finish it and let SRM configure itself.
Load the SRA
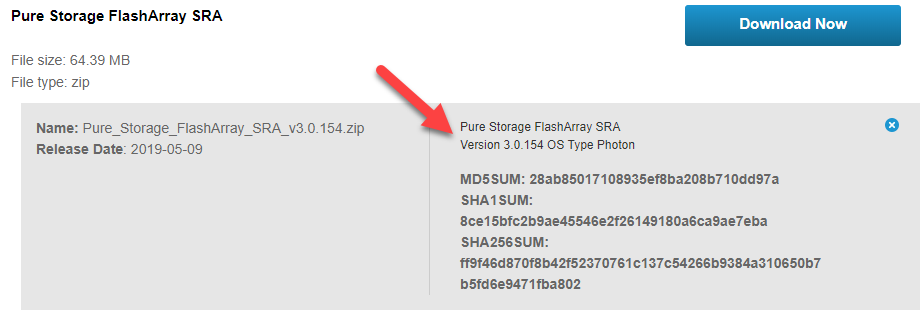
The next step is to load the SRAs. This is not done directly in the vSphere UI like before, this time it is done from the appliance configuration screen. You can download the Pure Storage FlashArray adapter here:
https://my.vmware.com/group/vmware/details?downloadGroup=SRM_SRA82&productId=889
Make sure you download the Photon version:
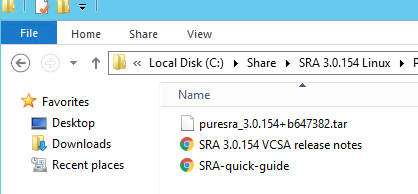
This will download a zip file, unzip it, and then you will see the tar file (the SRA) and some documents.
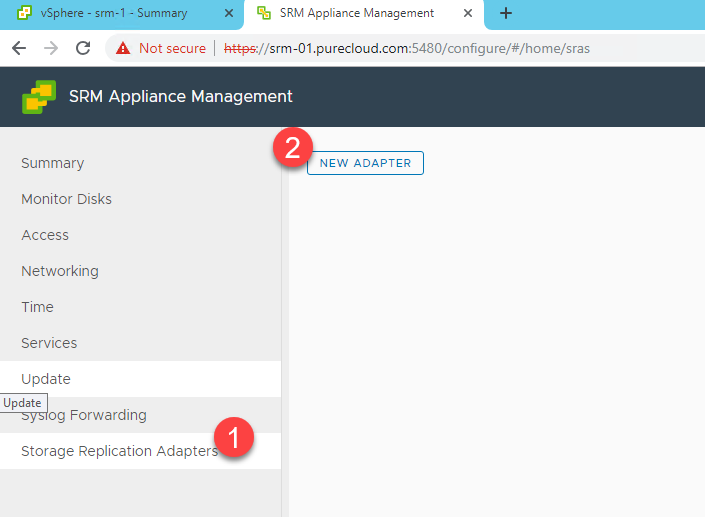
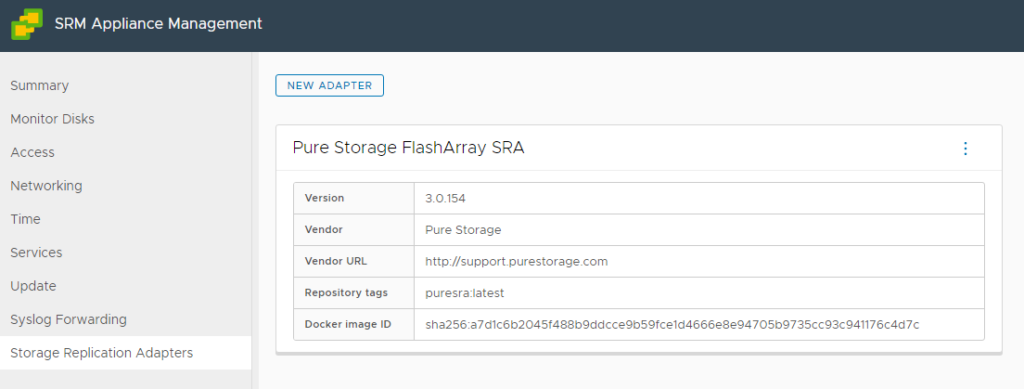
Go back to the appliance page and go to Storage Replication Adapters, then click New Adapter:
Choose the tar file and let is install.
So the fun part here is that there upload seems to fail with the message “SRA Upload failed”. We have reported this to VMware and they say it is a known issue–though I do not see it in the release notes.
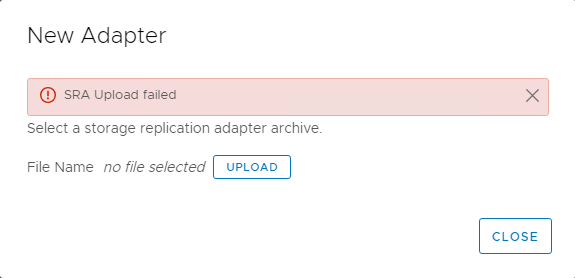
Though the SRA DOES indeed install fine. If you refresh the appliance page or click on another pane and click back you will see it has gone through fine:
Now repeat that whole process for the second SRM server. Use the same extension ID for it if you want to pair them.
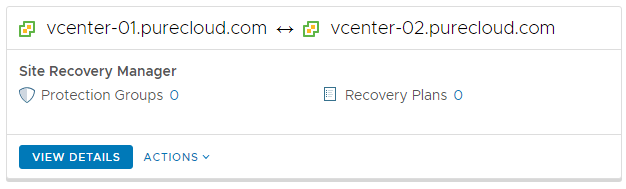
Pair SRM
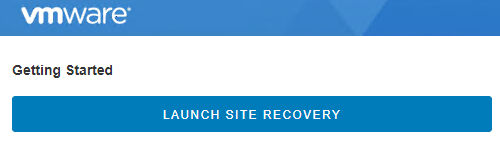
Now go to either of the SRM servers at https://<FQDN/IP> and click Launch Site Recovery.
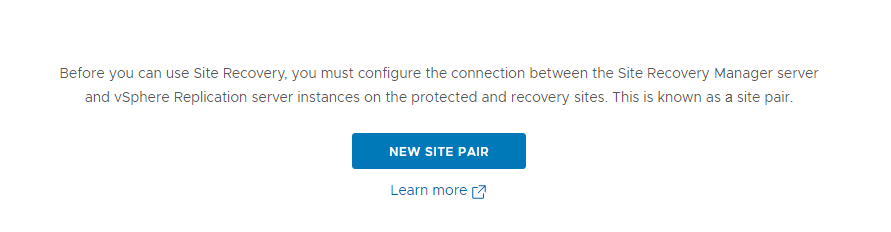
Then click New Site Pair
Select the local vCenter to the SRM server you logged into, and then specify the remote vCenter for the second site:
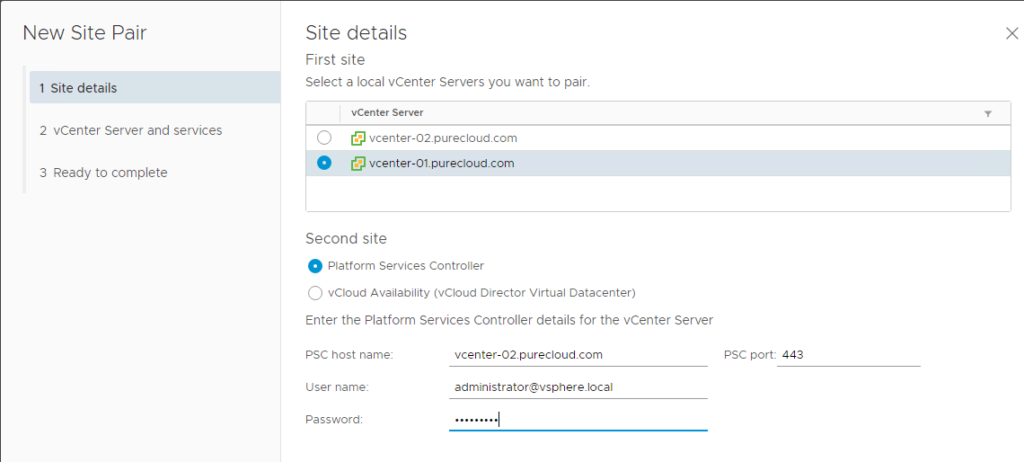
In the next window, specify the remote vCenter and select the pair.

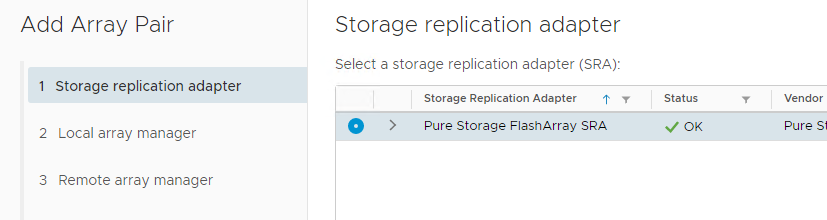
Configure SRAs
Now click on View Details then on Array Based Replication, Storage Replication Adapters. If nothing shows up, click Rescan Adapters. Do this for both vCenters listed.
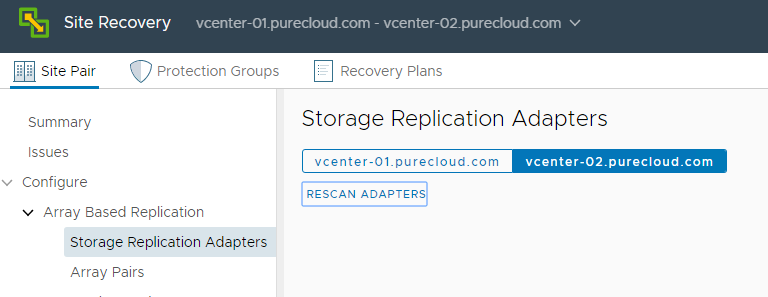
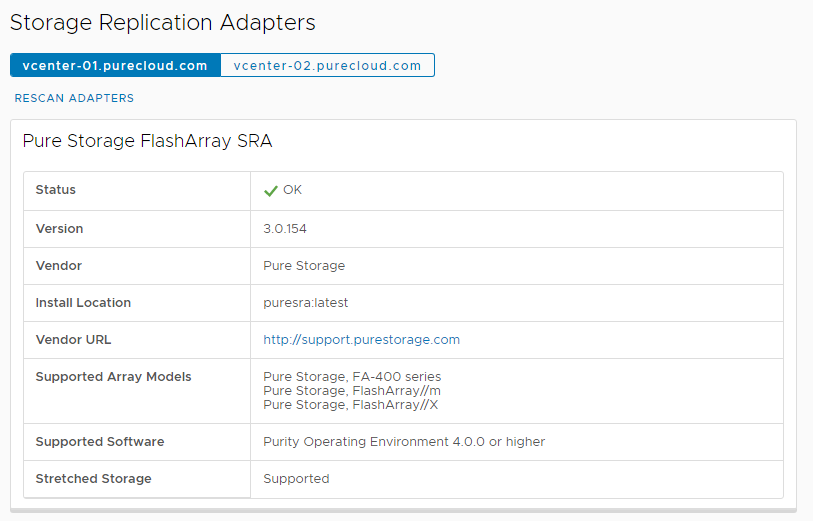
You should see the SRA come up when both have been rescanned.
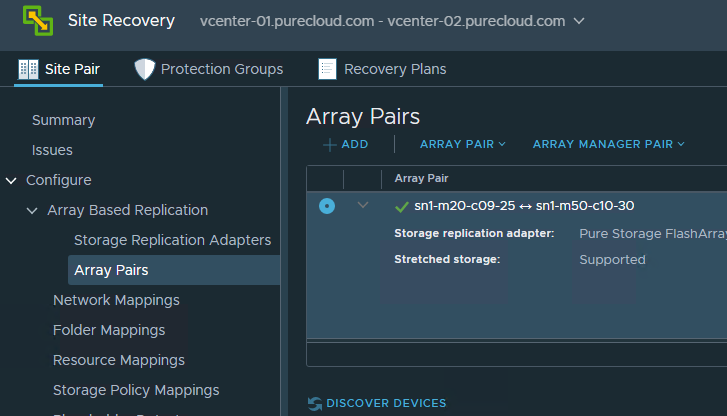
Now click Array Pairs and Add.
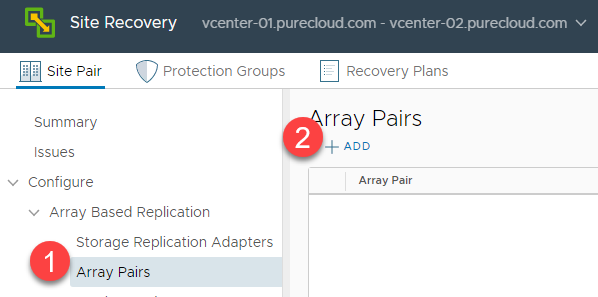
Choose the FlashArray SRA
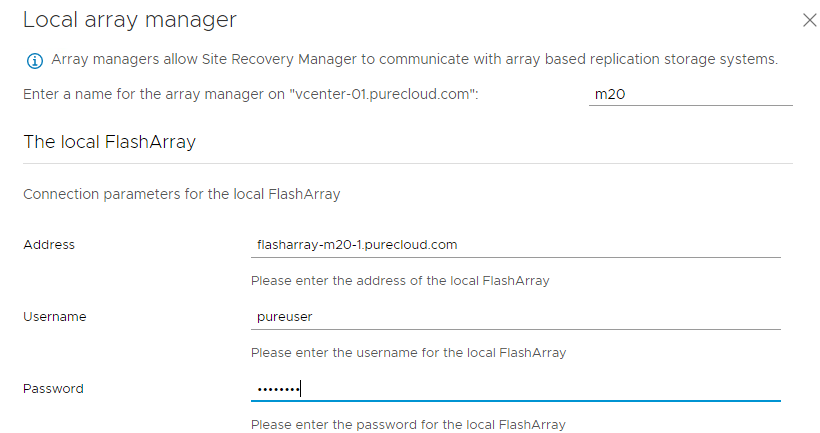
Enter a name for the local array manager–I usually use the local array name. Then enter the connection information for that array. In this case my local FlashArray is my m20.
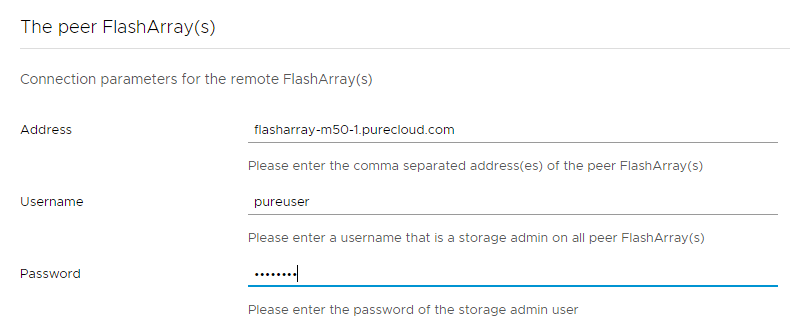
My remote array is my m50. I will add it into the peer array listing.
I will do the exact opposite in the remote manager.
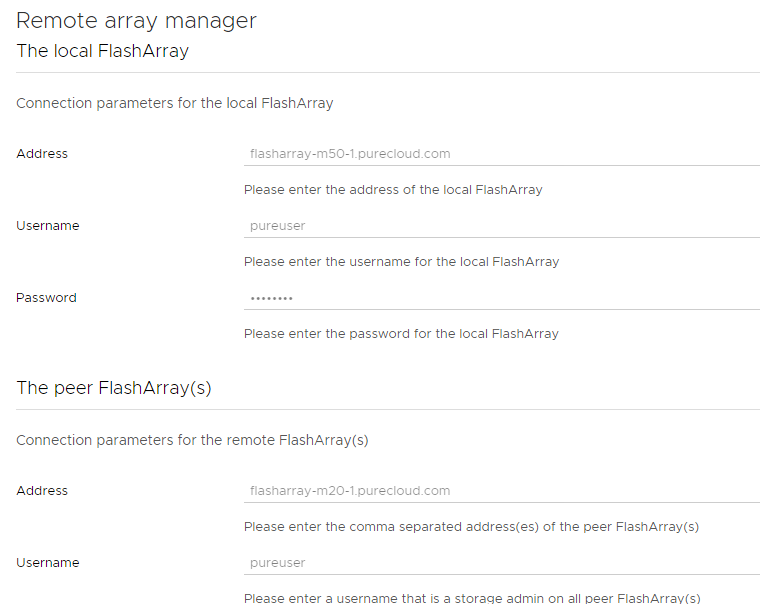
If everything it entered in properly, all should be good:

So once you deployed SRM and installed the SRA, not much changes besides that, so using it is pretty much what you are used to, which is great. The entire process can be managed from start to use via web browers–super simple.
Oh yeah, and of course, dark theme
Does the new version support Active Cluster without paying the extra blood money to VMware?
Unfortunately the licensing model has not changed in 8.2–you will still need enterprise for stretched support
Looking forward to when SRM will support array based replication for VVoLs!
Agreed! It is not far off!
Do Pure have a virtual FlashArray simulator (like a VSA) that could be deployed in a non-prod test lab environment?
We do not have one on premises, though we do have Cloud Block Store which can be deployed in AWS. So could be an option if you need test scripts etc.
Thanks for the info Cody, AWS wont work for me as my lab is isolated. Perhaps Pure could consider releasing a VSA style appliance for non-prod testing to it’s partners in the future – many other vendors do this already and it is so useful. Pin