
A few weeks back we introduced the Pure Storage OVA which currently now focuses on the VM Analytics Collector and I blogged about deploying it with PowerShell:
This was only deploying the OVA, not configuring it. Once deployed, you need to (or might want to):
- Change the default password
- Add vCenters
- Remove vCenters
- Import configuration
- Test phone home
Wouldn’t it be nice to do that all from PowerShell instead of SSH or the VM console? Of course it would! So I got to work on it! I have now updated my cmdlet Deploy-PfaAppliance to be able to reset the default password upon deployment and added a new cmdlet called Get-PfaAppliance to retrieve appliances and then configure them.
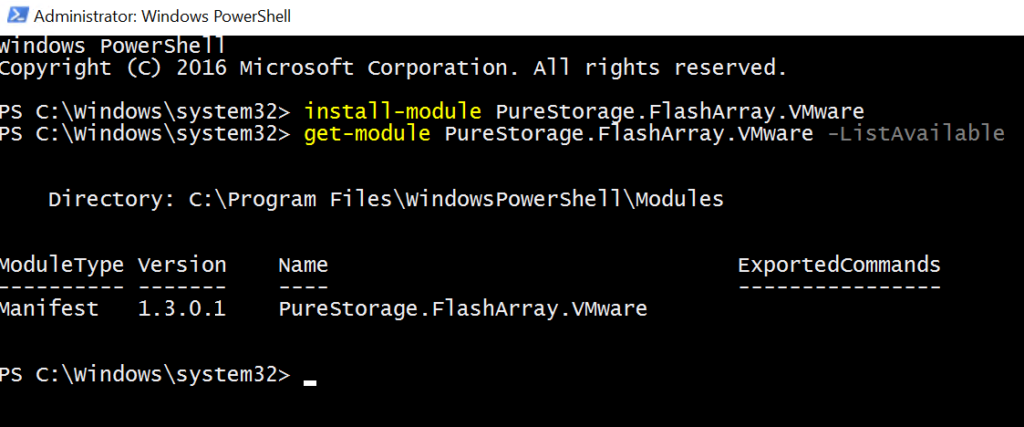
First off, install it… (remember PowerCLI needs to be installed too, so run install-module VMware.PowerCLI if you haven’t)
install-module PureStorage.FlashArray.VMware
…or update the module to the latest (needs to be at least 1.3.0.1):
update-module PureStorage.FlashArray.VMware
So first, lets deploy a new OVA. First you need to get your collector key from Pure1.
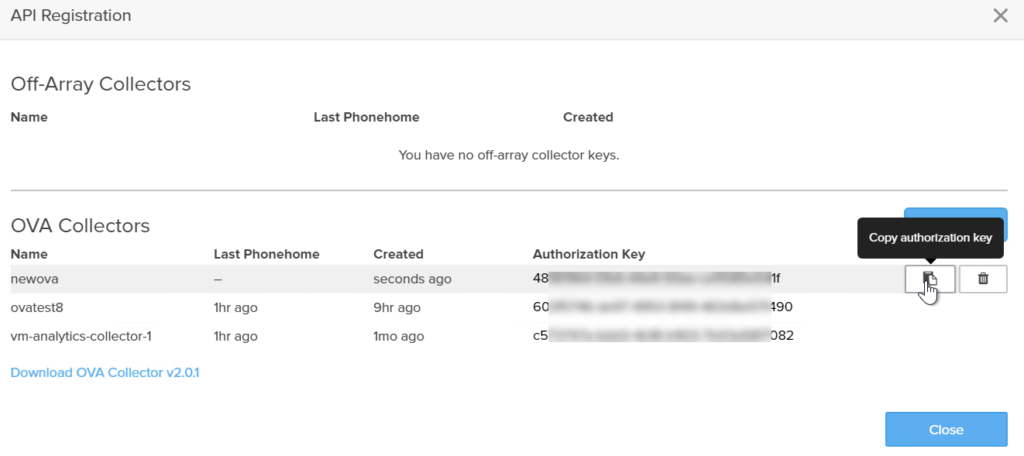
I created a new OVA called newova. Copy the authorization key.
Deploying the Appliance
Now the Deploy-PfaAppliance requires some inputs. Datastore, a host (or cluster) etc.
connect-viserver -Server <your vCenter>
$ds = get-datastore <datastore name>
$esxi = Get-VMHost <ESXi host name>
$pg = (Get-VirtualPortGroup -vmhost $esxi)[0]
$vmname = <desired name of appliance VM>
$authKey = <collector key from Pure1>
$mycreds = get-credential
Deploy-PfaAppliance -vmName $vmName -authorizationKey $authkey -datastore $ds -portGroup $pg -vmHost $esxi -dhcp -ovaPassword $mycreds.Password
So mine looks like this:
connect-viserver -Server vcenter-inf
$ds = get-datastore Infrastructure
$esxi = Get-VMHost esxi-09.purecloud.com
$pg = (Get-VirtualPortGroup -vmhost $esxi)[0]
$authKey = "481XXXXXXXXXXXXXXXX541f"
$vmname = "newova"
$mycreds = get-credential
$ova = Deploy-PfaAppliance -vmName $vmName newova -authorizationKey $authkey -datastore $ds -portGroup $pg -vmHost $esxi -dhcp -ovaPassword $mycreds.Password
In your case the vCenter name, the host, the datastore, the port group will be different. If you don’t want DHCP, you will need to specify the networking specifically.
See get-help Deploy-PfaAppliance -Examples for help on that:
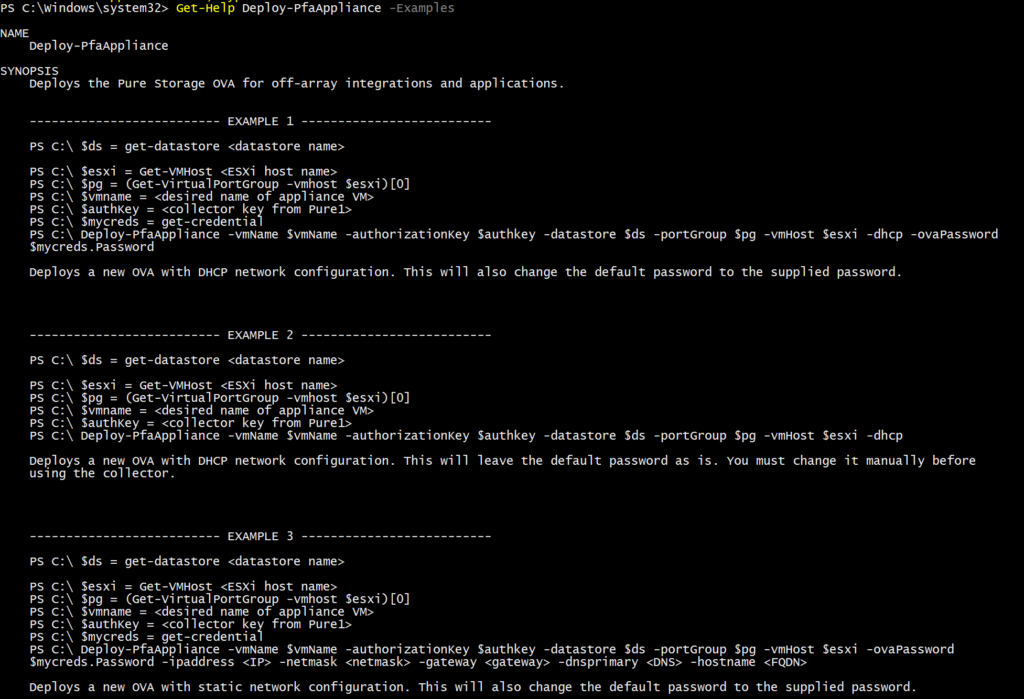
If you do not specify a password (which needs to be a secure string) then the OVA will deploy normally but you will need to login to it with pureuser/pureuser (console or SSH) and reset the password. If you specify it, the cmdlet will change it for you.
So let’s deploy! There is no need to download anything–it automatically downloads the OVA from Pure1.
The only time you would need to download it is if your vCenter cannot route out to Pure1 via TCP 443. If it cannot, you can download it manually from the Pure1 site (click on the link above in the Pure1 screenshot) and place it on the host you are running PowerShell from. Pass the location via the -ovaLocation parameter.
Deploy-PfaAppliance -ovaLocation “C:\users\downloads”
So I will be deploying the OVA with DHCP settings like above. It takes a minute or so to download, then another minute to deploy, give or take depending on your network speed. The process is verbose (tells you what it is doing) but you can suppress the noise with the -silent switch if you prefer.
$ova = Deploy-PfaAppliance -vmName $vmName -authorizationKey $authkey -datastore $ds -portGroup $pg -vmHost $esxi -dhcp -ovaPassword $mycreds.Password
The process will deploy the OVA, assign the settings, power it on and reset the password. The process will wait for VM tools to heartbeat and then for initial configuration, which is about 60 seconds upon first boot.

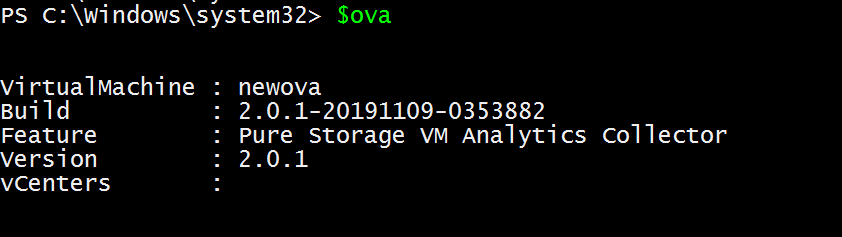
I have stored the result of this process in an variable called $ova. If you forget to do this (or you want to manage it at a later date), you can use the new cmdlet Get-PfaAppliance to retrieve it.
Getting the Appliance
So what is this object? Well it is a new custom class I have defined called PureStorageCollector.

This is a sub-class of PureStorageAppliance (leaving room for new instances of the appliance).
If you forgot to store the result of the Deploy-PfaAppliance into a variable (or just deployed it previously), you can get it again by running Get-PfaAppliance plus the name of the VM and credentials to it:
$creds = get-credential
$ova = Get-PfaAppliance -vm (get-vm newova) -applianceCredentials $creds

Replace newova with the name of your VM. Or simply omit the -vm parameter entirely. If you just run:
$creds = Get-Credential
Get-PfaAppliance -applianceCredentials $creds
Importing the Config of Another Appliance
Currently (though this will change) we do not support in-place upgrades of the appliance. You need to deploy a new one if you need a newer version. For the most part there is zero state in the appliance anyways besides, well, the configuration of the collector. Besides its network information this primarily consists of the connections you have provided it to vCenters.
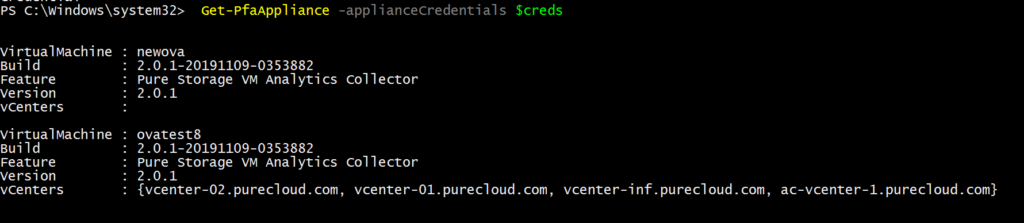
Once you have deployed a new appliance you can use the above object (retrieved from Get-PfaAppliance) to import the vCenter connections of another appliance. So like above I have two appliances.
Ovatest8 and newova. Ovatest8 has four vCenter connections and I want to copy those connections to newova so that I can delete ovatest8.
First, let’s store the old ova in an object called $oldOva:
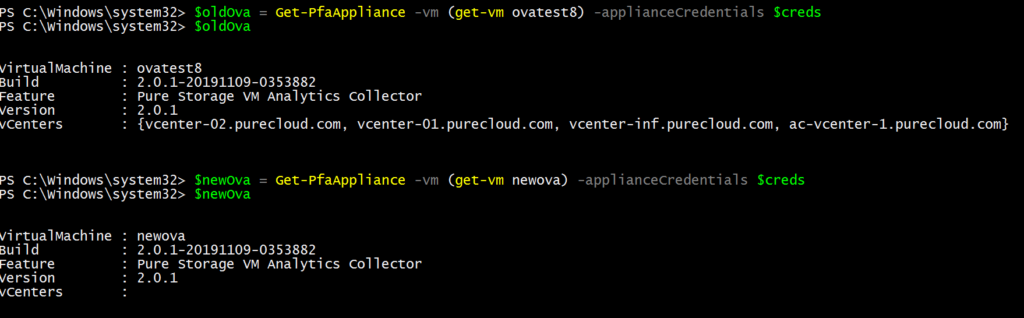
The OVA appliance object has a variety of methods you can run against it. One of them is called importConfig. So I want to import the configuration of the old OVA into the new one. So I will take the $newOva object and pull in the OVA config:
$newOva.ImportConfig($oldOva)
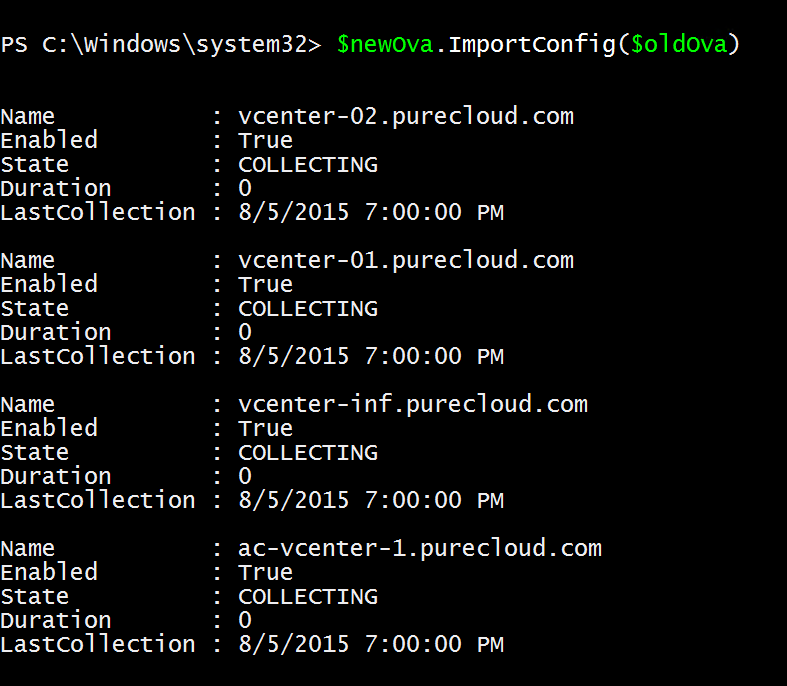
This will take all of the vCenter connections in the old OVA and copy them to the new one. The process will return the collection status of the vCenter connections in the new OVA.
Adding or Removing a vCenter to or from the Appliance
Maybe you don’t have an old appliance to import from or you want to add a new vCenter.
Store the appliance (if you haven’t already) in an object and then run .AddvCenter(<vcenter>,credentials) against it.
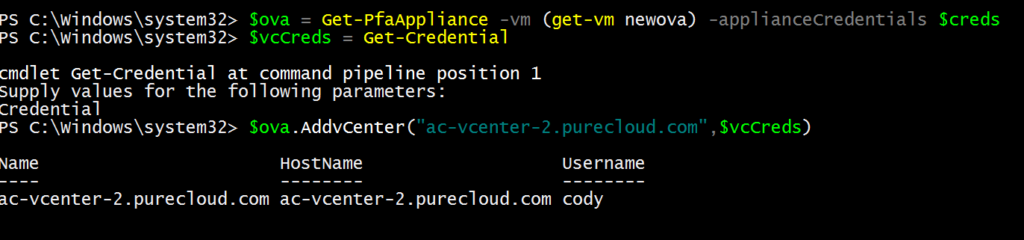
The credentials should be credentials for that vCenter. This will add them to the appliance/collector.
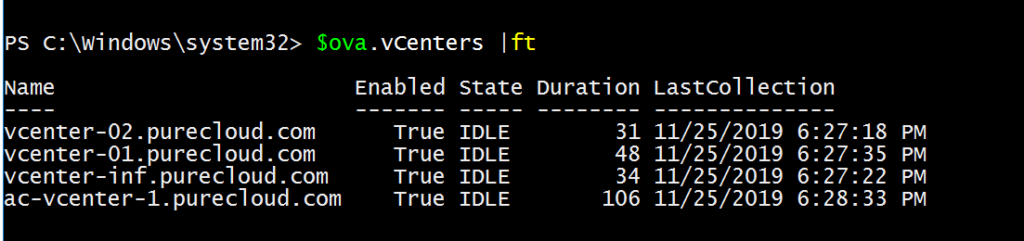
If you then look at the $ova.vCenters you will see it listed:
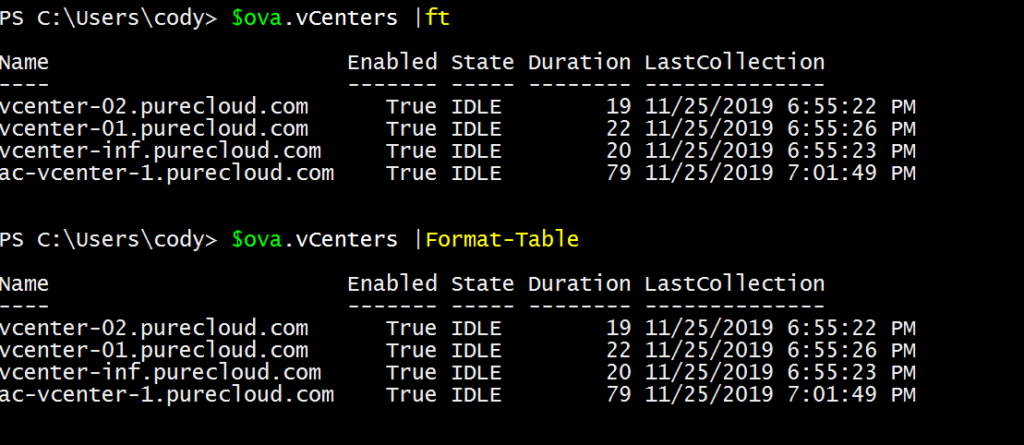
If you want it to look prettier, just “pipe” it to format-table or ft for short:
You can also remove a vCenter with the .RemovevCenter(<vcenter>) method.

Checking the vCenter Collection Status
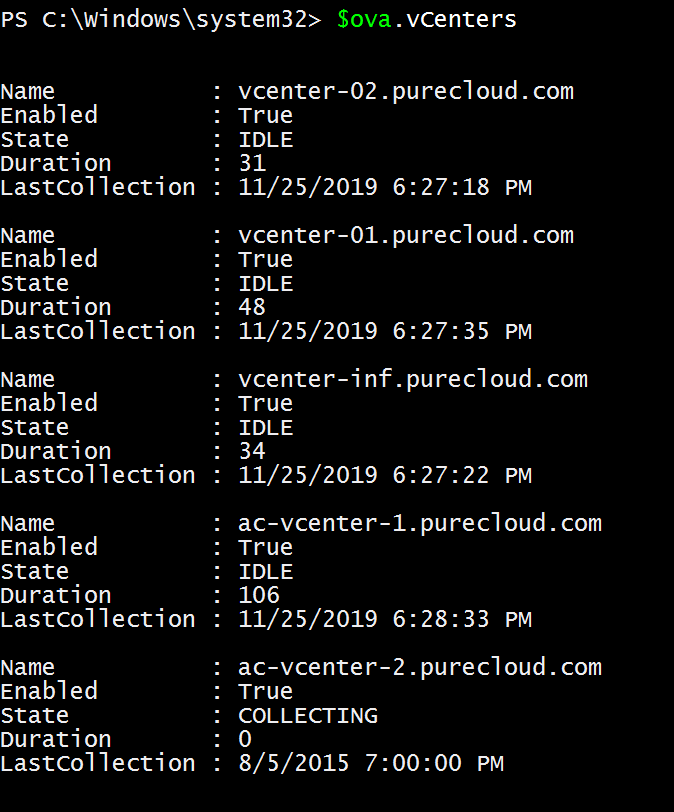
Every time you run Get-PfaAppliance, the cmdlet will store the latest vCenter connection statuses in the .vCenters property:
If you run it again it will update it. Or if you add or remove a vCenter the .vCenters property will automatically update.
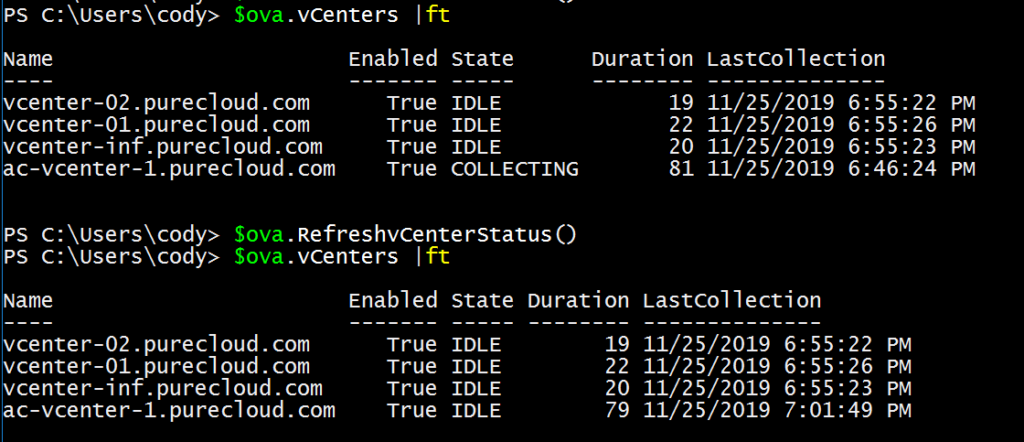
If you just want to check on the vCenter collection statuses without restoring the object, you can also run .RefreshvCenterStatus(). This will update the root object with the latest collection status.
Managing the Appliance
There are also methods for starting, stopping, or restarting the collector feature (not the whole VM just the container inside of the VM):
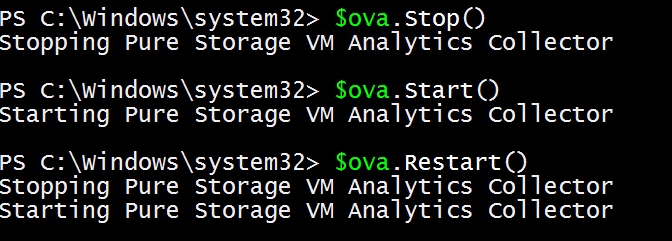
Generally you shouldn’t have to ever do this but hey well this way we have it.
Also you can test network connectivity back to Pure1, that makes sure it can dial back the collected information:

So if I disabled the VM network:

Let me know what you think! Please send any feedback via my Github repo for it:
Or in our Pure Storage Code Slack team which you can register for here. There is a #PowerCLI channel and a #ask-vmanalytics channel.
How long does it take for data to show up in Pure1? I set the collection frequency to 300 from 600 using the command purevmanalytics tune –set COLLECTION_INTERVAL 300
purevmanalytics tune –list
shows it getting collected and enabled
purevmanalytics phonehome shows Phonehome was triggered successfully!
The collector only dials home the information every hour, so you won’t see things come faster if you change the collection frequency. So you likely won’t see anything in Pure1 for at least an hour and for the initial deployment it can some times take a few hours to show up the first time
alright ill see if it worked monday..
i ran
purevmanalytics phonehome
a few times thinking it would send the data home like the man page says.
if collection frequecny is changed to once per day, will there be gaps in data? seems weird that default is to capture every 10 mins, but only upload once per hour. do collecion polls just gather the deltas from last time, or?
It just pulls the deltas since the last collection. Forcing phone home won’t make it show sooner either as Pure1 wants an hours worth of data before it will appear. There are some backend reasons for it that I am not intimately familiar with. The collection can only be set to a max of 1 hour interval so that wouldnt happen. As long as the collector doesnt have time gaps there shouldnt be any in Pure1. We collect more frequently than we phone home because some stats age out fairly quickly in vCenter by default and if we wait too long we will miss them.
I just deployed the new ova using the instructions and everything worked great. I had the 2.0.0 already deployed manually for a while now. But, how do I set the new ova to a static IP vs DHCP? I don’t see those instructions anywhere? Can this be done after the OVA is deployed?
Dang, i see the steps now to configure network on the OVA deployment. I will just delete the VM and deploy the OVA again.
Yeah currently you need to set IP information upon deployment, if you need to change it you just re-deploy and import the config. That will change in the future, but thats the process for now. While the collector is 2.0, the OVA itself is still very much 1.0.