
Another how-to post on iSCSI. Essentially another “for the good of the order post” here. iSCSI is becoming increasingly common, so figured I would put a post together that covers the ins and outs of port binding with standard vSwitches.
For information on distributed switches (which I highly recommend using over standard vSwitches) check out this post here:
Setting up Software iSCSI Multipathing with Distributed vSwitches with the vSphere Web Client
So on to Standard vSwitches.
The first step is to create a Standard vSwitch. If you already have one, you can skip this step of course. But for the sake of completeness I will create a new one.
Create a vSwitch (Optional)
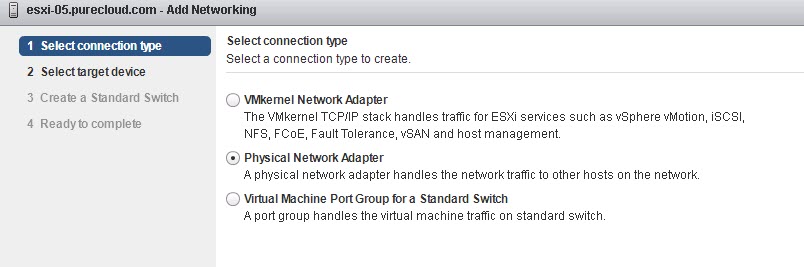
The first question in the wizard is what do you want to create? You can really choose almost any option. For my case I will choose “Physical Network Adapter”. I am creating a new switch, so I need to give it physical connectivity. Makes sense to me.
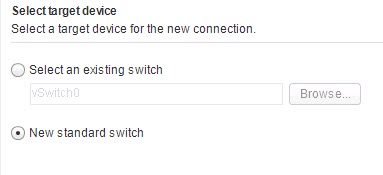
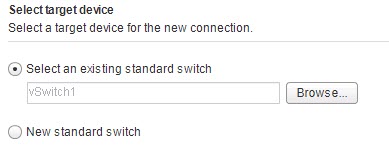
In the next screen, choose new standard switch:
Now to assign physical adapters to the vSwitch.
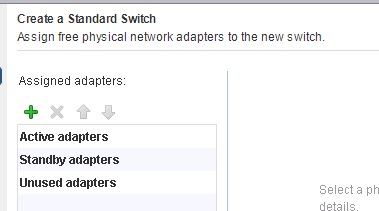
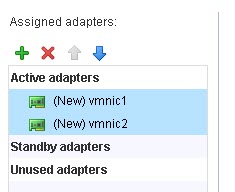
Choose the NICs that have network connectivity to your FlashArray iSCSI ports. Choose at least one physical NIC for redundancy. I am choosing vmnic1 and 2–you can use the shift key to select more than one at a time.
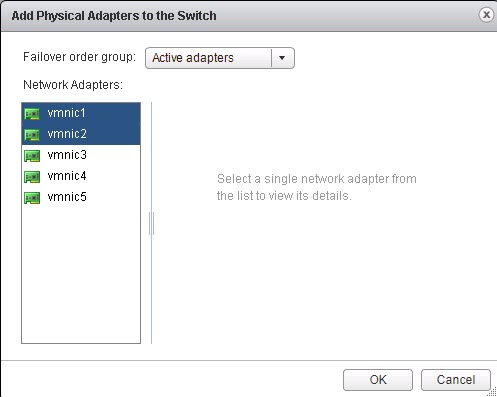
Put the NICs are in active mode–though since we are going to override them at the port group level, I guess it doesn’t really matter.
Finish the wizard.
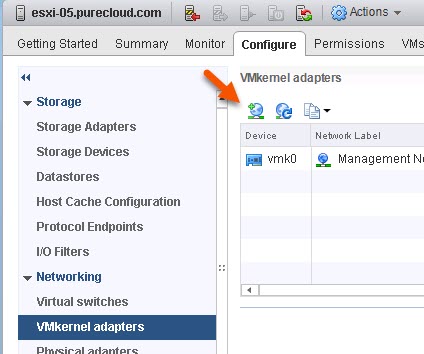
Create VMkernel Adapters
The next step is to create one or more VMkernel adapters. For every NIC you want to use for iSCSI, you need a respective VMkernel adapter. So in my case, I have two NICS. Therefore, I need two VMkernel adapters.
Move to the “VMkernel adapters” pane and create a new one.
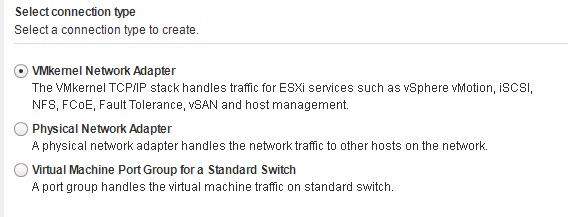
Next choose the “VMkernel Network Adapter” radio button:
Then your existing standard switch:
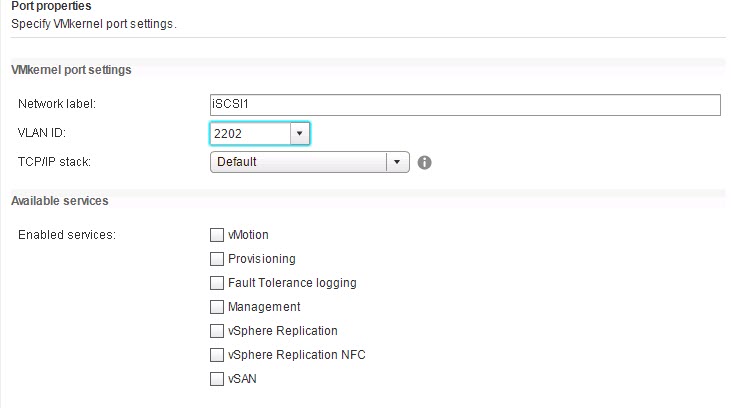
Now name the VMkernel adapter. I will name this one “iSCSI1”. Optionally add a VLAN. You do not need to enable any services on the VMkernel adapter.
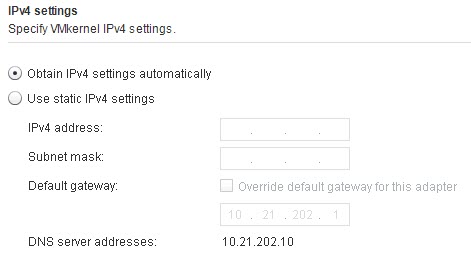
Lastly, you need to assign an IP information. DHCP or static.
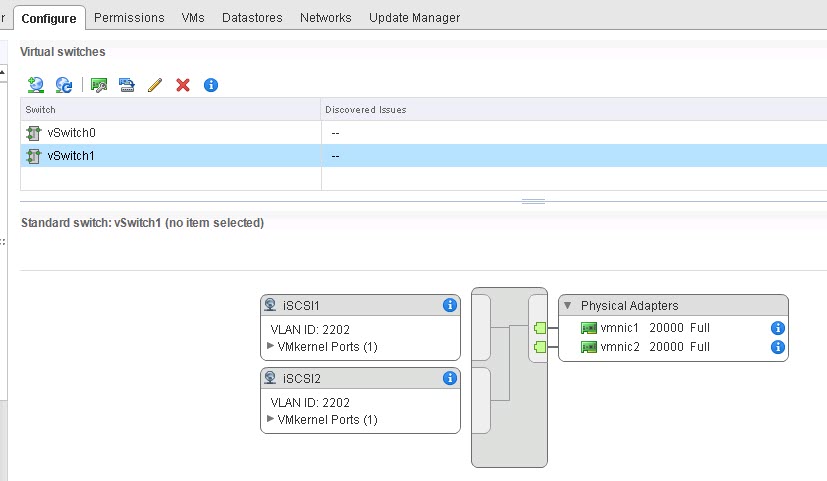
Repeat this step for each NIC you want to use in your iSCSI adapter. When you are done you should see them listed under your VMkernel adapters:
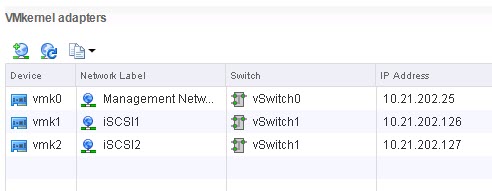
and your vSwitch:
Binding the VMkernel Adapters to the Software iSCSI Adapter
The last step is to bind the VMkernel adapters you created to the iSCSI adapter.
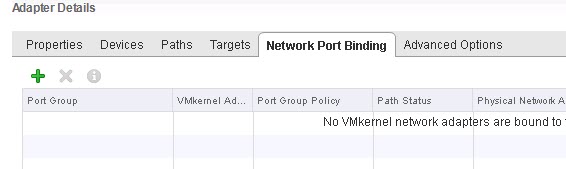
If you go to add them now, they will not be listed (or I think in older versions of vSphere they might just be marked as not compatible):
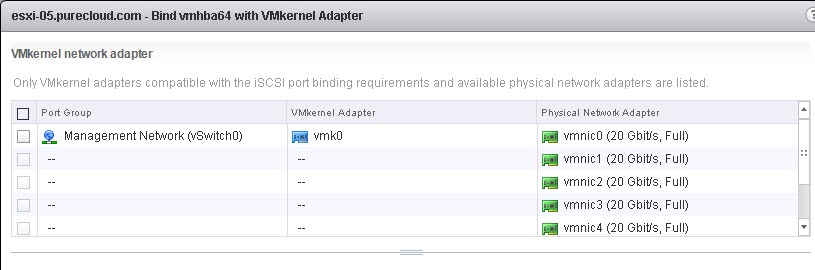
So why are they not there? Well because any VMkernel adapter in use with software iSCSI must be bound to only one physical NIC at a time. Since my vSwitch has two NICs that are both “active” my VMkernel adapters are using them both. We need to override that behavior for the VMkernel adapters by overriding the NIC teaming on the port groups that contain the VMkernel adapters.
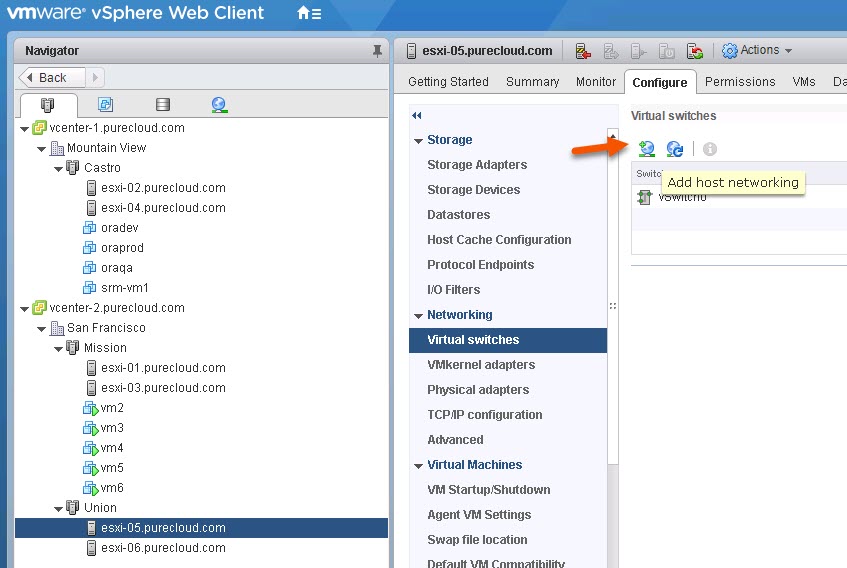
So click on the host and then the Configure tab and then the “Virtual Switches” pane. Select your vSwitch.

Now select one of the portgroups that contains one of the relevant VMkernel ports, one of mine is called iSCSI1. Click on the name (in my case iSCSI1) in the schematic to select the port group. The box turning a blue shade will indicate it has been selected.

Now click the pencil icon to edit it and then choose “Teaming and failover” in the window that pops up.
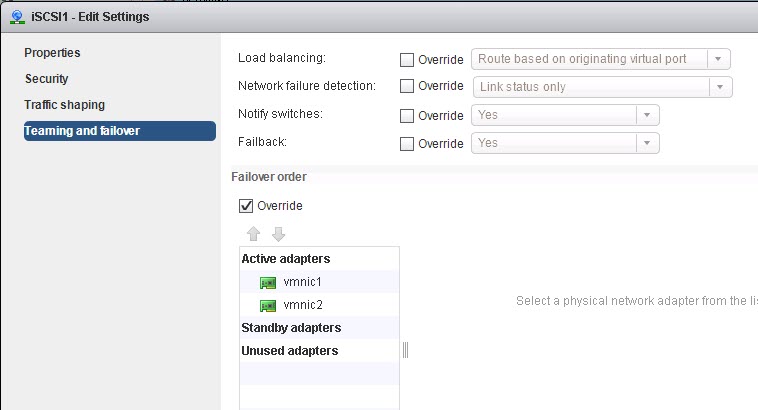
As you can see, I have both NICs as active. iSCSI port binding does not allow this. So I need to remove all but one and mark them as “unused”. Not standby. Unused. You might need to select “Override first” if it is not selected.
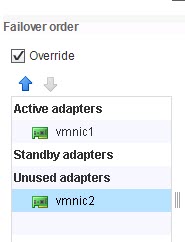
Click OK. Now repeat this for all of the port groups representing VMkernel adapters that you wish to add to the iSCSI adapter. Each port group should only have one active NIC and each one should have a different active NIC. One-to-one relationship.
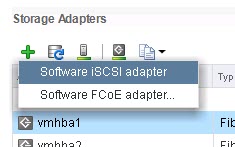
Once complete, you can now add them to your Software iSCSI adapter. So now click “Storage Adapters” and then scroll through the adapters and choose the Software iSCSI Adapter. Usually the last one at the bottom. By default this does not exist–if that is the case, just click the green plus sign and create one. If one exists, you do not need to, and rather cannot, create a second one.

So if needed, create it. Otherwise select it.

Click on the “Network Port Binding” sub-tab and then the green plus below it.
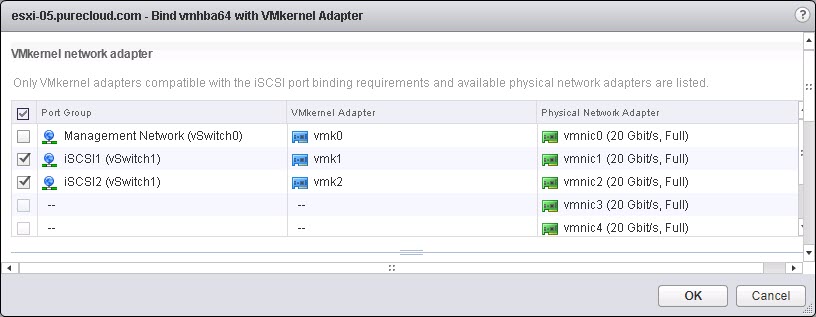
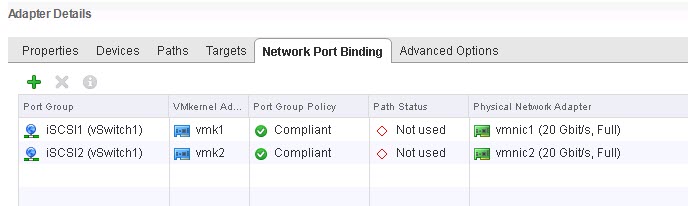
Now you should see the VMkernel adapters you configured earlier. Select them and click okay. You are now done!
If you need to now configure the iSCSI targets of the FlashArray check out this post:
Setting up iSCSI with VMware ESXi and the FlashArray
in your scenario you have both iSCSI 01 and 02 on the same subnet, is this also the same on the SAN side? The adapters have the same IP subnet 10.21.202.xxx ?
Thanks,
Yes in this example environment everything is on the same subnet
Would be nice to have a breakdown of doing this in the ESXi server and not through VCenter. VCenter usually is running on a VM in the environment, so if something happens to the iSCSI configuration you cannot check the settings using your method. lol
Hello, This is an awesome tutoral! One question about the binding: I have 4 physical NICS assigned to vSwitch3. vSwith 3 will be used for iSCSI traffic only and has 4 VMkernal adapters: “iSCSI1, iSCSI2, iSCSI3, iSCSI4” when I created each iSCSI VMkernal adapter I assigned a physical NIC to it. Now, to perform port binding it looks like I am supposed to disable some of the nics? Since I have each physical nic attached to a vmkernal port how does that change things
Thank you! You will need to set the each extra nic to disabled for each vmkernel port. Only one can be active and zero can be standby.
Is there a way to perform the port binding via command line on the ESXi host so I can automate the build process?
Certainly! PowerCLI is probably the simplest option to use at scale. (an example here https://www.jonathanmedd.net/2013/07/using-powercli-for-iscsi-vmkernel-port-binding.html) Though vRO could do it to. But at large scale–I think host profiles would be the best option here.
Hi! first of all, congrats for this tutorial, it is a terrific tutorial for who uses VM and iSCSI. Second, I’m using the 6.7 version and the interface is totally different. Could you atualize this tutorial or just give a tip about how to do it using the 6.7?
Hi Cody, thanks for this, such a great article. A question that I do have is if the SAN (non-Pure unfortunately) itself has multiple physical interfaces and I decided to put all interfaces onto the same subnet across the dual controllers, is it possible for the port binding to be used to bundle those physical interfaces on the SAN together (each interface getting a different IP on the same subnet)? Will those show up and be available to the ESXi host to create some type of HA/fatter pipe?