
Purity 6.0 ships with a new REST version 2.2. 2.2 includes the endpoints to manage ActiveDR processes (demote/promote), tagging (more on that in a later post) and more.
REST 2.x is a new major release of our REST API that changes the underlying structure of the API, the endpoints, authentication, queries, etc. Our current PowerShell SDK uses REST 1.x (which is changing) but for folks who might want to write their own PowerShell against REST, or starting using it now–here is some help.
The REST 2.x supports two modes of authentication:
- Username and password based
- Oauth2 Public/Private key based
The latter is very similar to how we handle the Pure1 REST API–indeed they were designed with the same principles. We learned somethings from our 1.x REST on the FlashArray put those lessons to work when we built the first Pure1 REST and now are bringing those lessons learned back to the FlashArray in the form of REST 2.x.
NOTE! Oauth is definitely, definitely, more involved. When we release our PowerShell SDK we will hide most of this. Username/password is easier, but lets learn the harder, but more secure way first, then go to an example of using either to request the FA volumes at the end.
Oauth2 Authentication
Oauth2 authentication is inherently more secure, but admittedly is more complex.
The process includes:
- Creating a private/public key pair
- Entering the public key into the FlashArray
- Retrieving the key ID and the application ID
- Creating and signing a JSON web token with the private key
- Requesting an access bearer token
Let’s walk through this.
Presumably, if you are using PowerShell you are likely using Windows. If so, follow these instructions to create a Windows cert. Otherwise, use OpenSSL. I wrote instructions on this here:
Admittedly, that is for the Pure1 REST, but the cert creation is no different.
Create a certificate:
$cert = New-SelfSignedCertificate -certstorelocation "<a href="cert:\currentuser\my">cert:\currentuser\my</a>" -DnsName FaRestCert

You can specify a different certificate store location and/or a DNS name. That doesn’t matter. Now pull the public key from it. I am adding the appropriate formatting too:
("-----BEGIN PUBLIC KEY-----<code>n" + "MIIBIjANBgkqhkiG9w0BAQEFAAOCAQ8A" + ([System.Convert]::ToBase64String($cert.PublicKey.EncodedKeyValue.RawData)).tostring() + "</code>n-----END PUBLIC KEY-----")
This will return the public key.

Copy all of that. Login to the FlashArray GUI (or CLI). Go to Settings > Access then click on the plus sign in the API Clients panel.
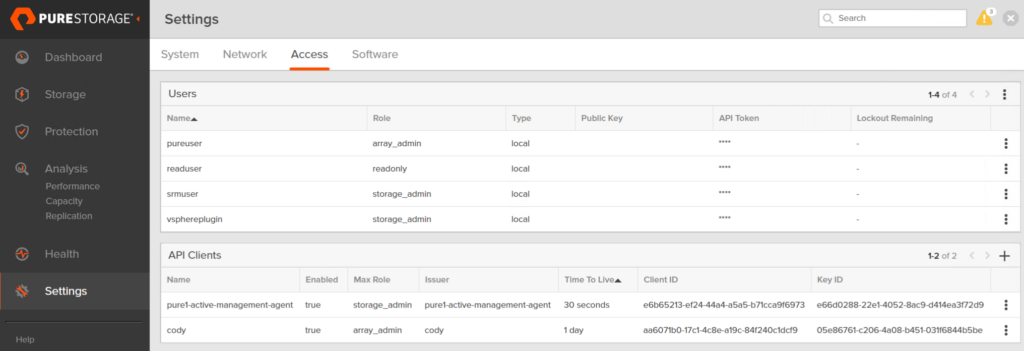
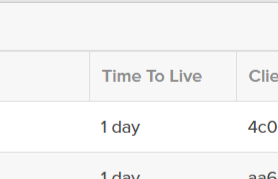
Give the client a name (for instance: codyPowerShell), choose a role, and optionally a TTL. The TTL dictates how long sessions created from this key pair will be valid for. Default is 1 day.
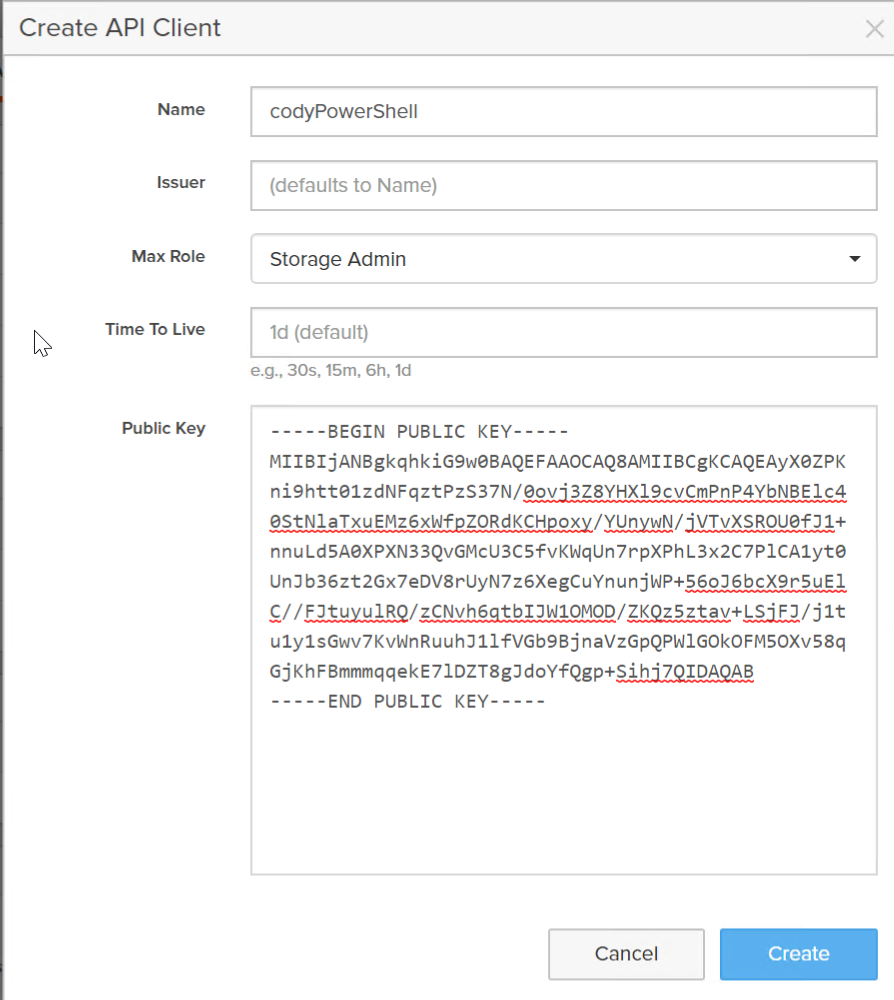
Click Create.

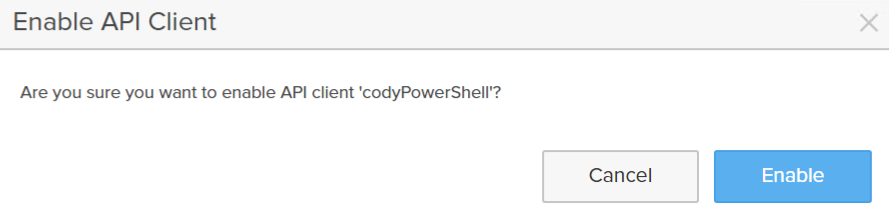
Now enable the API Client (or when you are ready):
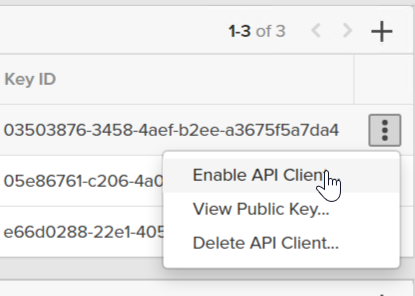
Copy down the issue, the key ID, and the client ID.
We have to now build the JWT. It has the following parameters:
| JWT claim | Location | API Client Field | Description |
|---|---|---|---|
| kid | Header | key_id | Key ID of the API client that issues the identity token. |
| aud | Payload | id | Client ID of the API client that issues the identity token. |
| sub | Payload | Login name of the array user for whom the token should be issued. This must be a valid user in the system. | |
| iss | Payload | issuer | Application ID for the Pure1 or API client’s trusted identity issuer on the array. |
| iat | Payload | Timestamp of when the identity token was issued. Measured in milliseconds since the UNIX epoch. | |
| exp | Payload | Timestamp of when the identity token will expire. Measured in milliseconds since the UNIX epoch. |
One goes into the header, the rest are in the payload.
Now back to PowerShell. First we need to create the header. The header includes a few things, the encryption mechanism, the strength of it, and the key ID.
So store the key ID in a variable:
$kid = "03503876-3458-4aef-b2ee-a3675f5a7da4"
Then create the JWT header:
$pureHeader = '{"alg":"RS256","typ":"JWT","kid":"' + $kid + '"}'

The next step is to create the data payload of the JWT.
First the client ID, labeled aud in the JWT.
$aud = "aa6071b0-17c1-4c8e-a19c-84f240c1dcf9"
Then we need to specify the sub and the iss, which is the issuer when you created your API client. Remember this may or may not be the same as the name.

The sub must be a valid username for the FlashArray. I will go with pureuser.
$sub = "pureuser"<br>$user = "codyPowerShell"
Now I want to build the iat (current time in epoch milliseconds) and the expiration (when this JWT will no longer be valid to request new sessions. Note that the EXP does not say how long a particular session will be active–that is specified in the API Client when you create it in the TTL:
This is about how long this JWT can be re-used to create new tokens. I am going to make it 30 days.
$curTime = [Math]::Floor([decimal](Get-Date((Get-Date).ToUniversalTime()) -UFormat "%s"))<br>$expTime = $curTime + 2592000
Now put it all together:
$payloadJson = '{"aud":"' + $aud + '","sub":"' + $sub + '","iss":"' + $user + '","iat":' + $curTime + ',"exp":' + $expTime + '}'

So we have the header and the payload. First we URL encode all of it, then we sign it with our private key.
$encodedHeader = [Convert]::ToBase64String([System.Text.Encoding]::UTF8.GetBytes($pureHeader)) -replace '\+','-' -replace '/','_' -replace '='$encodedPayload = [Convert]::ToBase64String([System.Text.Encoding]::UTF8.GetBytes($payloadJson)) -replace '\+','-' -replace '/','_' -replace '='

Then we combine them:
$toSign = $encodedHeader + ‘.’ + $encodedPayload
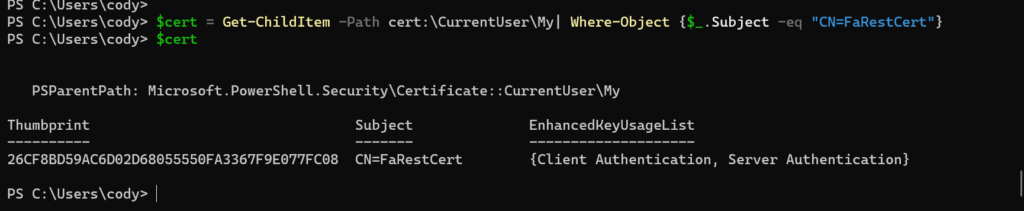
The next step is to sign it with our private key. If you just created the certificate in this session you need to refresh the object storing it, otherwise the private key will not be found.
$cert = Get-ChildItem -Path cert:\CurrentUser\My| Where-Object {$_.Subject -eq "CN=FaRestCert"}
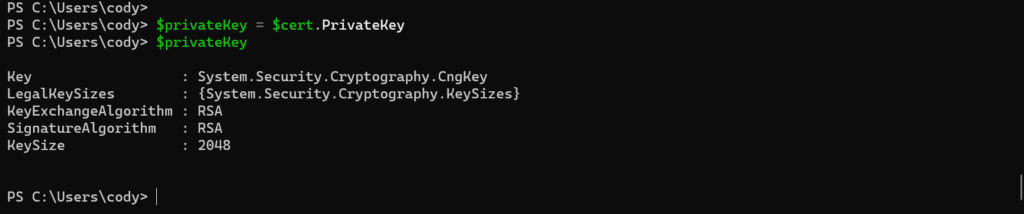
Then get the private key:
$privateKey = $cert.PrivateKey
Then convert the payload to bytes and then sign the payload.
$toSignEncoded = [System.Text.Encoding]::UTF8.GetBytes($toSign)$signature = [Convert]::ToBase64String($privateKey.SignData($toSignEncoded,[Security.Cryptography.HashAlgorithmName]::SHA256,[Security.Cryptography.RSASignaturePadding]::Pkcs1)) -replace ‘\+’,’-‘ -replace ‘/’,’_’ -replace ‘=’

Now assemble the JWT by combining the encoded data with the signature:
$jwt = $toSign + '.' + $signature

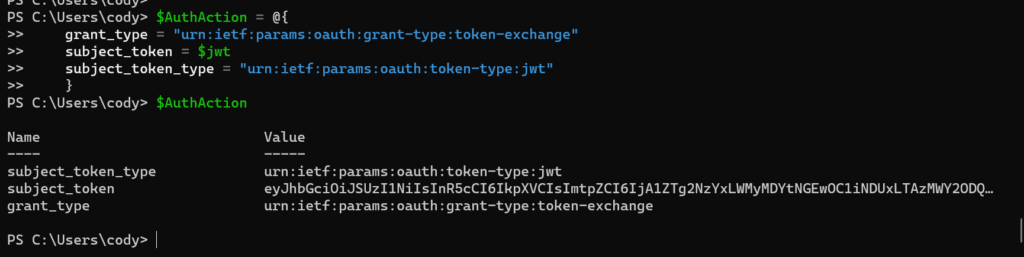
Now create the REST body:
$AuthAction = @{
    grant_type = "urn:ietf:params:oauth:grant-type:token-exchange"
    subject_token = $jwt
    subject_token_type = "urn:ietf:params:oauth:token-type:jwt"
    }
Now retrieve the session token. Replace the IP with your FlashArray IP or FQDN.
$faToken = Invoke-WebRequest -Method Post -Uri "https://10.21.202.52/oauth2/1.0/token" -ContentType "application/x-www-form-urlencoded" -Body $AuthAction -SkipCertificateCheck
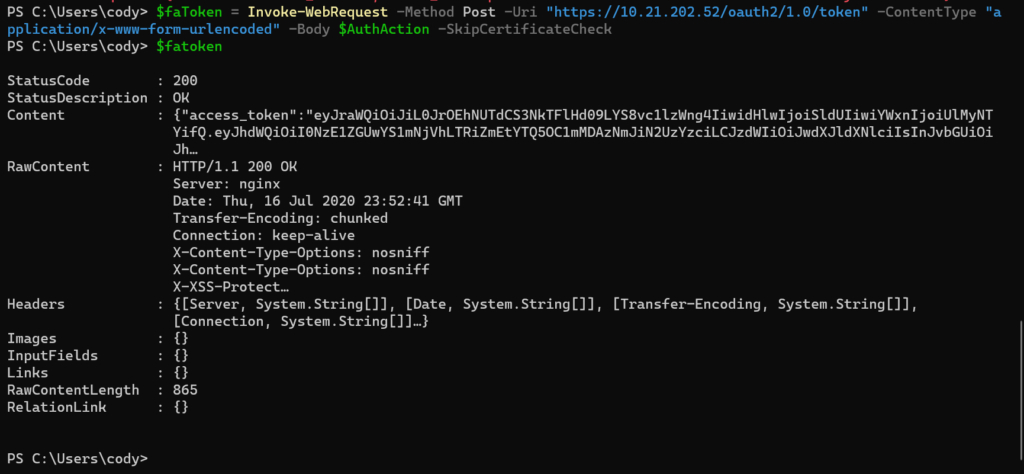
This session ID is then stored under the content property in the access_token sub-property. Convert it from JSON and pull out the token. The token get sent in REST operations from now on in the REST header as a bearer token, so the following command does the above as well as formats the bearer token with it:
$AuthHeader = @{authorization=”Bearer $((($faToken.content)|convertfrom-json).access_token)”}

To make a rest call go down to the example section below.
Put it all together! Replace the first 5 variables with your own.
$flasharray = "10.21.202.52"
$kid = "6eb7e40a-cd0c-4159-be51-4a946761e416"
$aud = "4715de0a-f65a-4bfa-a498-f0036bb7e3c7"
$sub = "pureuser"
$user = "codyPowerShell"

#create cert
$cert = New-SelfSignedCertificate -certstorelocation "cert:\currentuser\my" -DnsName FaRestCert
("-----BEGIN PUBLIC KEY-----`n" + "MIIBIjANBgkqhkiG9w0BAQEFAAOCAQ8A" + ([System.Convert]::ToBase64String($cert.PublicKey.EncodedKeyValue.RawData)).tostring() + "`n-----END PUBLIC KEY-----")

##
#STOP!!! Go to the FlashArray and create the API Client!
##

#create header
$pureHeader = '{"alg":"RS256","typ":"JWT","kid":"' + $kid + '"}'

#create payload
$curTime = [Math]::Floor([decimal](Get-Date((Get-Date).ToUniversalTime()) -UFormat "%s"))
$expTime = $curTime  + 2592000
$payloadJson = '{"aud":"' + $aud + '","sub":"' + $sub + '","iss":"' + $user + '","iat":' + $curTime + ',"exp":' + $expTime + '}'

#encode header and payload
$encodedHeader = [Convert]::ToBase64String([System.Text.Encoding]::UTF8.GetBytes($pureHeader)) -replace '\+','-' -replace '/','_' -replace '='
$encodedPayload = [Convert]::ToBase64String([System.Text.Encoding]::UTF8.GetBytes($payloadJson)) -replace '\+','-' -replace '/','_' -replace '='
$toSign = $encodedHeader + '.' + $encodedPayload

#sign header and payload
$cert = Get-ChildItem -Path cert:\CurrentUser\My| Where-Object {$_.Subject -eq "CN=FaRestCert"}
$privateKey = $cert.PrivateKey
$toSignEncoded = [System.Text.Encoding]::UTF8.GetBytes($toSign)
$signature = [Convert]::ToBase64String($privateKey.SignData($toSignEncoded,[Security.Cryptography.HashAlgorithmName]::SHA256,[Security.Cryptography.RSASignaturePadding]::Pkcs1)) -replace '\+','-' -replace '/','_' -replace '='

#assemble JWT
$jwt = $toSign + '.' + $signature

#assemble REST call
$AuthAction = @{
    grant_type = "urn:ietf:params:oauth:grant-type:token-exchange"
    subject_token = $jwt
    subject_token_type = "urn:ietf:params:oauth:token-type:jwt"
    }

#retrieve token
$faToken = Invoke-WebRequest -Method Post -Uri "https://$($flasharray)/oauth2/1.0/token" -ContentType "application/x-www-form-urlencoded" -Body $AuthAction -SkipCertificateCheck

#build bearer token
$AuthHeader = @{authorization="Bearer $((($faToken.content)|convertfrom-json).access_token)"}
User Name Authentication
The traditional behavior for authentication was:
- Send a username and password
- Receive an API token
- Send the API token
- Receive a session token
- Make your REST calls
Technically, REST 2.x does not directly support authentication with anything besides Oauth2, but to help folks with their transition to REST 2.x we have offered the ability to use the API token to generate a session ID. So you can use 1.x REST to get the token and then use it with REST 2.x to get the session.
So the first step is to get the token. If you have the token you can skip this step (maybe you saved it locally or tattooed it on your arm). If you are only armed with your username and password, this is the step for you!
So the simplest way to do this is to actually use our current Pure Storage PowerShell SDK. The SDK has a cmdlet called New-PfaArray that takes in credentials and saves the API token for that user in custom object. The nice thing about this is that while the Pure Storage PowerShell SDK doesn’t support PowerShell Core, this particular cmdlet does. So it works fine in core.
So if you haven’t installed it, do it with:
install-module PureStoragePowerShellSDK
The next step is to authenticate. So if my IP address (yes you can use FQDN too of course) for my FlashArray is 10.21.202.52, I can run:
$flasharray = new-pfaarray -endpoint 10.21.202.52 -credentials (get-credential) -ignoreCertificateError
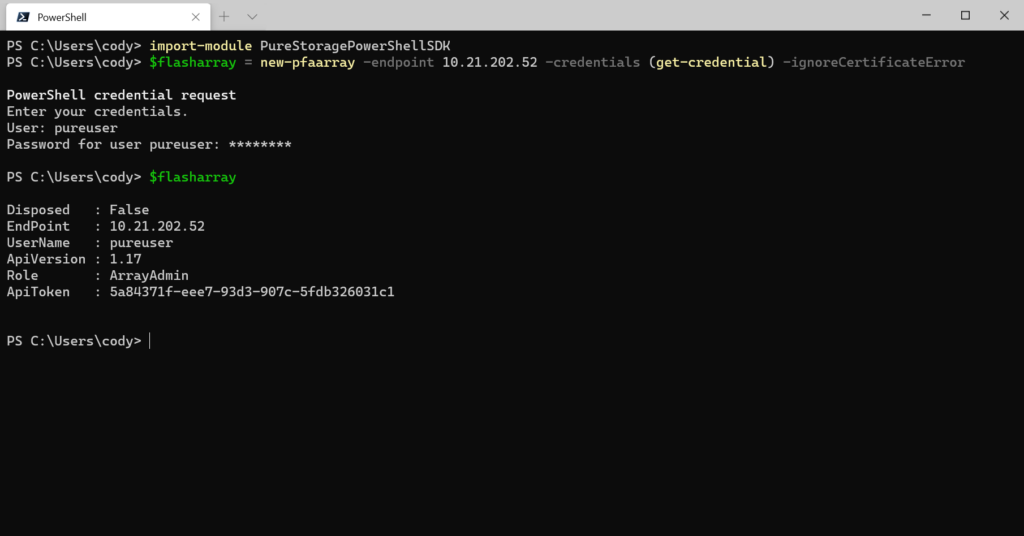
Now we have the token stored in the $flasharray.ApiToken property. The next step is to take that token and put it in the appropriate format like below:
$ApiToken =@{"api-token"=$flasharray.ApiToken}
Next send the token via the REST 2.x Post call. This is an important part: you cannot use invoke-restmethod for this. The reason being is that the API session token gets returned in the header of the REST response. invoke-restmethod DOES NOT return header information to PowerShell unless there is an error. Invoke-webrequest, however, does return the header and it stores it in the property “headers”.
So run the following (assuming you use the same variable names):
$AuthResponse = Invoke-webrequest -Method Post -Uri "https://$($flasharray.Endpoint)/api/2.2/login" -Headers $ApiToken -SkipCertificateCheck

We can see in the response that there is the Headers property. In there we can see a sub-property called x-auth-token. That’s your REST session ID.

Store this in the proper format:
$AuthHeader = @{"x-auth-token" = ($AuthResponse.Headers."x-auth-token")[0]}

Now just pass that header into subsequent REST 2.x calls.
Example
So regardless of how you authenticated the rest is the same. Pass the header you built as the REST header. Whether an API token header or a bearer token.
$volumes = Invoke-webrequest -Method GET -Uri "https://$($flasharray.Endpoint)/api/2.2/volumes" -Headers $AuthHeader -SkipCertificateCheck
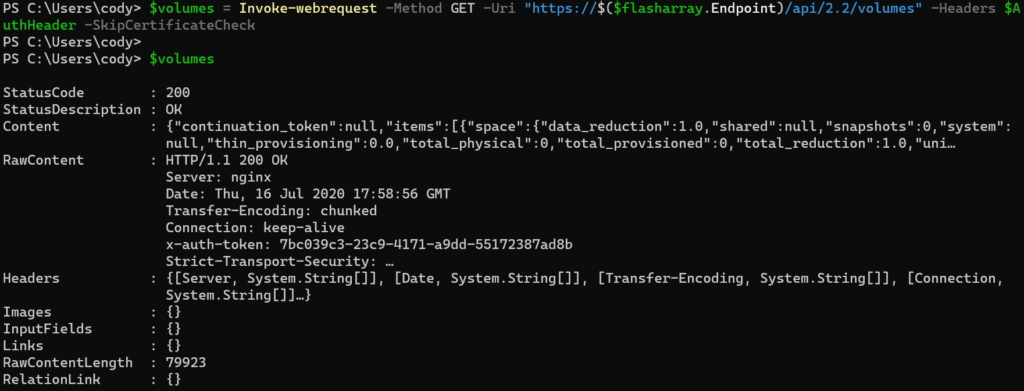
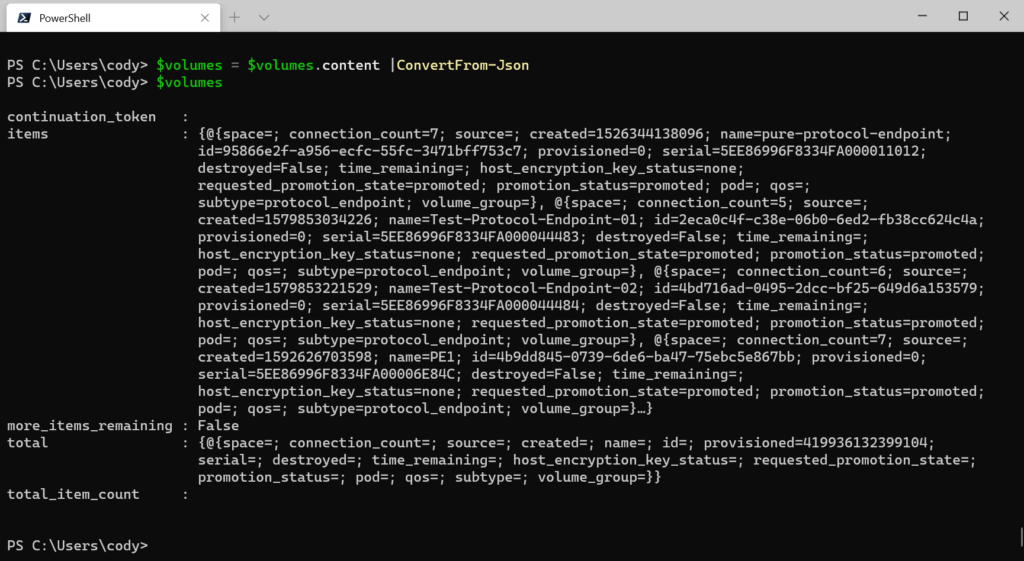
The actual REST payload is stored in the Content property.
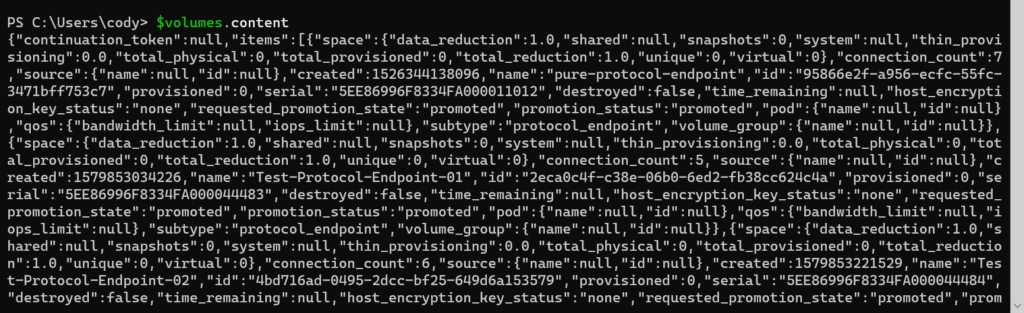
There are a few pieces of meta data (continuation token being the most important–this is for large environments with more results than a single response will handle–I will talk about that in another post). And in that is the items property, which has (in this case) the volume results.
First you want to convert it from a large JSON string into an actual PowerShell object:
$volumes = $volumes.content |ConvertFrom-Json
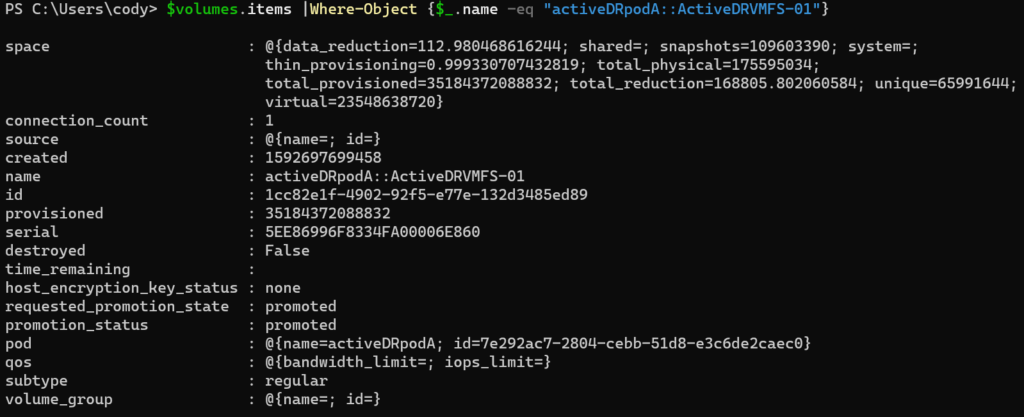
Then you can pull objects out by addressing the items property:
$volumes.items |Where-Object {$_.name -eq "activeDRpodA::ActiveDRVMFS-01"}
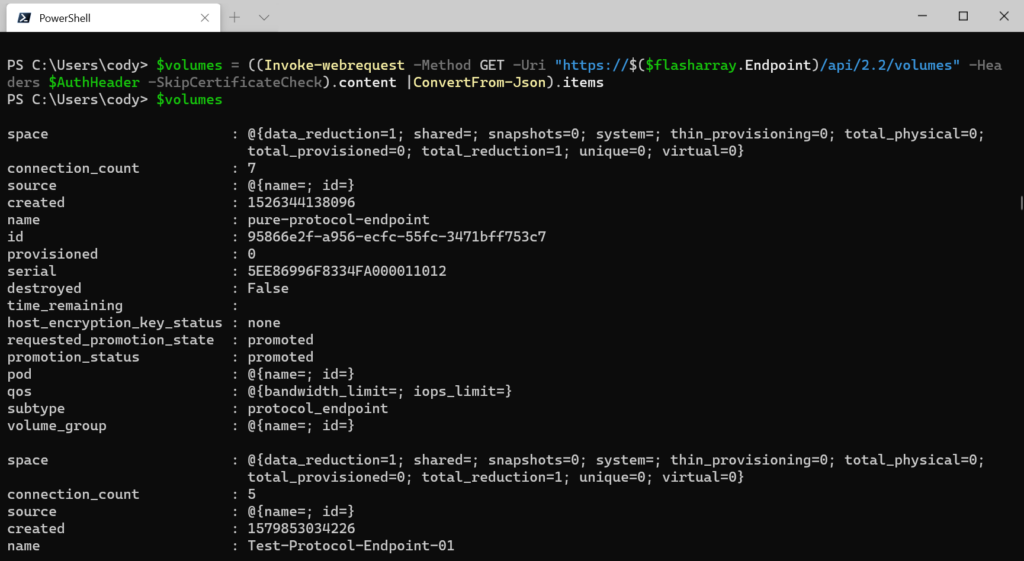
You can combine the previous steps in a one-liner. Getting the volumes, converting from JSON and returning only the volume info:
$volumes = ((Invoke-webrequest -Method GET -Uri "https://$($flasharray.Endpoint)/api/2.2/volumes" -Headers $AuthHeader -SkipCertificateCheck).content |ConvertFrom-Json).items
The full process:
$flasharray = new-pfaarray -endpoint 10.21.202.52 -credentials (get-credential) -ignoreCertificateError
$ApiToken =@{"api-token"=$flasharray.ApiToken}
$AuthResponse = Invoke-webrequest -Method Post -Uri "https://$($flasharray.Endpoint)/api/2.2/login" -Headers $ApiToken -SkipCertificateCheck
$AuthHeader = @{"x-auth-token" = ($AuthResponse.Headers."x-auth-token")[0]}
$volumes = ((Invoke-webrequest -Method GET -Uri "https://$($flasharray.Endpoint)/api/2.2/volumes" -Headers $AuthHeader -SkipCertificateCheck).content |ConvertFrom-Json).items
Cody – thanks so much for publishing this. I’m starting to use it today and ran into an issue using the private key on the cert to sign the request. I fixed the CryptographicException by specifying “-KeySpec KeyExchange” when running the New-SelfSignedCertificate cmdlet to create the cert.
Just wanted to provide another update. I ran into 1 other thing when running the $privateKey.SignData function. Without getting too far into the weeds I’ve found that creating the cert with the example below worked for me – using PowerShell 5.1 and Windows 10. I haven’t tried on PowerShell Core yet.
$cert = New-SelfSignedCertificate -certstorelocation “Cert:\LocalMachine\My” -NotAfter (Get-Date).AddYears(10) -DnsName “FaRestCert” -KeySpec “KeyExchange” -HashAlgorithm “SHA256” -Provider “Microsoft Enhanced RSA and AES Cryptographic Provider”
Very odd, I have not seen this myself. I have not had to specify this when creating keys. I would be curious to understand the difference. Anything non-default-like) in your environment?