
I am working on some new integration efforts around a feature we call “offload” and figured since I am setting it up, I might as well document it.
For the un-initiated we have a feature called Snapshot Offload that creates snapshots of one or more sets of volumes in a write-consistent manner and sends them to a non-FlashArray target (similar to our snapshot replication from one FlashArray to another conceptually). Those snapshots can then be ingested back to that FlashArray, a different one, or a Cloud Block Store instance in AWS or Azure.
Snapshot offload allows you to send to either some object store, so AWS S3, Azure Blob, GCP Object, or a random NFS target:
For this post I am going to walk through creating an AWS S3 bucket, providing credentials, and then configuring a protection group.
Create S3 Bucket
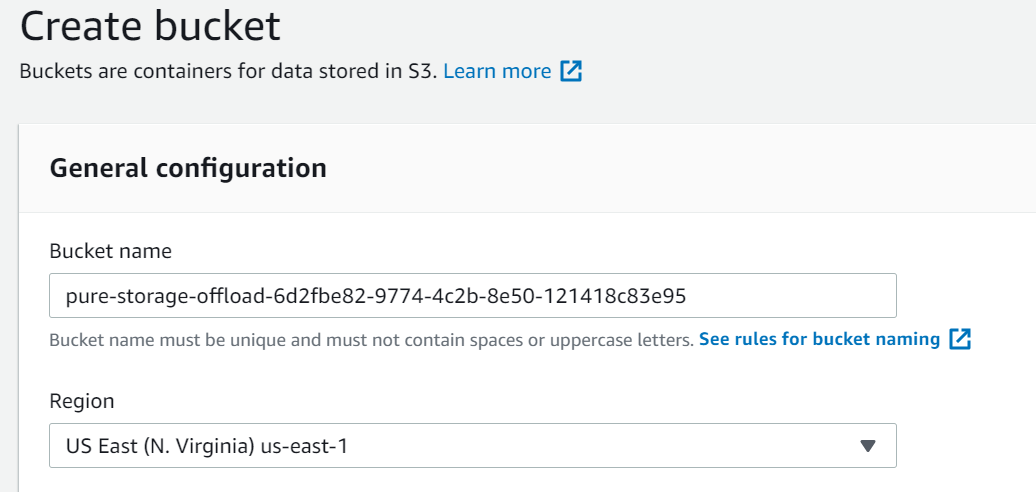
So the first step is to create an S3 bucket, so head over to AWS. Go the the S3 service and click create bucket.
You can use a pre-existing bucket but it needs to be empty–this bucket should be reserved for offload.
Choose a name–this needs to be globally unique, generally I recommend adding a GUID so that you don’t need to get creative with naming.
There are a lot of ways of generating a new GUID, new-guid in PowerShell is a simple one.
Then…
KEEP IT PRIVATE. DO NOT MAKE S3 BUCKETS PUBLIC UNLESS YOU HAVE YOUR AFFAIRS IN ORDER. Certainly never do this for an offload bucket.
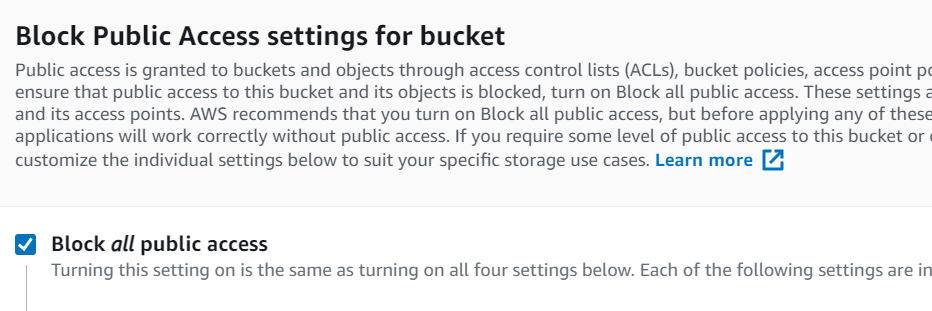
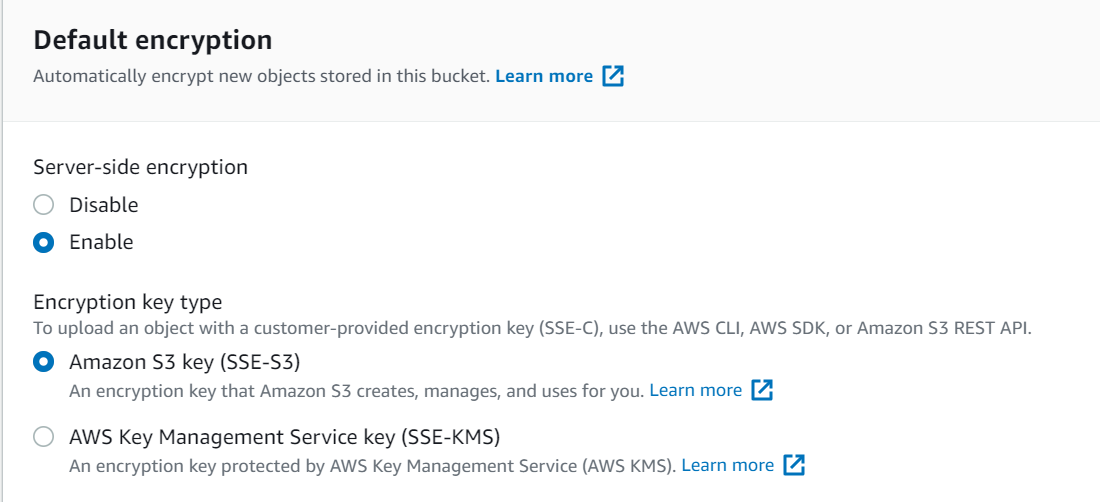
Do not turn on versioning–we do not support that today. But encryption is required. Amazon encryption is fine, but bring-your-own-key is supported as well.
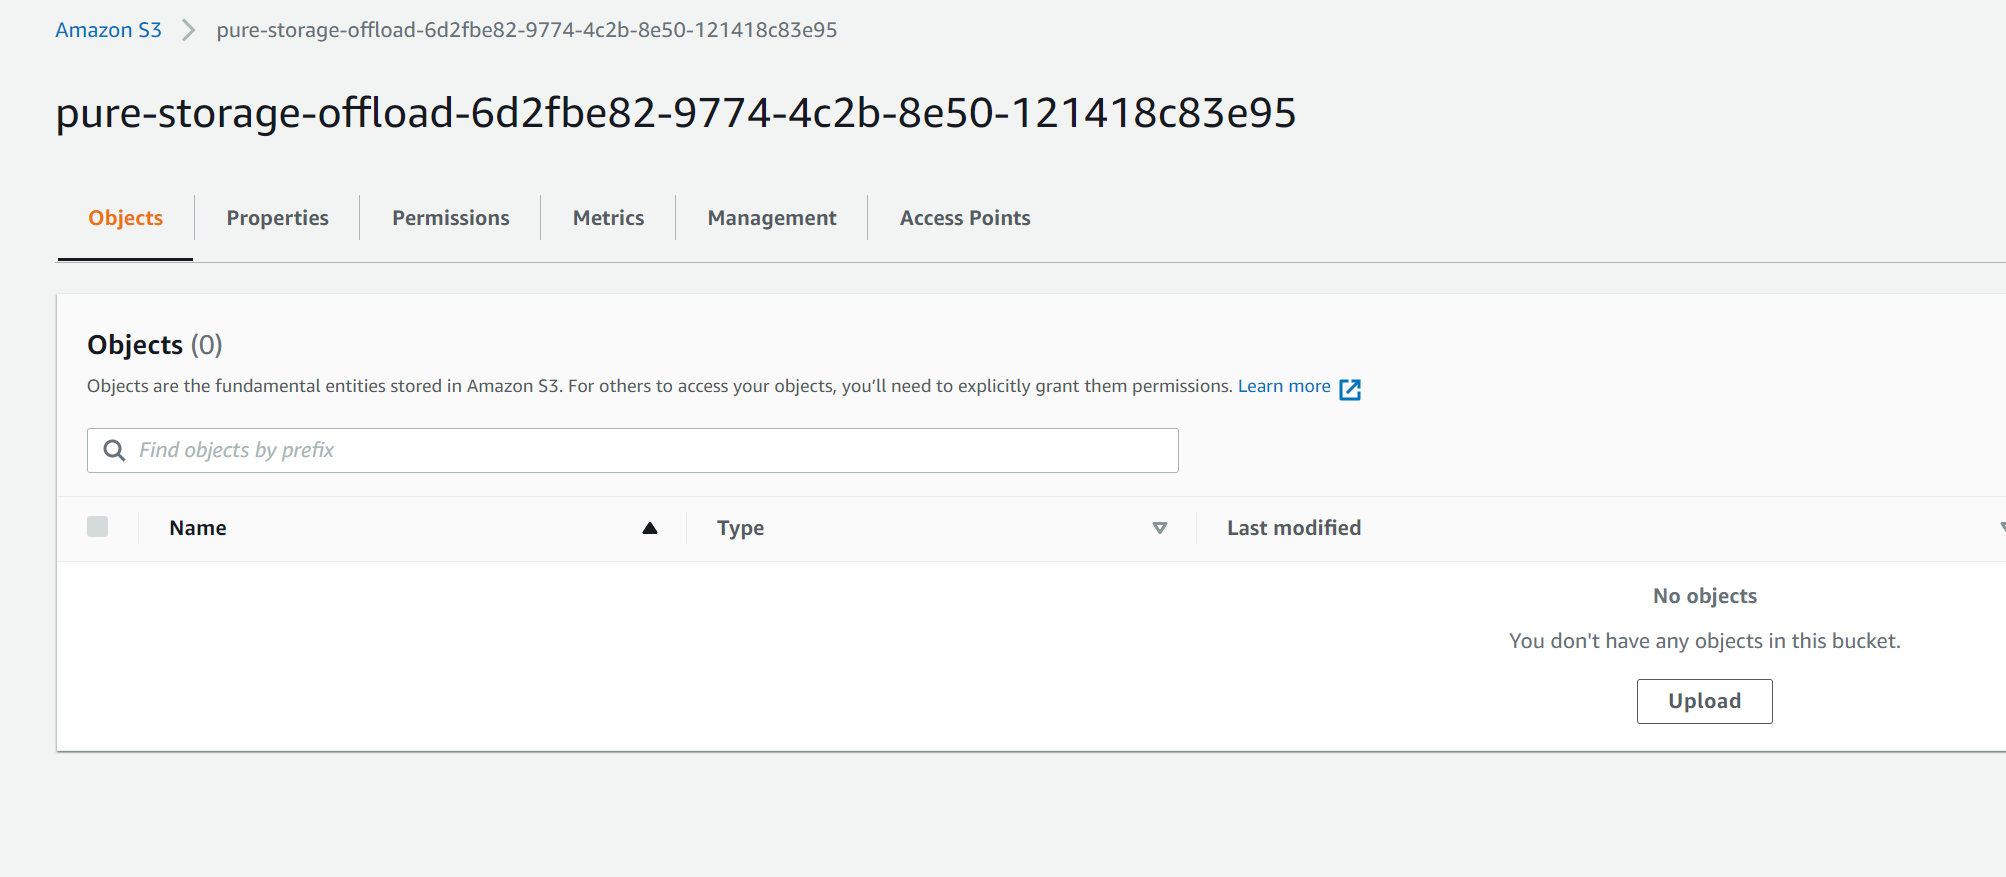
We have our bucket!
IAM Configuration
The next step is to configure access. The authentication between the FlashArray (or CBS) and the AWS S3 bucket requires very little authority. It needs to be able to list buckets, and then see and manipulate objects in the bucket you created. So for this reason it is recommended to create a new and specific user for this access.
In the AWS console, jump over to IAM (identity access management). Before doing so, don’t forget to store the S3 bucket name, you will need that in a bit.
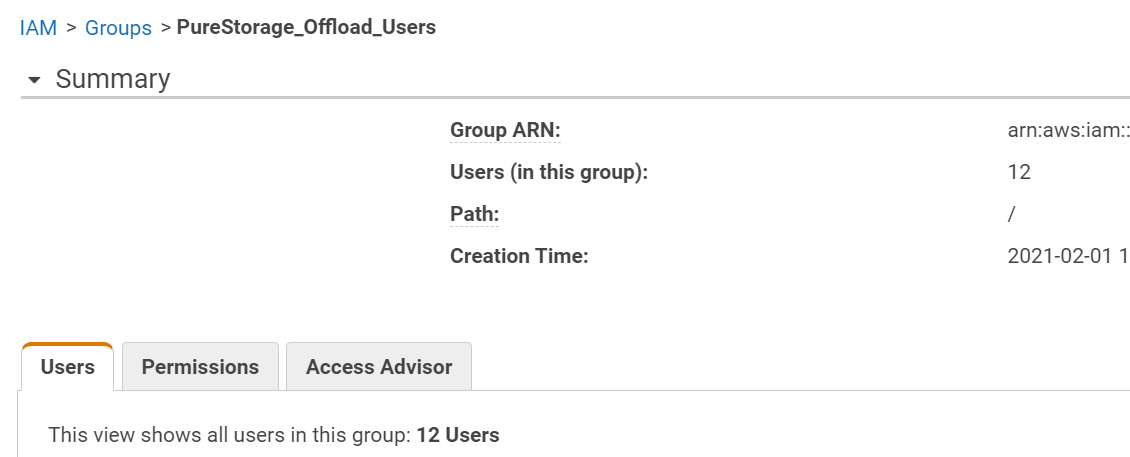
IAM is not much different between any other authentication/user management source you are used to. There are users, user groups, and permissions. For offload you do not need a specific group or user, but I like to create a specific user for each bucket, so that can amount to more than a few users if you have multiple buckets. So I created a new group:
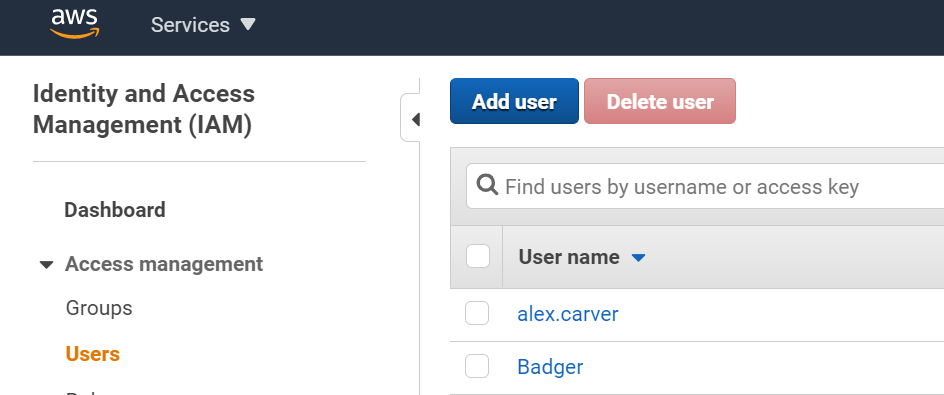
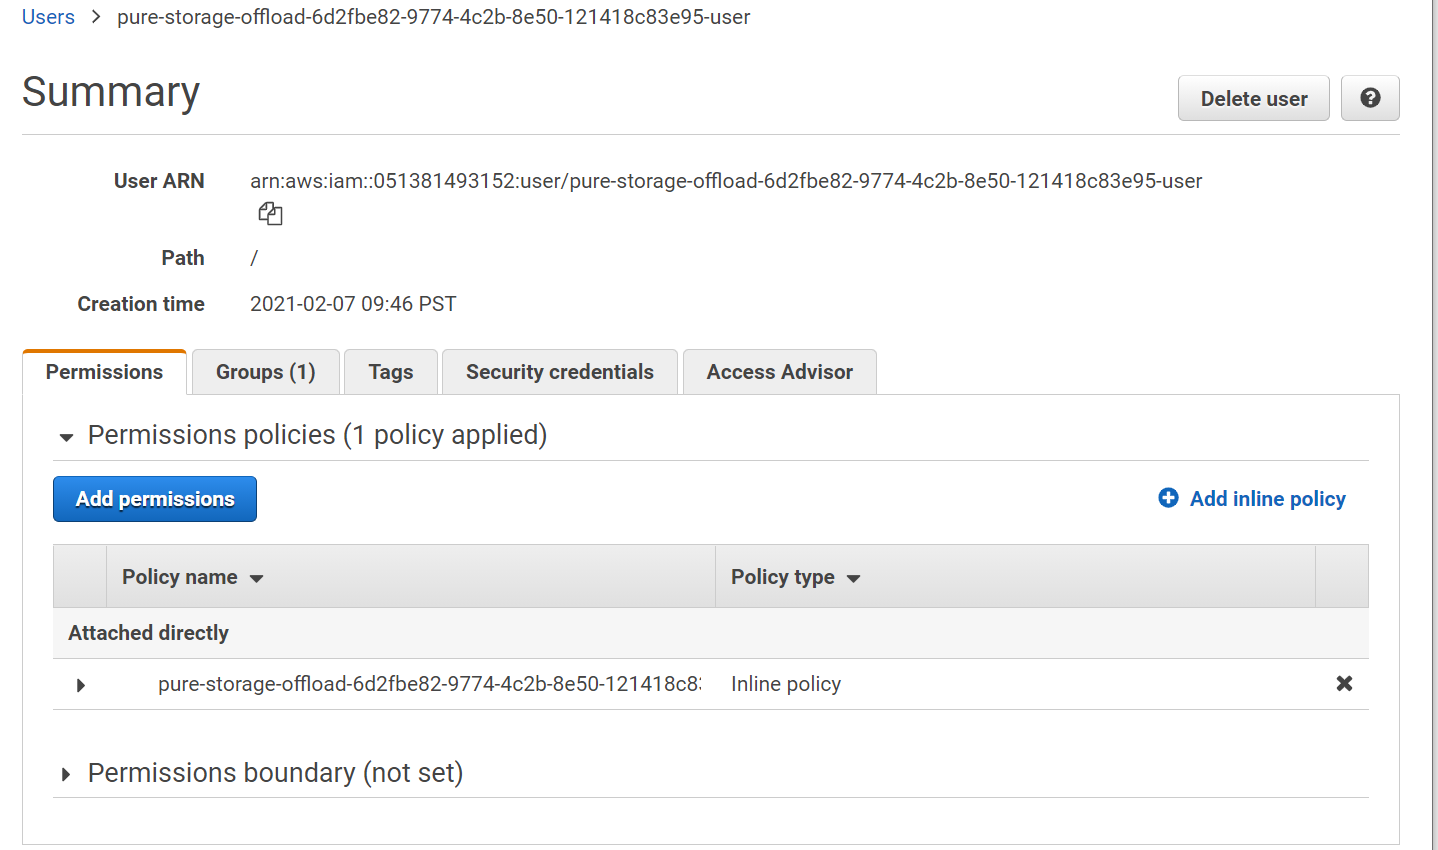
Then I will create a new user. Under IAM > Users < Add User
To keep it clear, I use the S3 bucket name as the user name plus “-user” as the end.
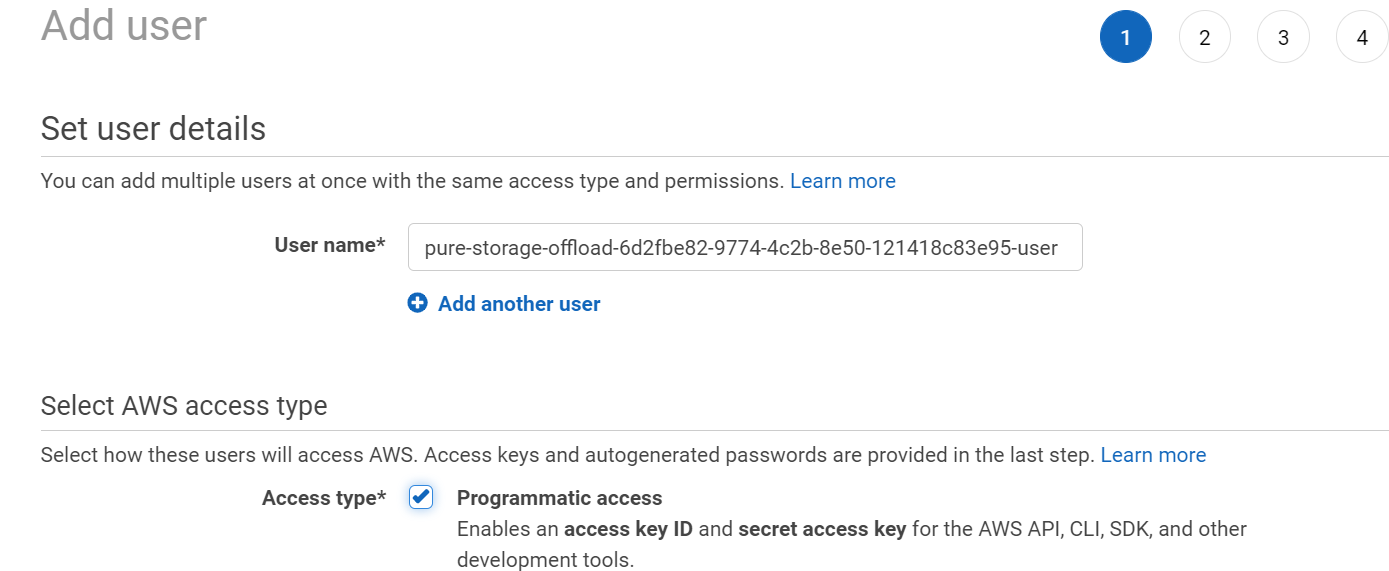
Also, important. Enable Programmatic access for this user. We will need to generate API keys for the FlashArray to use.
Next add the user to the group you created, though this is optional.

Complete the wizard (the rest is optional and up to you).
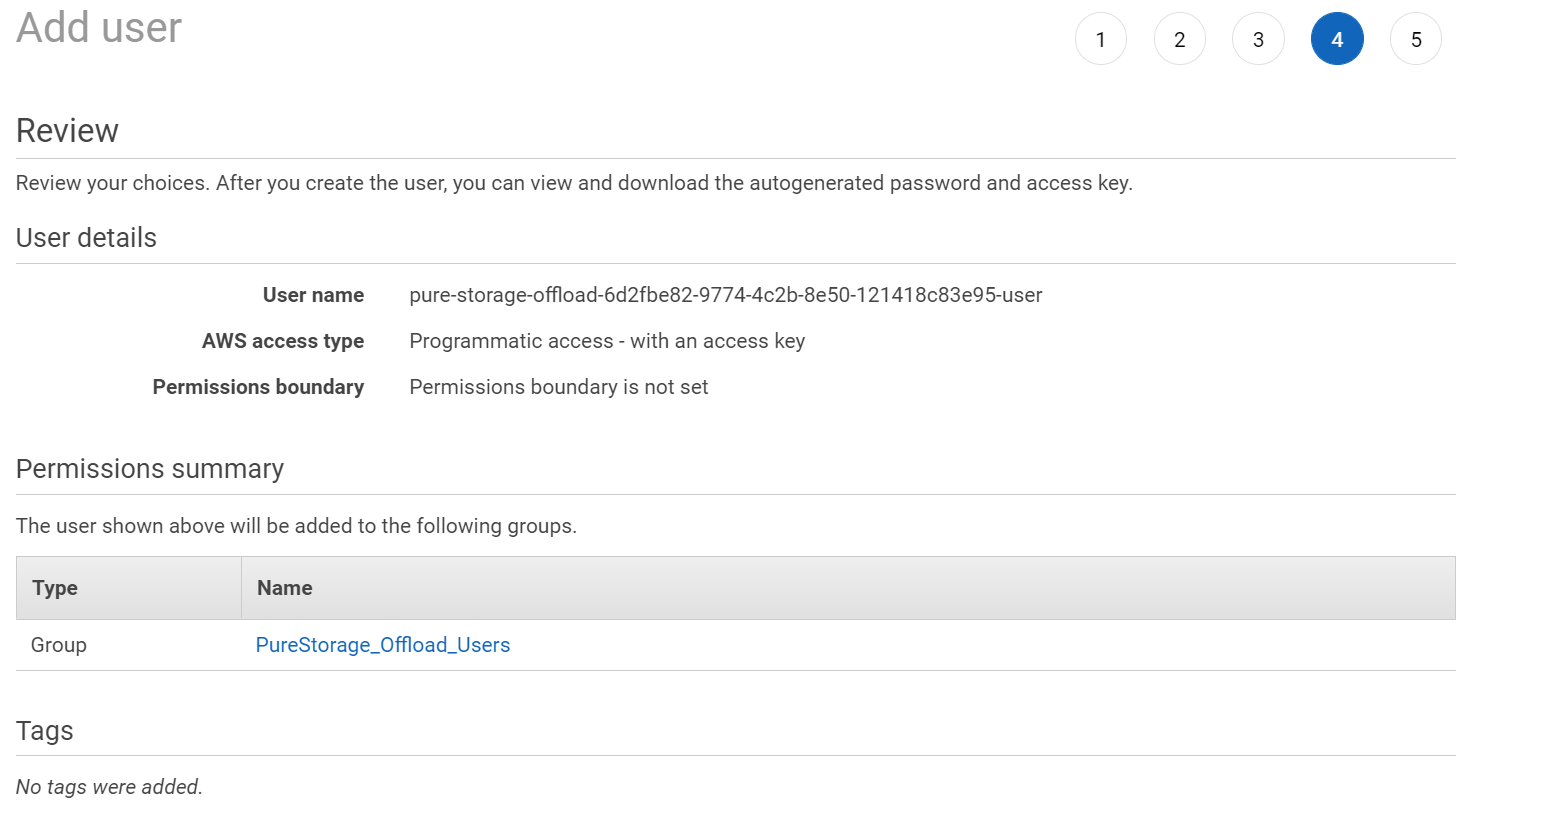
The creation will also create an API key. Record both the Access Key ID and the Secret Access Key ID. This is the ONLY time you can record the secret access key ID. If you skip this step, you will need to generate a new key for the user. AWS only allows the secret to be be seen by you upon the time of creation–from that point on it is, well, secret.

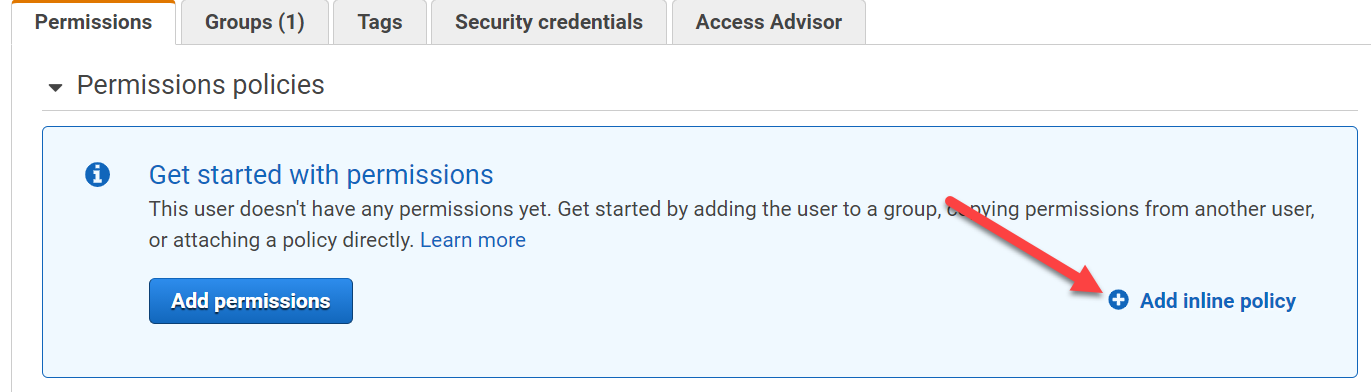
Now go to that user and click Add Permissions or Add Inline Policy. I will use an inline policy because this user was created specifically for one purpose, so a flexible managed policy is not needed here. A 1:1 mapping between permissions and the user is what I need. Up to you how you do it. The permission creation process is the same either way essentially.
Note you can do this during the creation wizard instead (if you don’t add it to a group) or have a group policy that dictates the permissions– doing the latter is for another blog post though as a per-group policy with dynamic bucket names for the user is something I have not tried yet.
In this case, I find it simpler to just directly specify the JSON for the IAM policy than to use the visual editor. Click on JSON and replace the default with below (replacing my bucket name with yours):
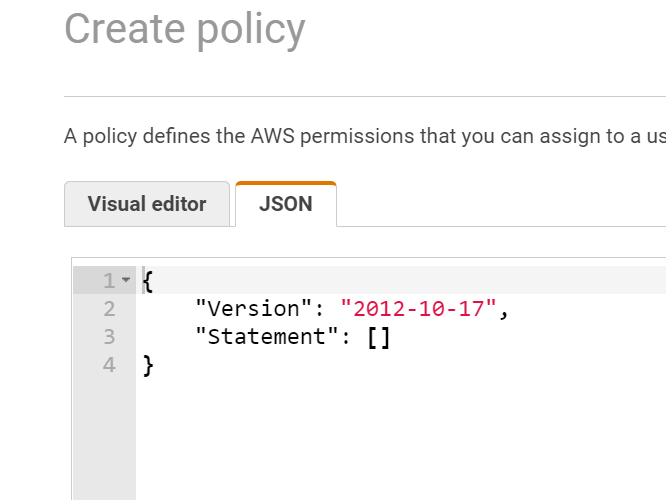
{
    "Version": "2012-10-17",
    "Statement": [
        {
        "Effect":  "Allow",
        "Action":  ["s3:ListAllMyBuckets", "s3:GetBucketLocation"],
        "Resource":  ["*"]
        },
        {
        "Effect":  "Allow",
        "Action":  ["*"],
        "Resource":  ["arn:aws:s3:::pure-storage-offload-6d2fbe82-9774-4c2b-8e50-121418c83e95"]
        },
        {
        "Effect":  "Allow",
        "Action":  ["s3:*Object"],
        "Resource":  ["arn:aws:s3:::pure-storage-offload-6d2fbe82-9774-4c2b-8e50-121418c83e95/*"]
        }
    ]
}
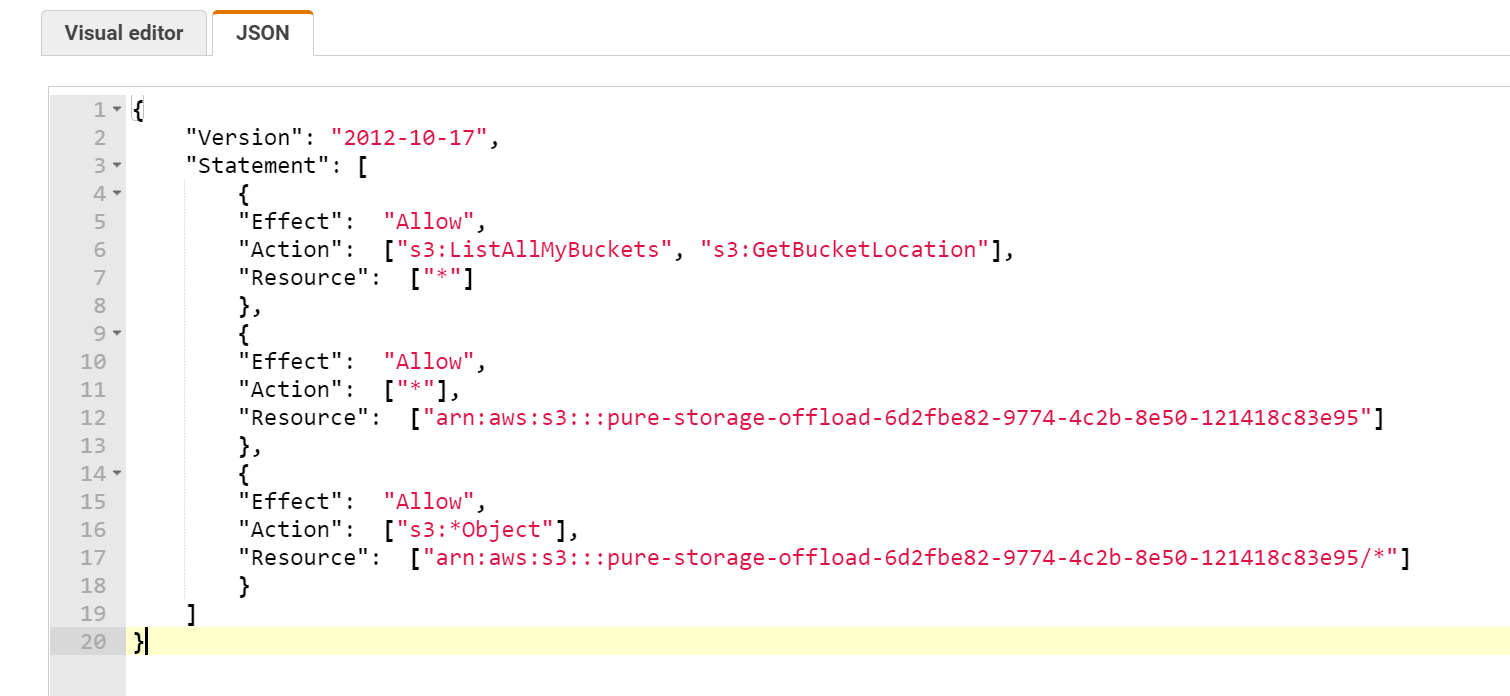
This will allow the user to list all buckets and their region, and then entirely manipulate the specified bucket and the contents within. I have yet to find a way to restrict an IAM role from being able to list all buckets, seems to be all or none with that one.
Click Next. Add a name and a description–I am following my standard here of naming with the bucket name.
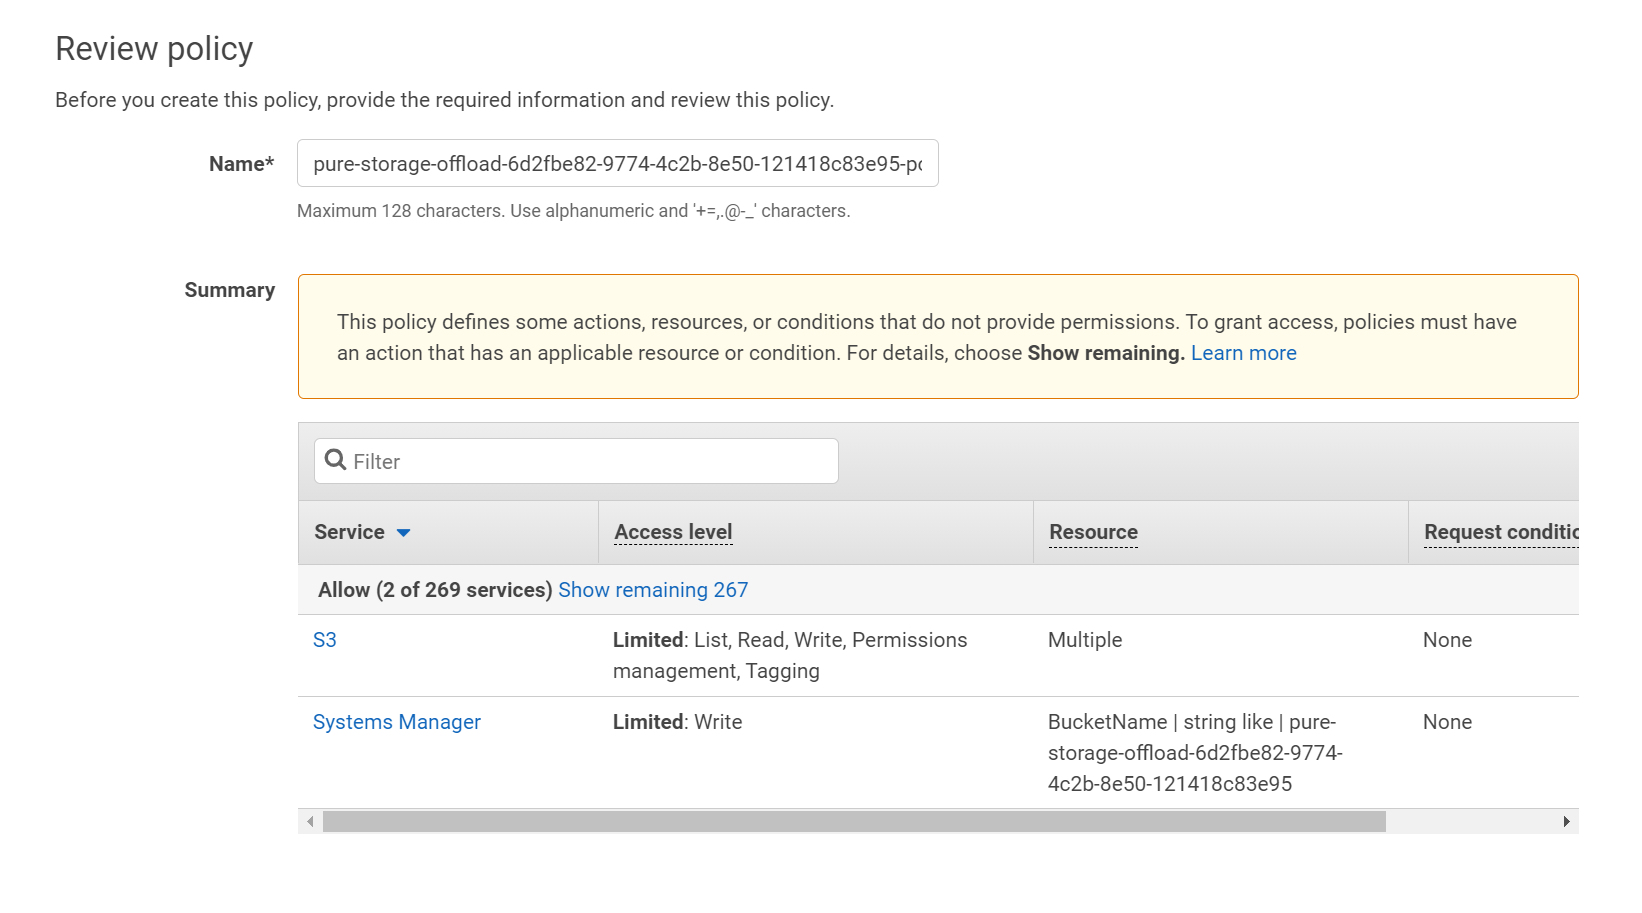
Finish with Create Policy. Go back to the IAM user creation wizard and refresh the policy list and choose the one you just created.
You’re now done with AWS. Now to your FlashArray.
Configuring Offload on a FlashArray
To deploy the app, you need to go to Settings > Software > App Catalog.
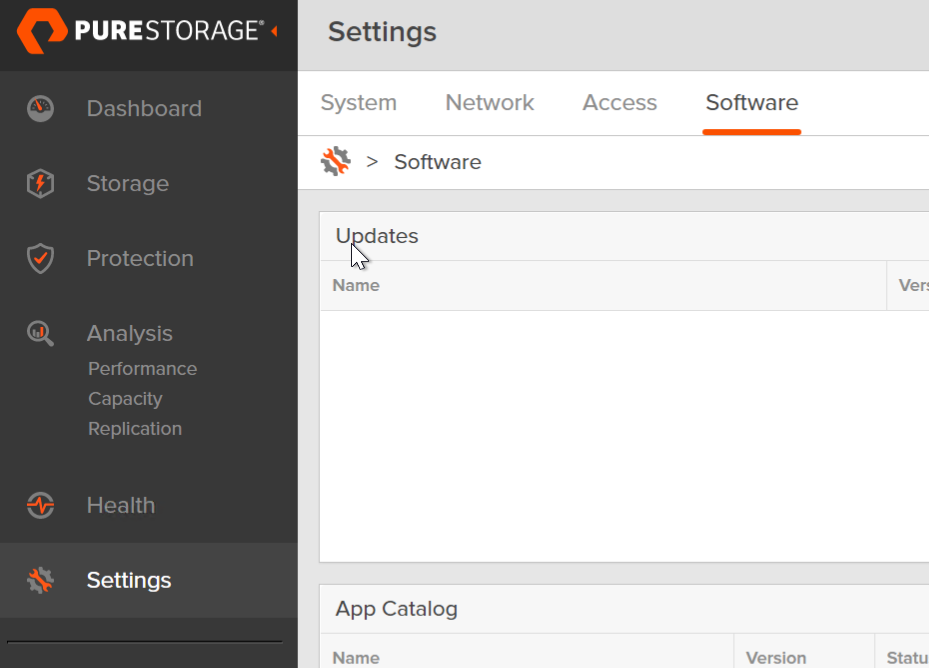
Find Offload and click Install.

Confirm.
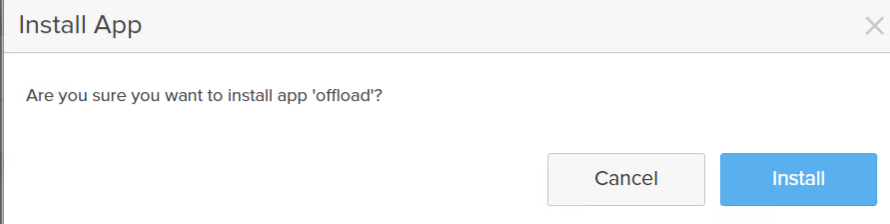
This will download the app, then deploy it. Takes a few minutes.

Once complete it will appear in the catalog. It is fairly common to see the initial state as unhealthy. 99.9% of the time it is because you didn’t provide network information. The deployment process isn’t authorized to change your networking information, nor does it have a way to know what networking configuration to use.

So we need to do two things, assign the offload app to a specific interface and also give it an IP address (it does not support DHCP today). So identify the replication ports on the FlashArray (at least one on each controller) in Settings > Network:
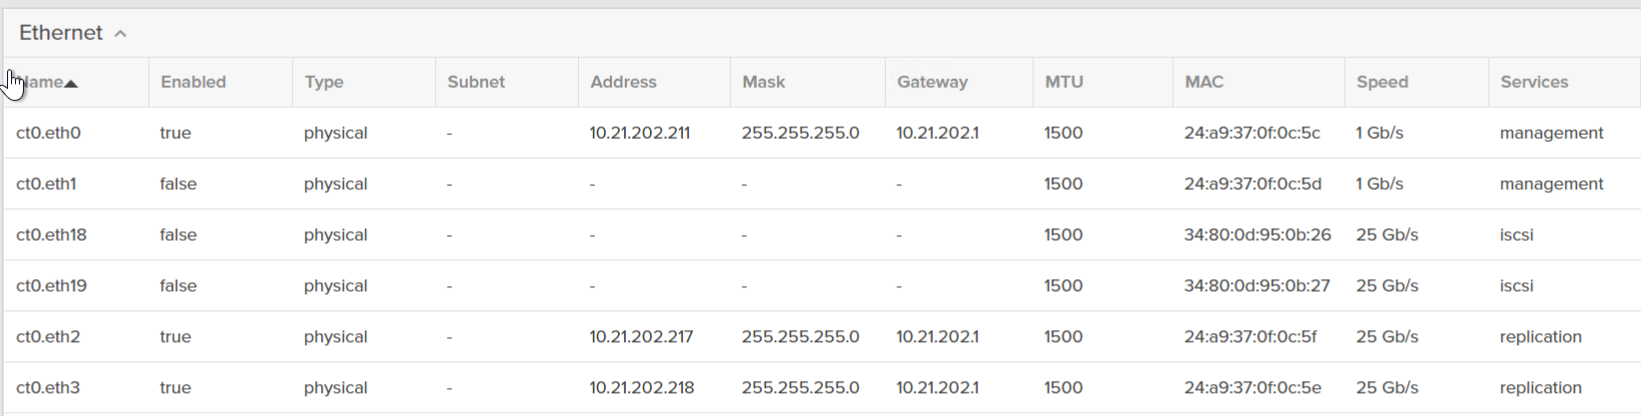
I will use ct0.eth3 and ct1.eth3. These are enabled and online replication ports, one on each controller.
So SSH in (this part can also be done via the API).
So the command is:
purenetwork eth create vif @offload.data0 --subinterfacelist ct0.eth3,ct1.eth3
If you are on Purity 6.0 or earlier it is a bit different:
purenetwork create vif @offload.data0 --subinterfacelist ct0.eth3,ct1.eth3

In the GUI, you will now see it:

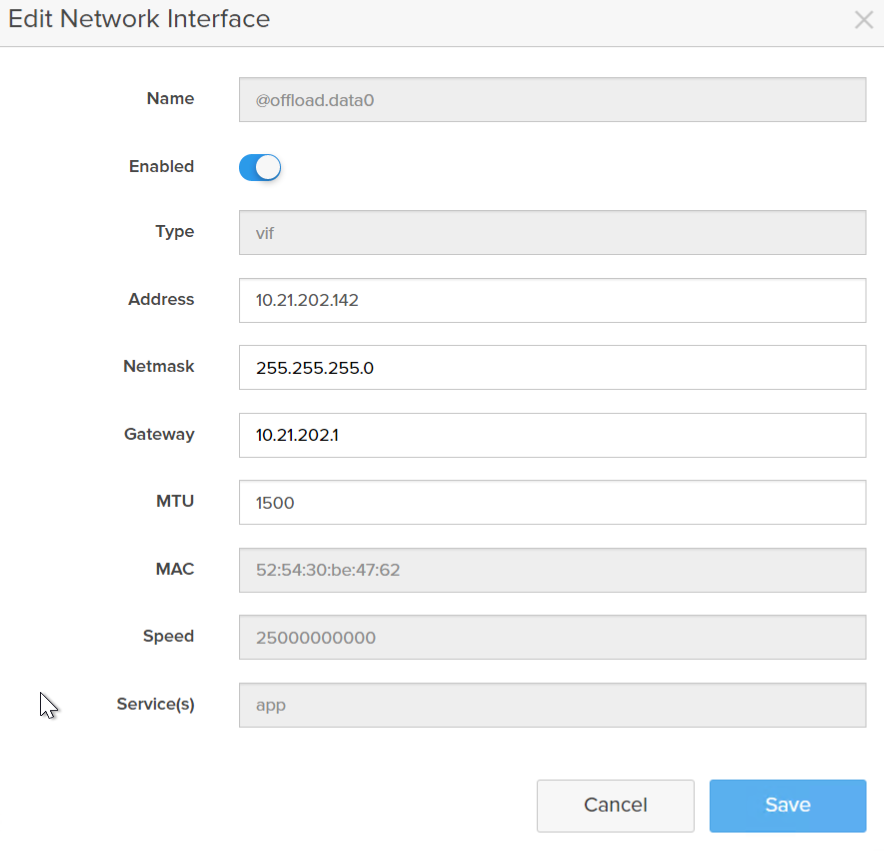
Click the edit symbol and add the IP information and slide the toggle to enable the interface.
Now go back to Settings > Software > Installed Apps and choose offload and enable it.

After a few moments, it will become enabled and healthy. If still unhealthy check your network settings (right IP info and you enabled the interface).

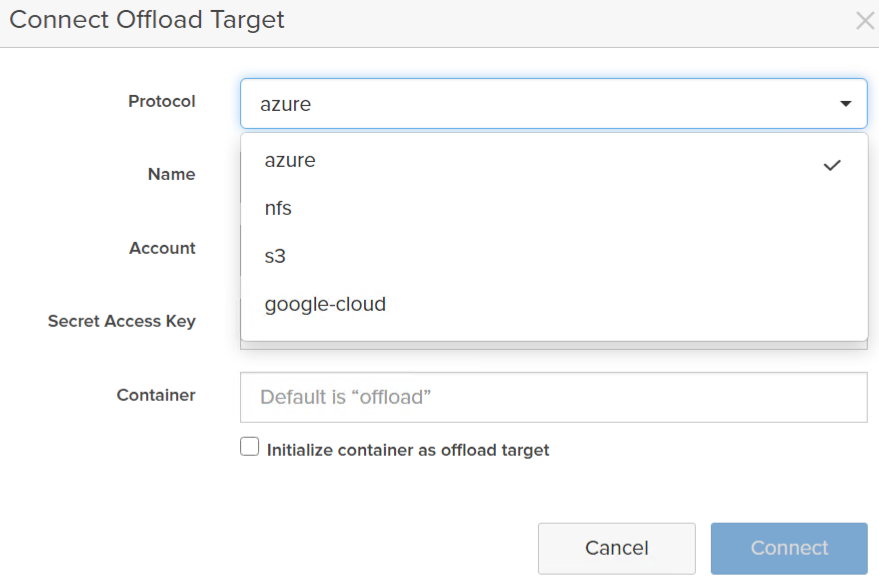
Now go to the Storage dashboard and click the plus sign in the Offload Targets panel.

Enter in your information:
- Protocol: choose S3
- Web Service: AWS
- Name: give it something that makes sense. I use my bucket name.
- Access Key ID: You user access ID
- Secret Access Key: The secret for the credentials, if you forgot to store this, you will need to generate a new one.
- Bucket name–the bucket name only, you do not need the full URL or ARN (AWS resource notation) name.
- Initialize: If this is a new bucket, choose initialize. If this is a previously-used target, do not select initialize.
- Placement: Usually go with retention based–it will automatically use infrequent access for snapshots if your retention is more than 30 days. If it is shorter is will use the standard tier. Note the main difference is cost (from AWS) for retrieval. See details here.

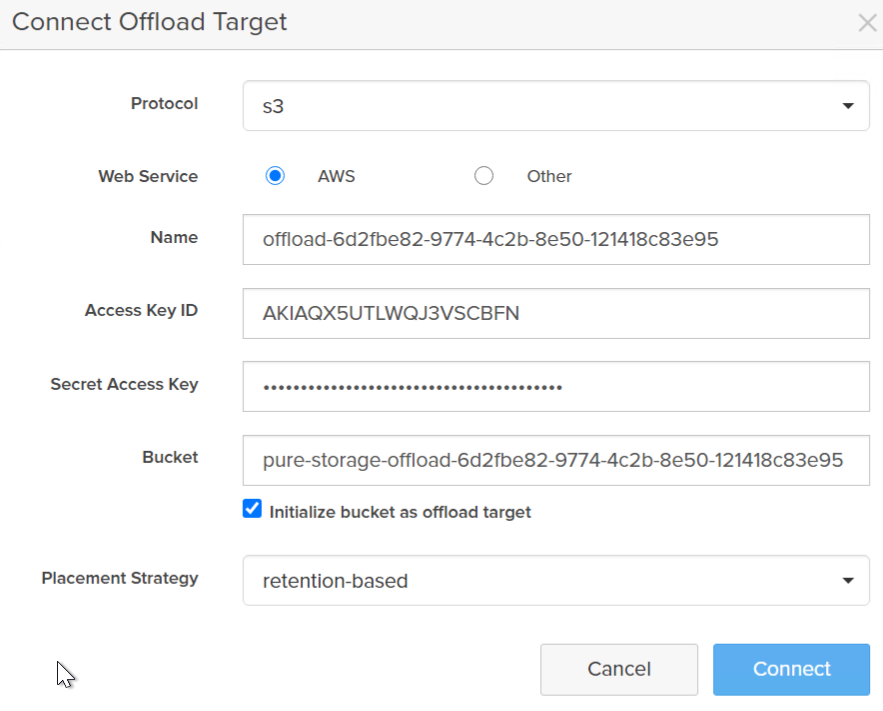
Click Connect.
The bucket will be scanned and configured which takes a few moments.

Then it will go to connected, meaning it is ready to use.

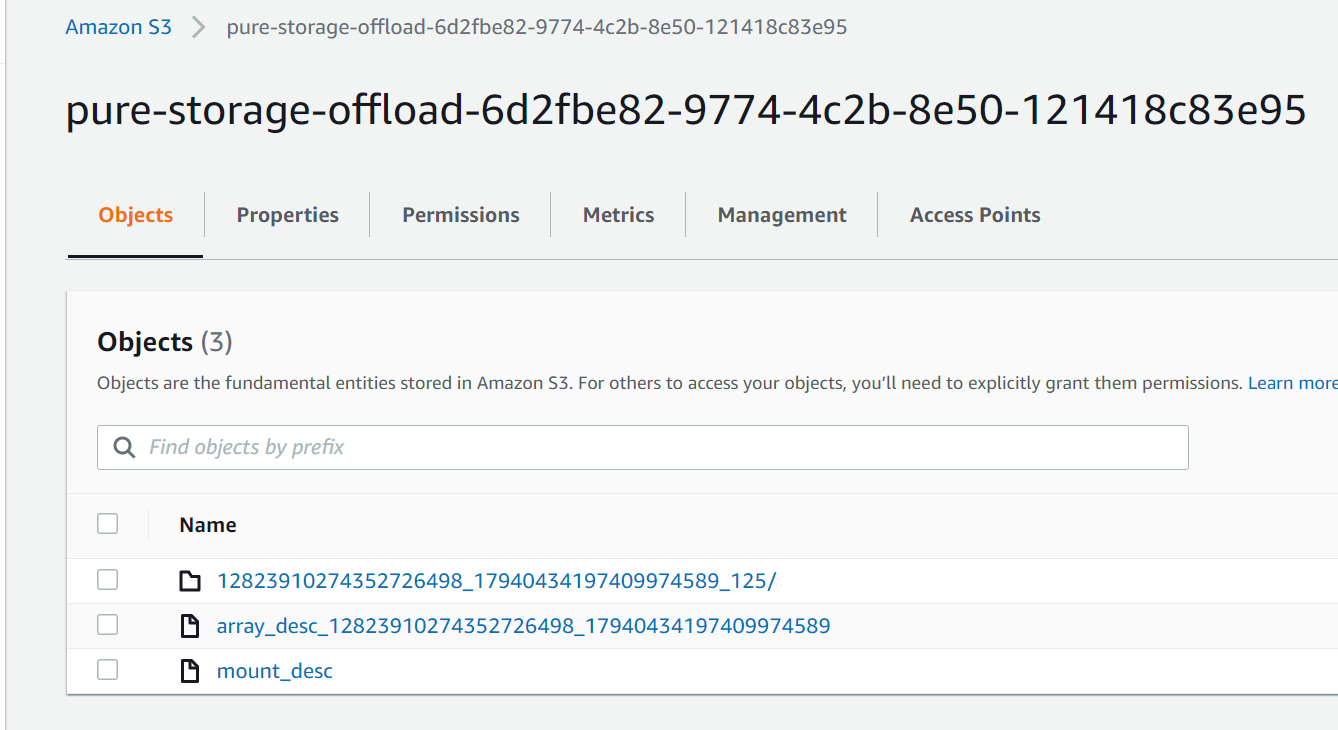
If you look at your bucket now in AWS, it will have the config files in it:
Creating a Protection Group
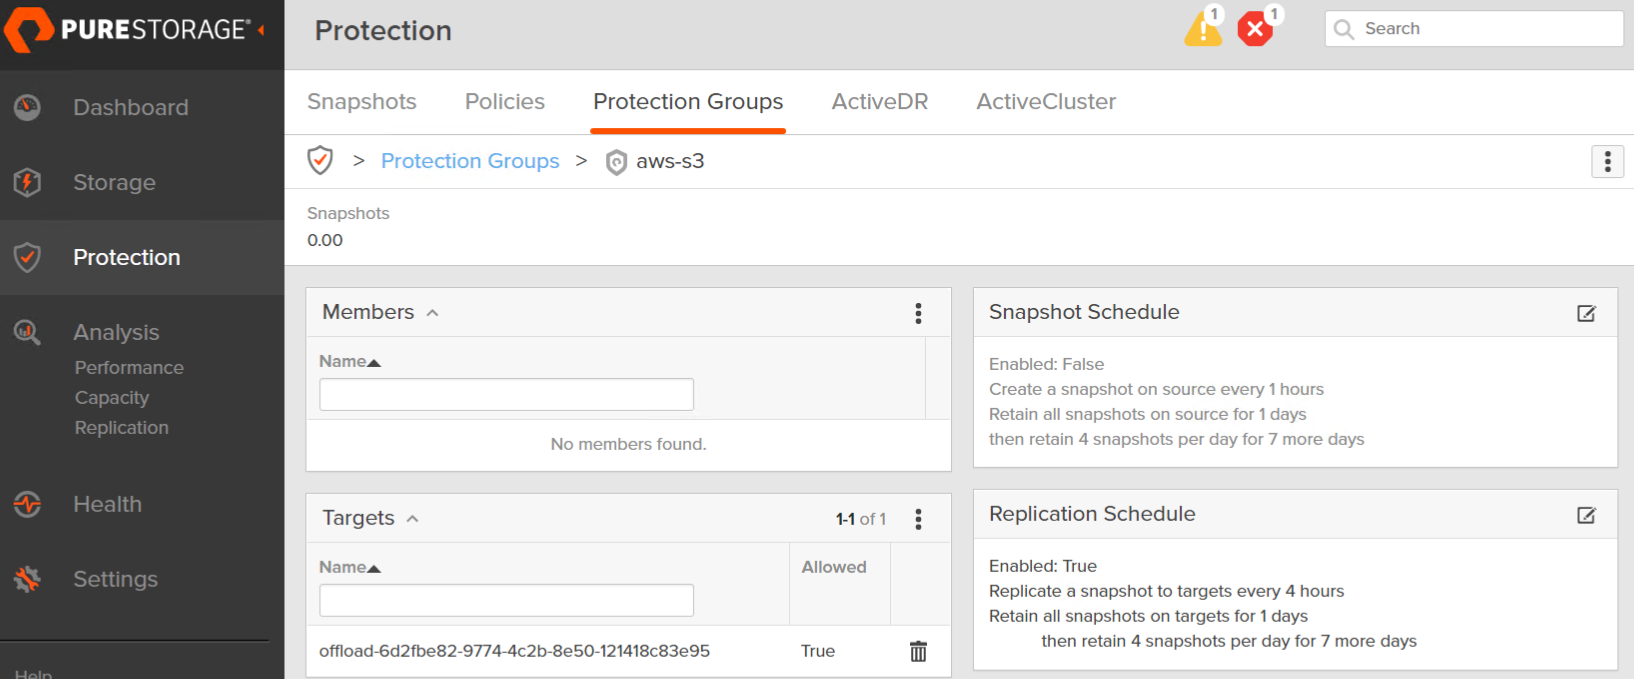
Protection groups are a grouping of volumes that you want to replicate and/or snapshot at a write-consistent fashion to one or more targets. These targets can be FlashArray or Cloud Block Store instances, or offload targets, such as AWS S3. A volume can be in more than one protection group and a protection group can have multiple targets, and a target can be in multiple protection groups. So overall, fairly flexible.
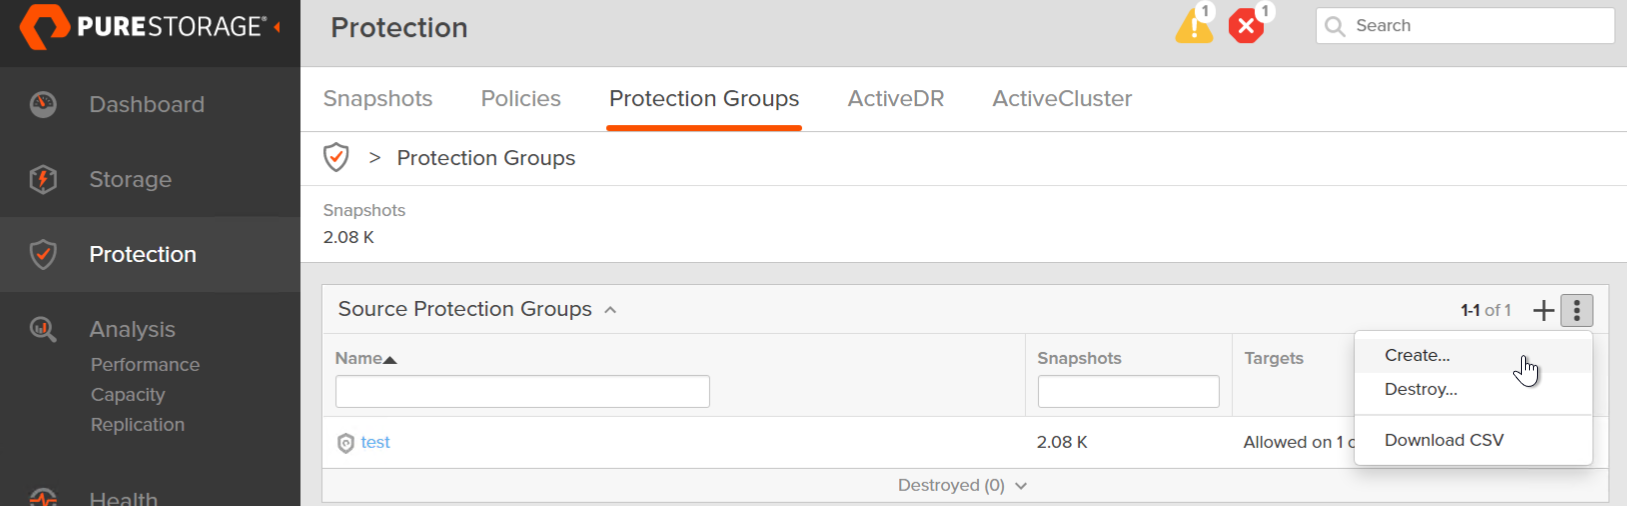
In your FlashArray GUI, go to Protection > Protection Groups and click the plus to create a new one or the vertical ellipsis and choose Create. Not that depending on Purity version this screen might look a bit different.
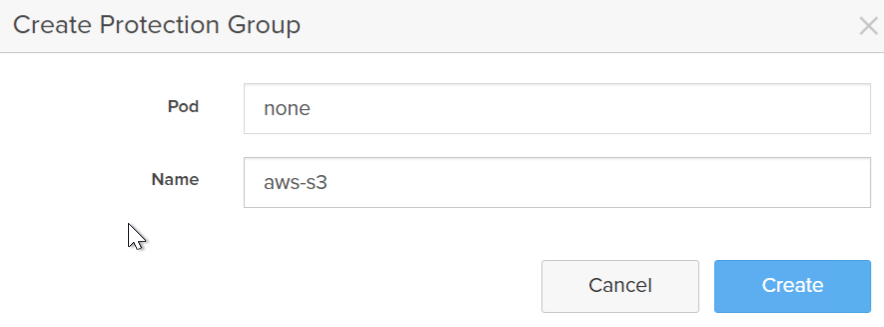
Give it a name. Currently offload is not supported from pods, so do not choose a pod.
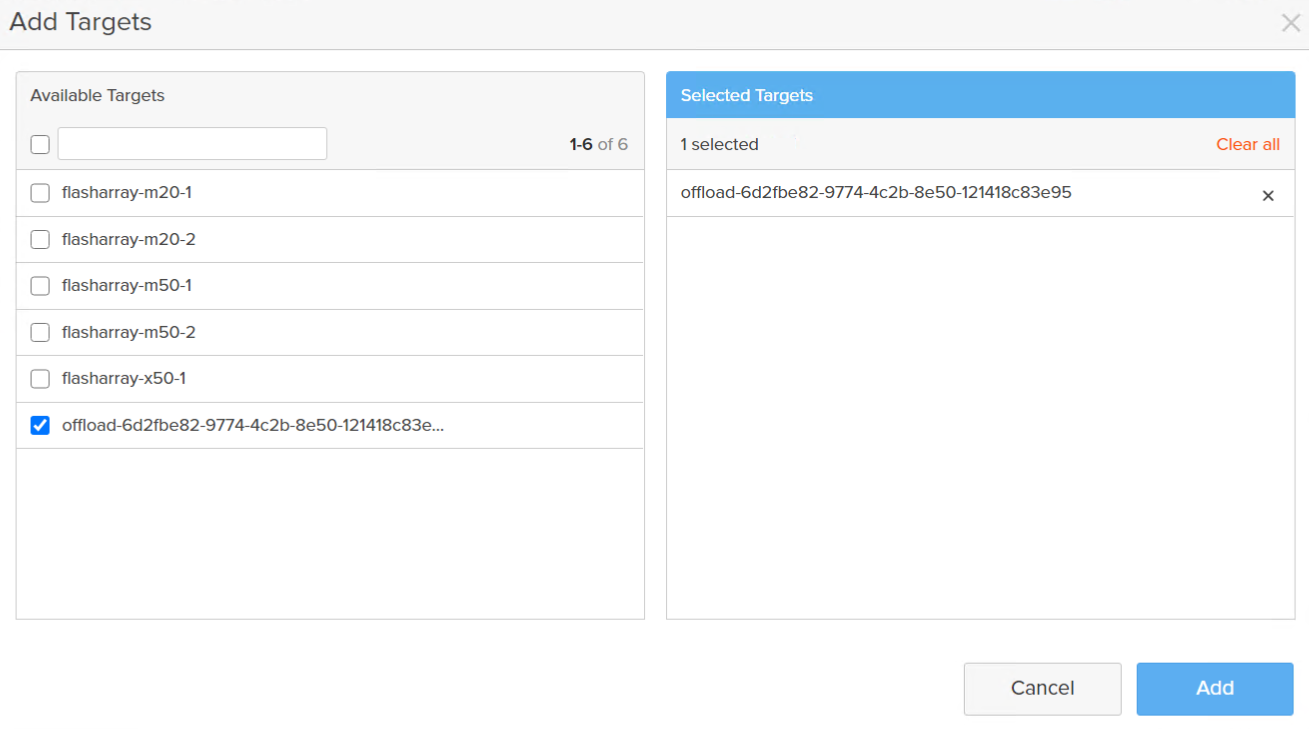
Click on the new group and choose Add from the Targets panel.
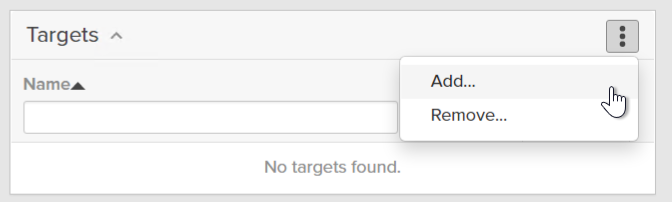
Choose your offload target. Note that an offload target can be in the same protection group as a FlashArray target.
Now enable a replication schedule.
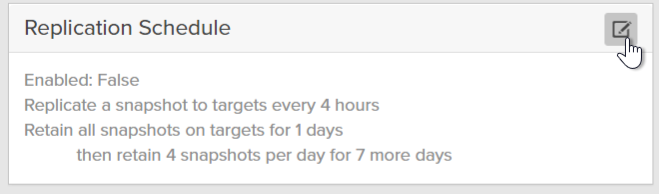
Ensure you enable replication. If you chose retention based for offload and you make “Retain all snapshots on the target for X” more than 30 days it will send them to the infrequent access storage class.
You are now all done! End to end. You can now start protecting volumes to AWS. In an upcoming post I will show you how to automate this.
Great article with concise, easy to follow steps. Do you have any articles about how to retrieve the offloaded snapshots back from the AWS bucket?
I’m thinking in the event of DR where you need to restore the data back to something, somewhere what steps would need to be taken?