
This is part 7 of this 7 part series. Questions around managing VMFS snapshots have been cropping up a lot lately and I realized I didn’t have a lot of specific Pure Storage and VMware resignaturing information out there. Especially around scripting all of this and the various options to do this. So I put a long series out here about how to do all of this.
The series being:
- Mounting an unresolved VMFS
- Why not force mount?
- Why might a VMFS resignature operation fail?
- How to correlate a VMFS and a FlashArray volume
- How to snapshot a VMFS on the FlashArray
- How to mount a VMFS FlashArray snapshot
- Restoring a single VM from a FlashArray snapshot
This post will overview the process to restore a virtual machine from a FlashArray snapshot of a VMFS. This will be step-by-step in order to explain the process. In other posts I will explain how this can be further simplified with some available tools.
Once you have followed the steps in the earlier post “Recovering a FlashArray VMFS Snapshot” you can start this process.
First ensure the old VM (if it still exists) is powered-off. You don’t want network collisions.

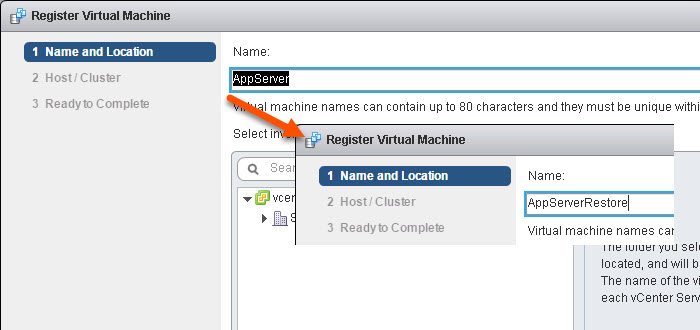
Right-click on your recovered datastore and choose “Register VM”.

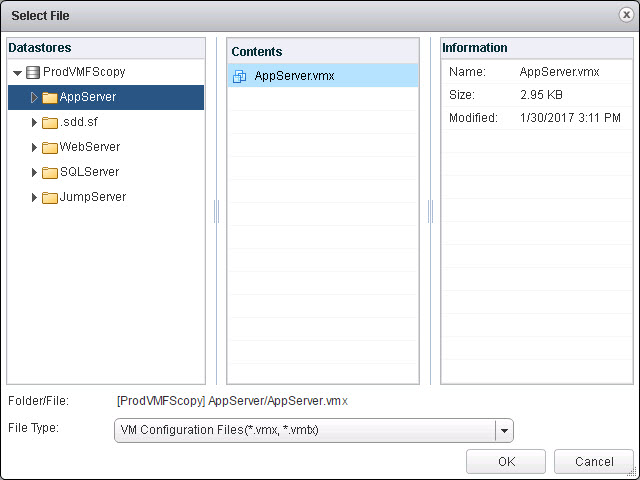
I want to recover my “AppServer” VM. So I navigate to that folder and choose the correct VMX file.
Now follow the wizard to register the VM. My old VM is still registered, so I am going to give the restored VM a slight new name. “AppServerRestore”. I recommend not deleting the old VM until you confirm the new VM is up. Then you can delete it and rename the new one back to the original name.
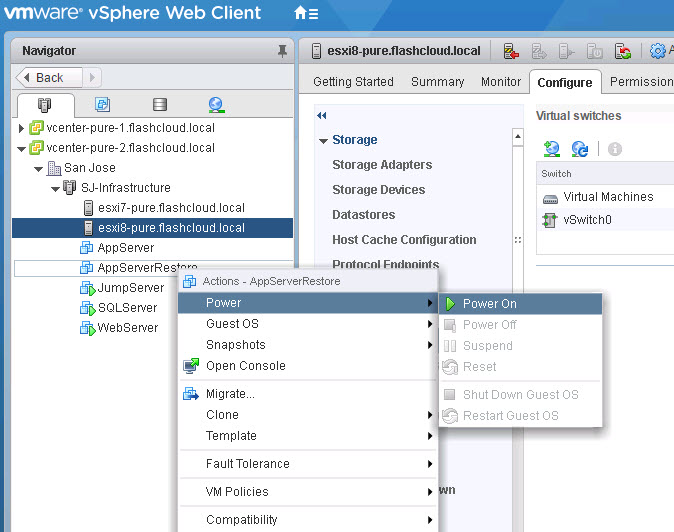
Great. Now power on the new VM.
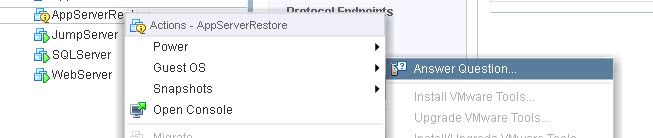
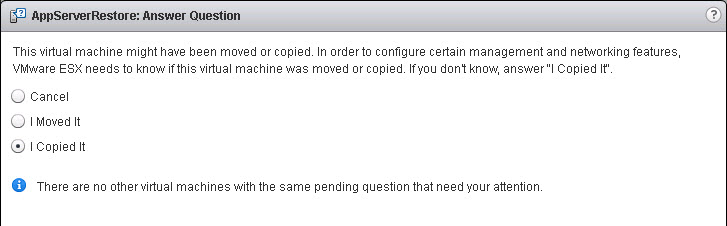
ESXi will ask you a question since the VM is seen as copied. Answer the question, usually “copied” is fine. See this KB for more info.
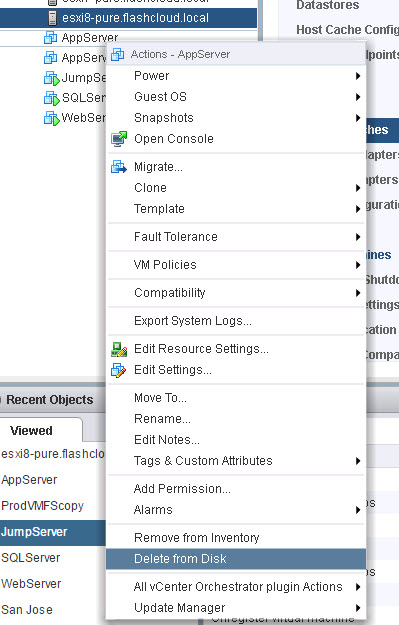
Next, verify the new VM is powered-up correctly and whatever change you need is there. When that is verified, delete the old VM.
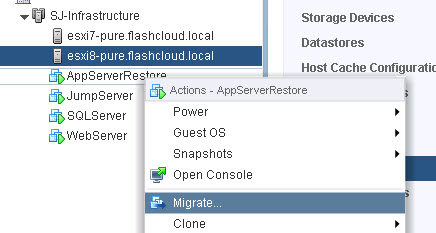
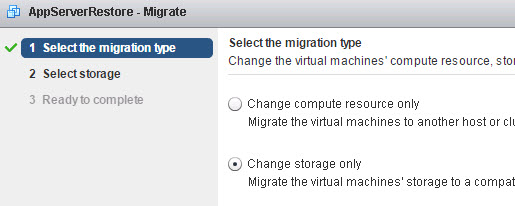
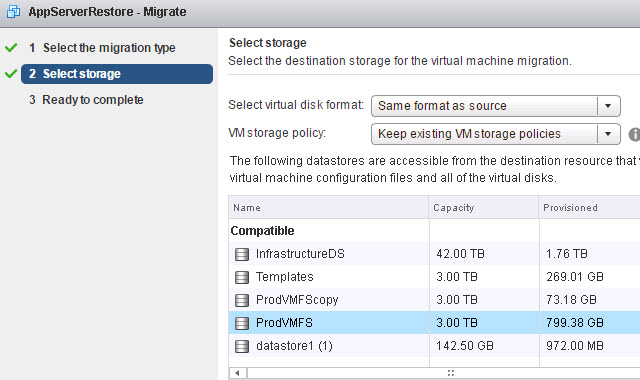
Then Storage vMotion the restored VM back to the original datastore. Choose the storage move option and then the original datastore and finish the wizard.
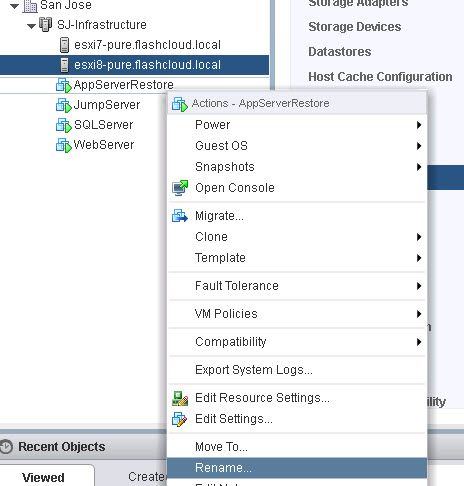
Now rename the VM back to the original name.
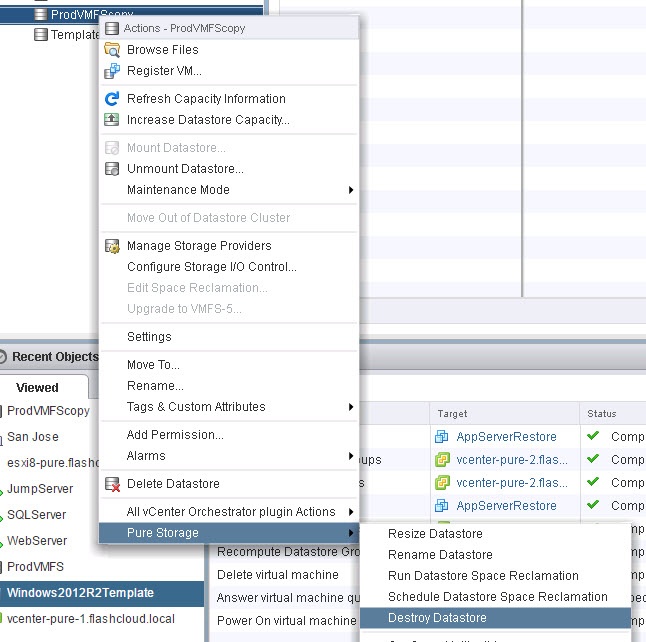
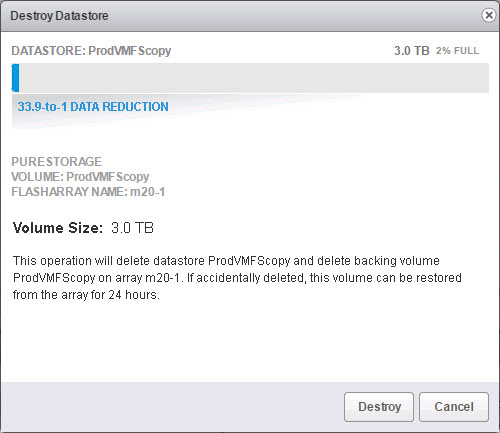
If you have nothing else to restore from that datastore, go ahead and right-click on the restored datatore and use the Pure Storage option to destroy the datastore and the underlying FlashArray volume.
One Reply to “VMFS Snapshots and the FlashArray Part VII: Restoring a VM”