
Hello- this is part 4 in the series of blogs on ActiveDR + NFS datastores. In part 3, I covered how to configure vSphere for a test failover and then how to perform a test failover. In this blog I’ll be covering how to perform a failover and failback.
FlashArray Failure – ActiveDR Failover
What happens if an array fails? I’m going to forcefully stop Purity on both controllers of the source FlashArray (flasharray-x50-1) to simulate this situation. In this case, the workflow is the same as during the failover test except disconnecting the networking from the VMs you are about to power on. It is probably not a good idea to disconnect that so in general, you’ll want to leave these VMs as-is for this scenario. The requirements of your environment might require something else here. So you’ll promote the surviving array and power on the VMs based on the last-replicated state of the VMs.
If this is a test you are doing in a test/proof of concept deployment, to replicate what I’m doing, simply unplug the power cables on the FlashArray. Please do not pull power on your production FlashArrays :-). Here’s a table of articles in this series:
| ActiveDR with NFS Datastores Topic | Specific Topics (NFSD = NFS Datastores) |
| Overview | What’s ActiveDR? What are NFSD? |
| FlashArray Configuration | FlashArray NFSD and ActiveDR config |
| vSphere Configuration and Test Failover | vSphere configuration for ActiveDR; test failover |
| Production Failover and Failback | ActiveDR failover and failback in vSphere |
Let’s promote the pod on the target FlashArray. In the FlashArray GUI of the target, left click on (1) Protection, left click on (2) ActiveDR, left click the (3) ellipses then left click (4) Promote Local Pod…

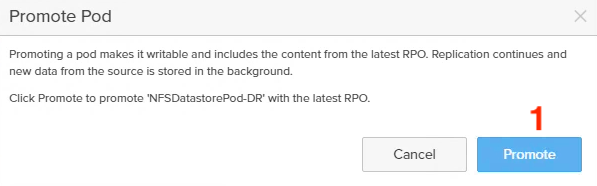
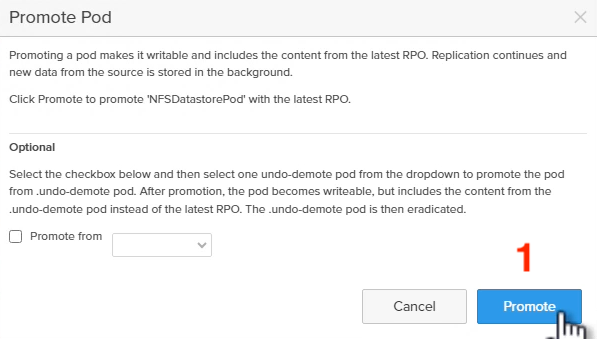
On the window that pops up, simply left click (1) Promote.
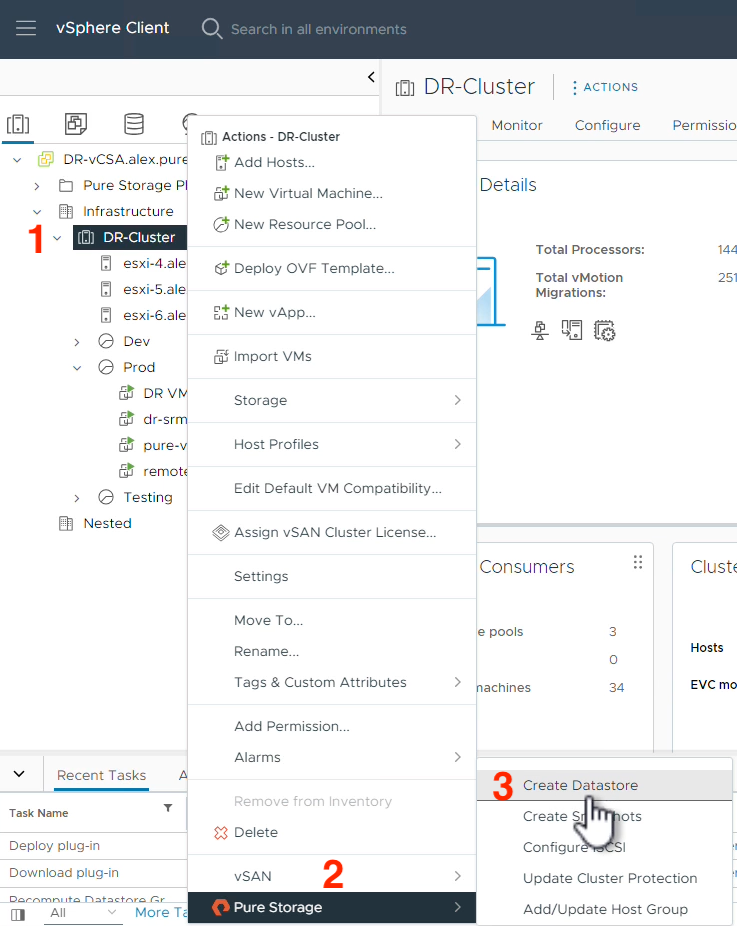
Now that the target side is promoted, we can safely mount the associated NFS file system in vSphere. As a reminder, when an ActiveDR pod is demoted, it is read-only. When an ActiveDR is promoted, it is read-write. After you’ve navigated to the vCenter GUI, right click on the (1) Cluster object you want to mount the NFS file system to, hover on (2) Pure Storage and finally left click on (3) Create Datastore.
Select (1) NFS and left click (2) NEXT.
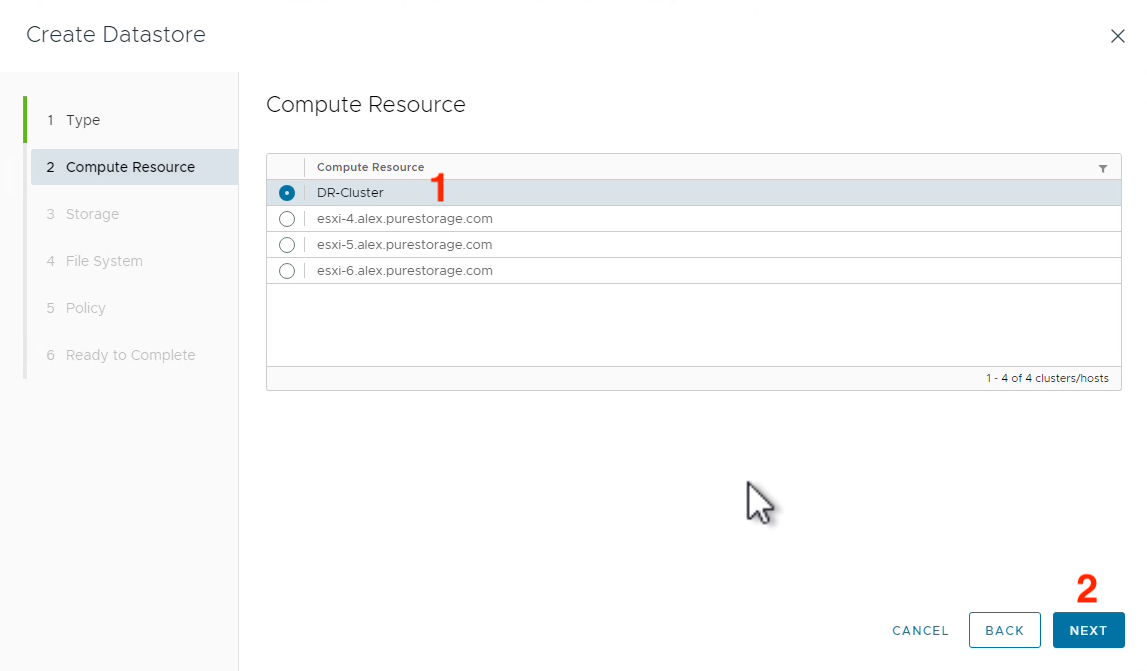
Select the (1) Cluster compute resource you want to mount the NFS datastore to then (2) NEXT.

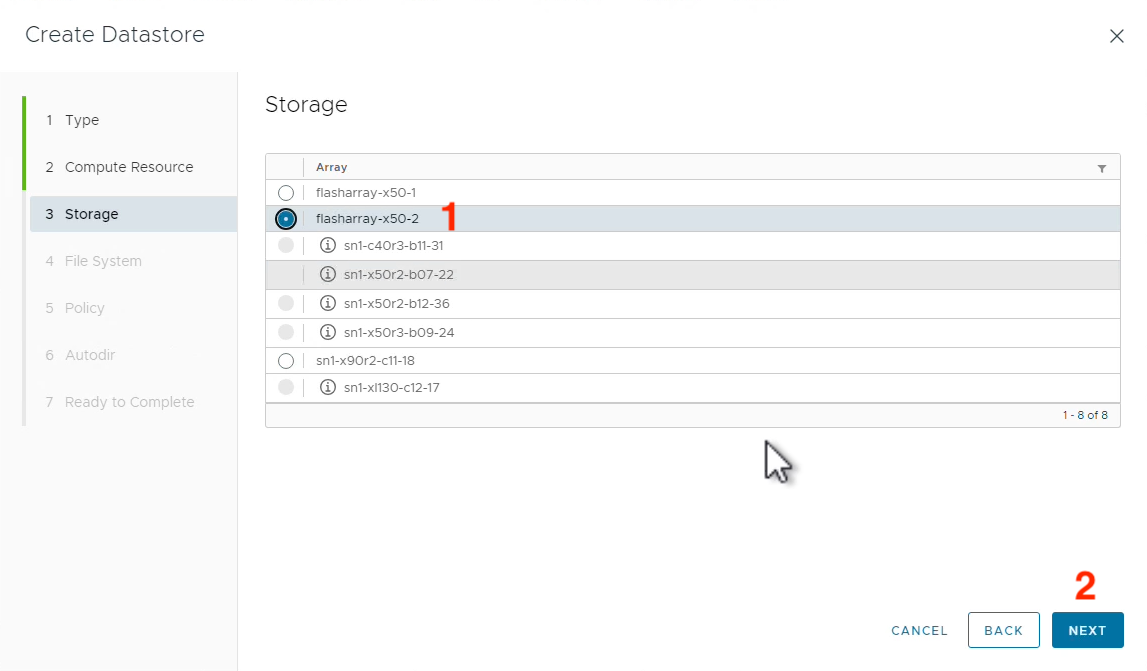
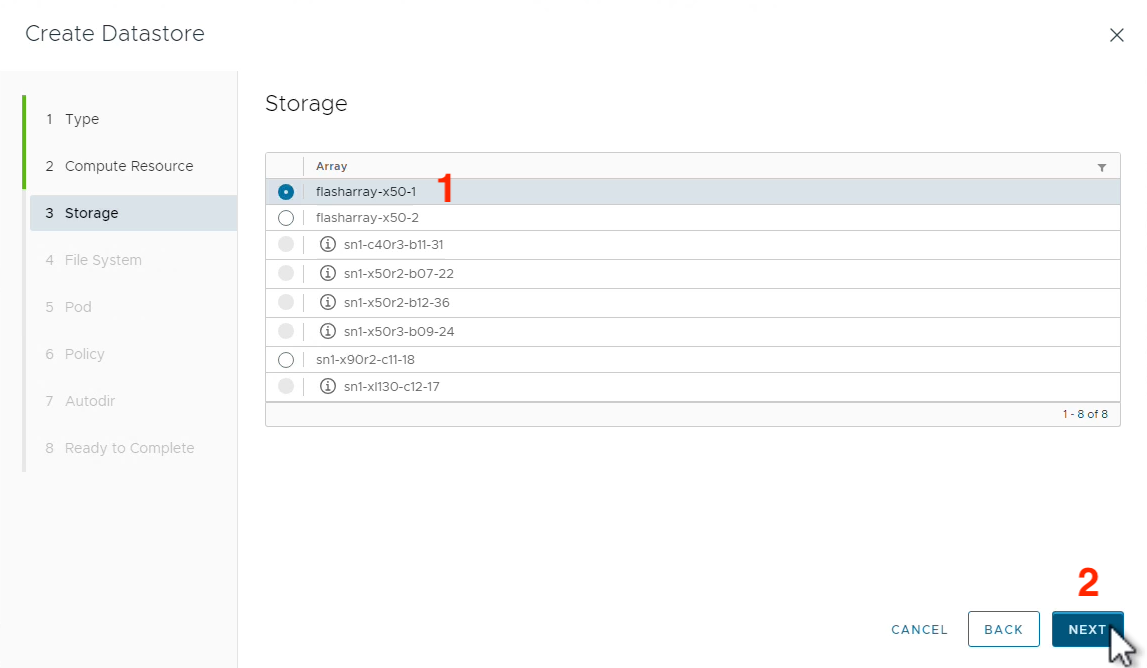
Select the (1) FlashArray object that is the target for ActiveDR replication and left click (2) NEXT.
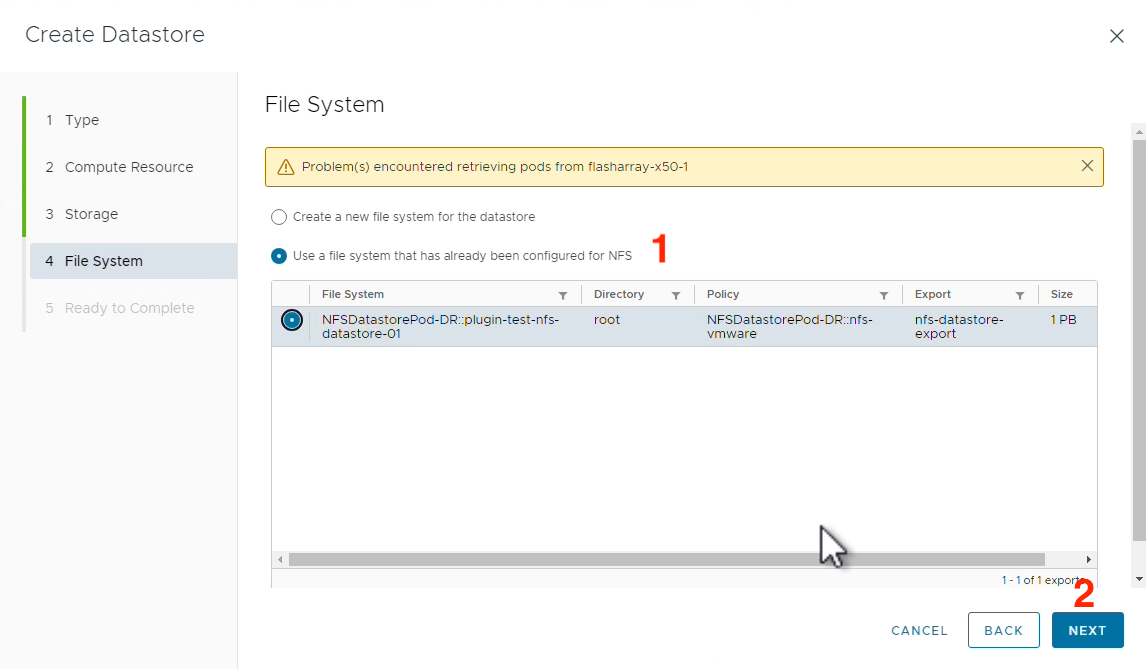
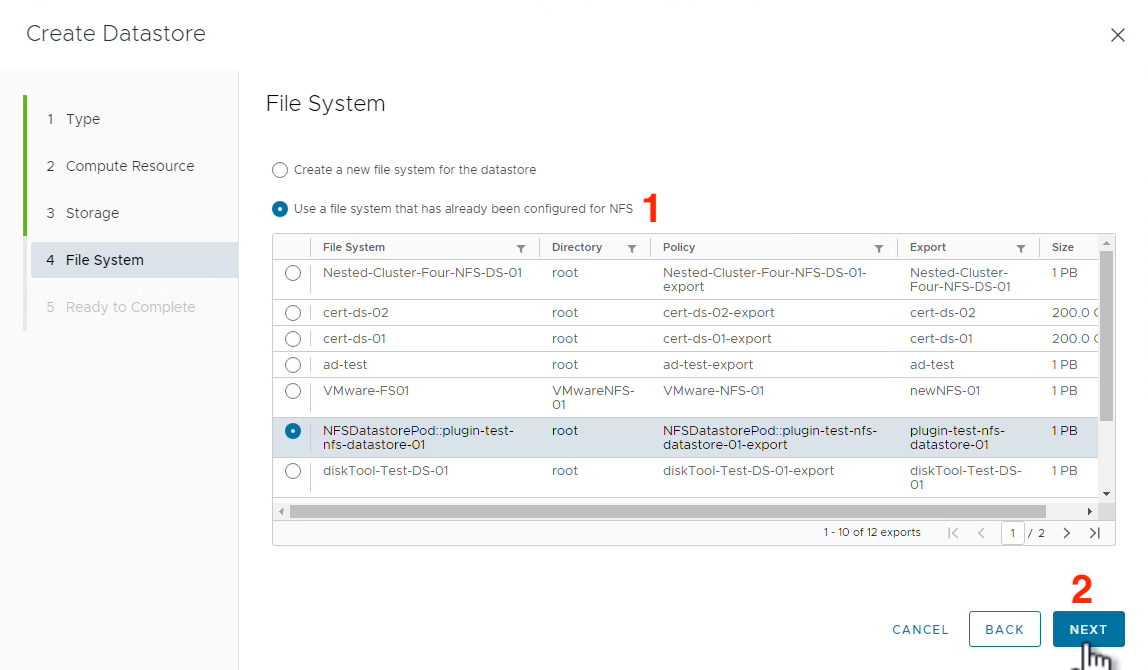
Select (1) Use a file system that has already been configured for NFS, select that NFS file system, then click (2) NEXT.
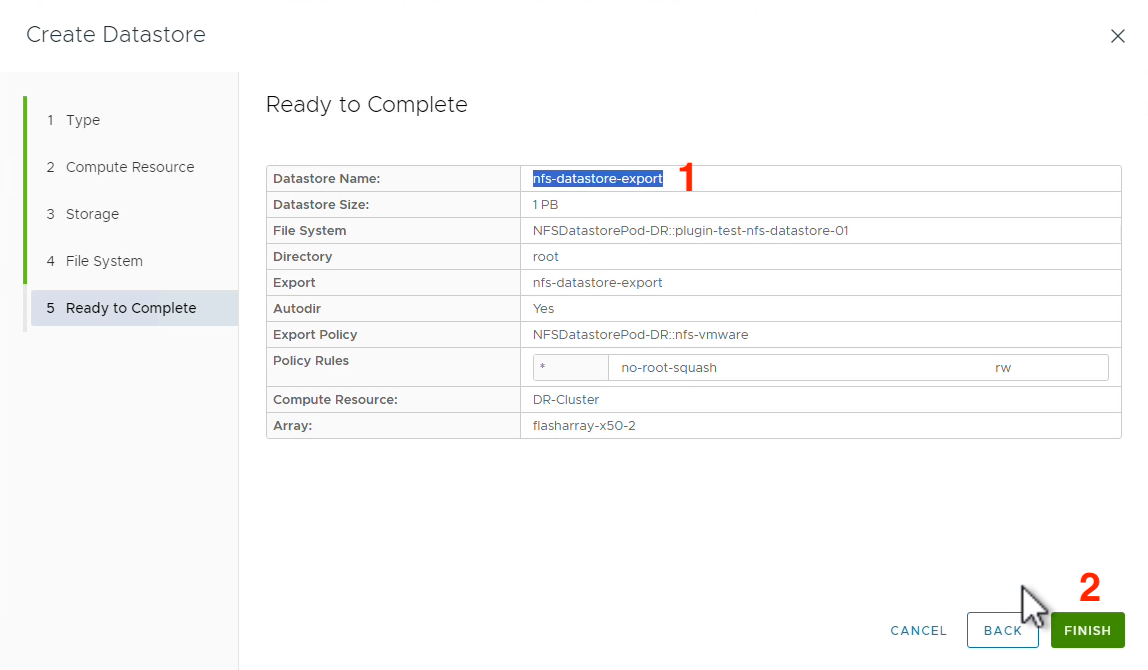
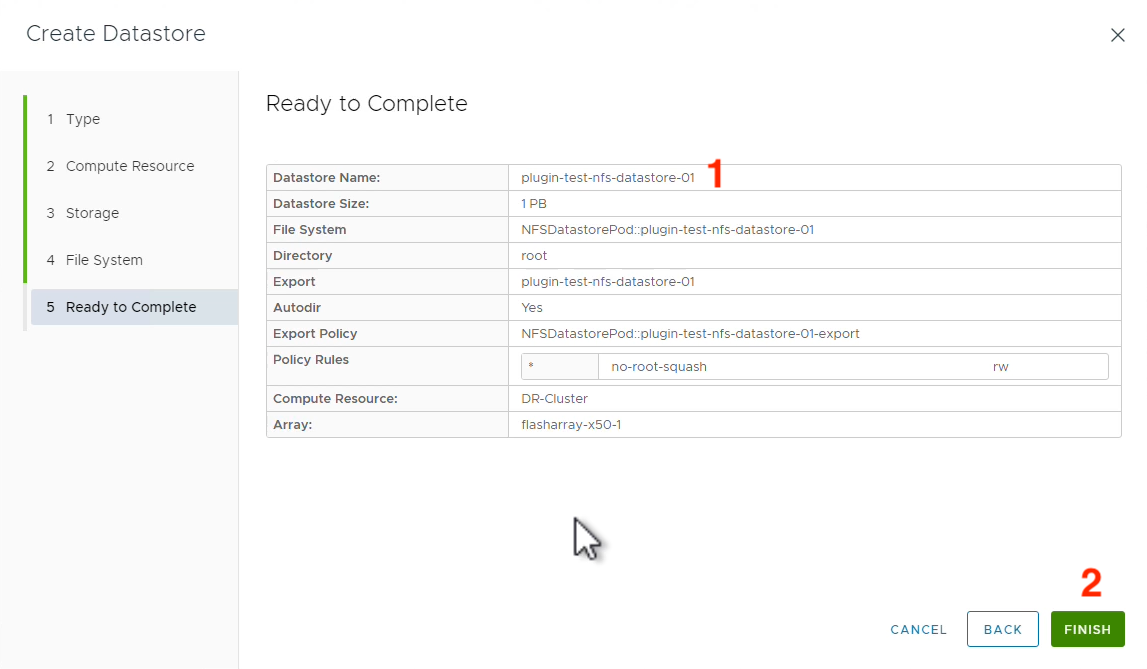
Note the (1) Datastore Name and left click (2) FINISH.
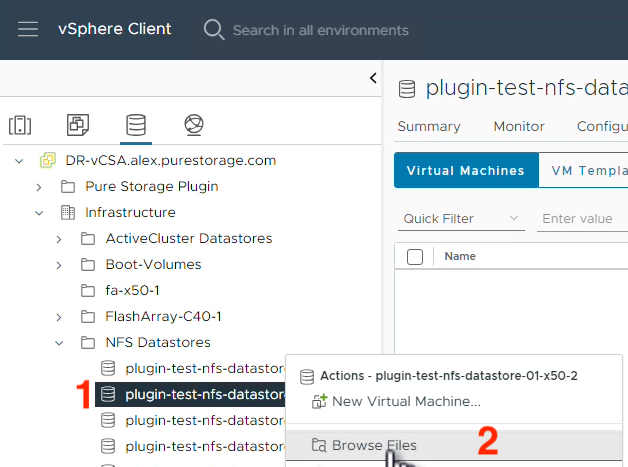
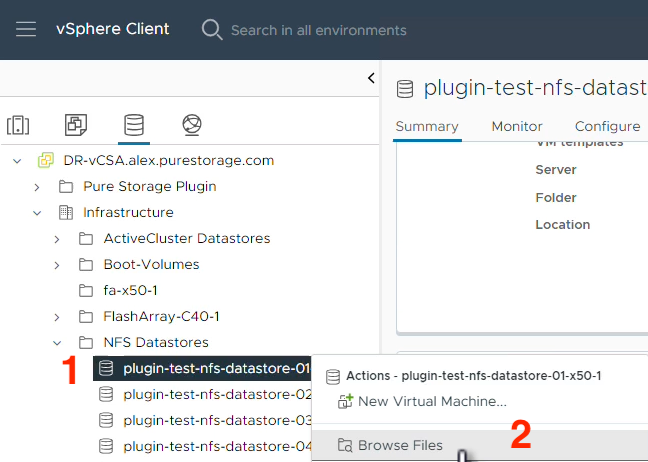
Find the Datastore Name from the previous window, right click on the (1) Datastore and left click (2) Browse Files.
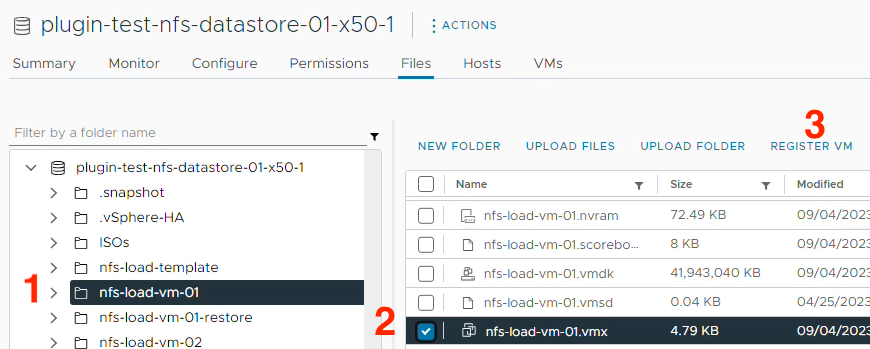
Left click on the (1) Directory of a VM you want to power on. Find and select the (2) .vmx file for that VM and left click the (3) REGISTER VM hyperlink.
Populate a (1) Name for the VM, select the (2) Location you want this VM to reside in and left click (3) NEXT.

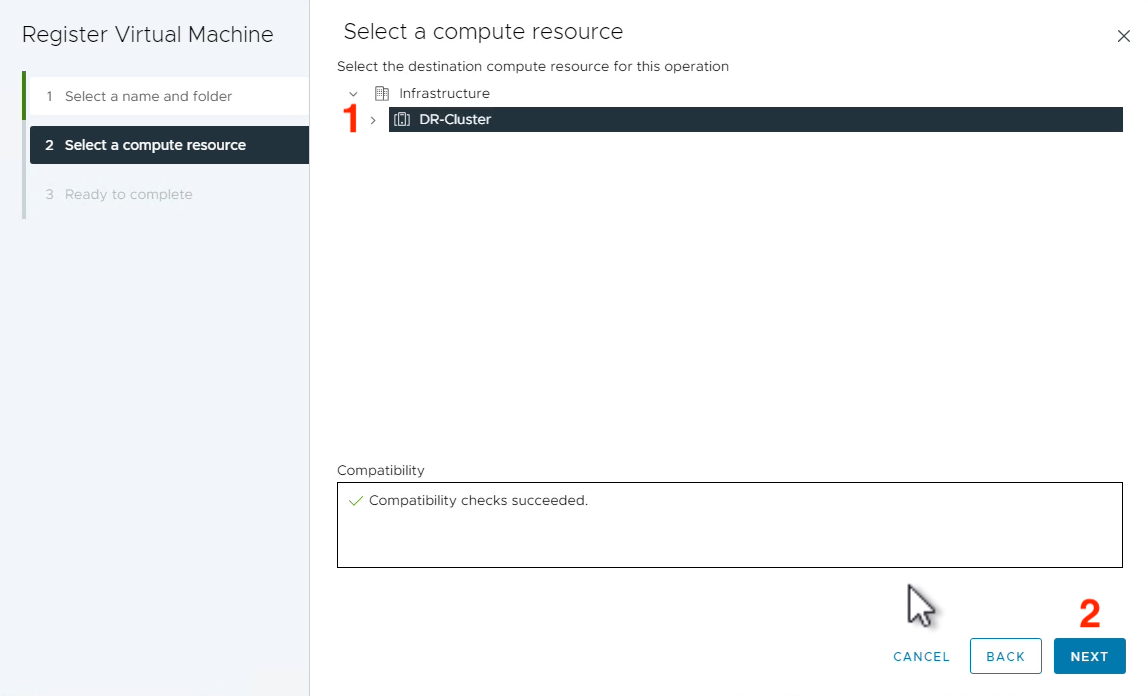
Select a (1) Compute Resource where you’d like this VM to live and left click (2) NEXT.
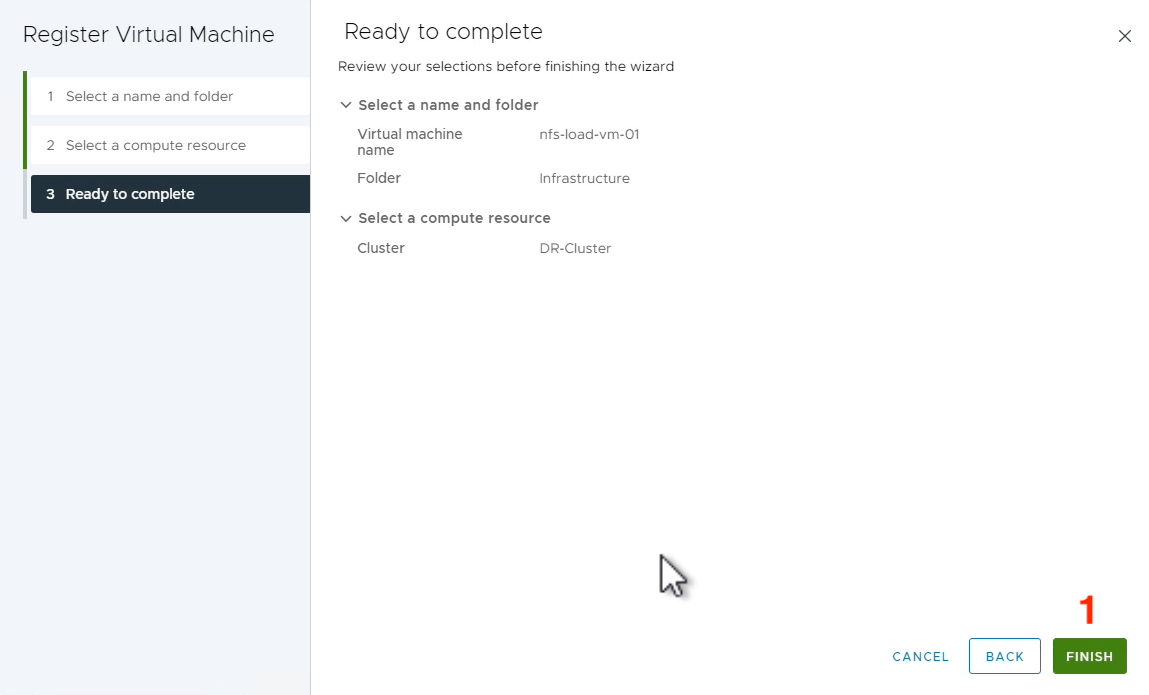
Finally confirm the details and select (1) FINISH.

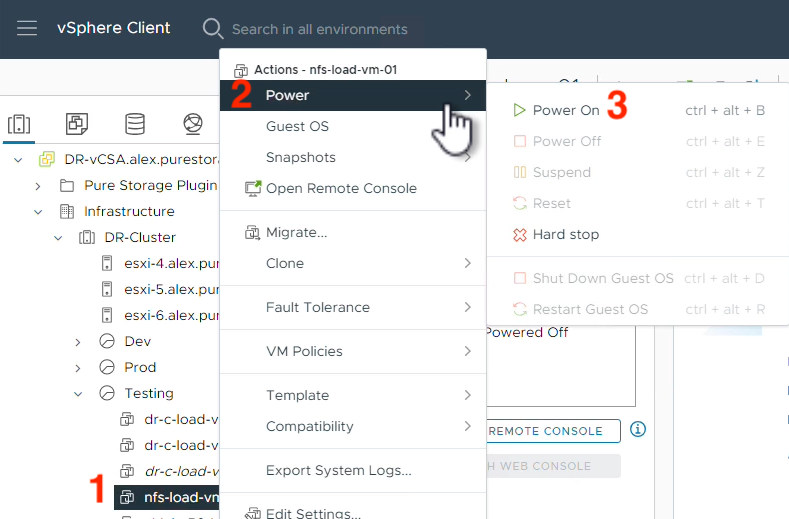
Now that the test VM is registered, we need to power it on and answer a question for vSphere about this VM. Right click on the (1) VM name, hover over (2) Power, then left click (3) Power On.
Before this VM can boot, we have to tell vSphere if we copied it or moved it. Navigate to the VM’s (1) Summary tab, left click (2) Actions and left click (3) Answer Question…


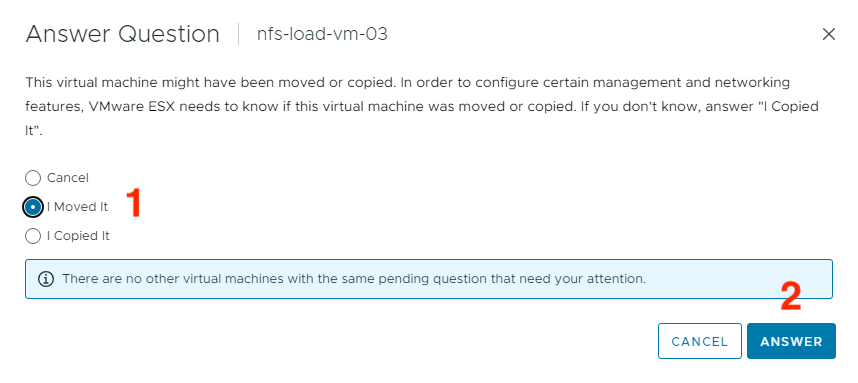
This VMware KB covers why you’d want to answer one way or another, so review this and make a decision about what makes sense for your failover. More than likely, you will be selecting “I moved it” for a production failover. Select the (1) option appropriate for your environment and left click (2) ANSWER.
From here you have a lot of options for the orphaned VM(s) and inaccessible datastore previously connected to the original source FlashArray that is currently offline. I recommend removing from vSphere’s inventory whatever VMs you registered and are currently running your production workloads on the original target FlashArray. I also recommend unmounting the NFS mount of the original source (currently offline) FlashArray from vSphere.
This way, when the original source array becomes healthy, the VMs that were running on that NFS mount won’t try to power back on and continue to run- you’ve migrated those VMs to the original target FlashArray so having the same moved VM online in two different datastores isn’t a good idea. Additionally, you will be demoting the pod on the original source FlashArray, making it read-only. When making a previously read and write capable datastore read-only, VMware requires the objects to be cleaned up before connecting them again to vSphere.
When the original source FlashArray comes back online, demote the pod on the original source FlashArray without quiescing the changes. This will ensure the direction of replication is correct- the original target FlashArray should be replicating your production data to the original source FlashArray because the original target is running your production workloads and has been while the original source was offline.
ActiveDR Failback
Now that everything is back online and your original target FlashArray is running your production workload, replicating the data to the original source FlashArray, you will likely want to reverse the direction of replication and migrate your production workload back to the original source. If you are doing this in a production environment, you will want to schedule this activity during a maintenance window because all workloads and VMs running on this NFS datastore will need to be offline during the replication direction change.
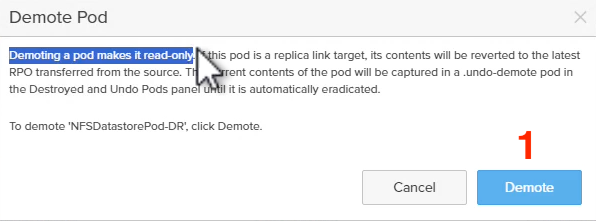
In order to reverse replication to make the original source the current source again, we need to first clean up the objects in vSphere associated with the original target and then demote the original target pod while quiescing the changes from the original target so those changes are persisted on the original source. In the FlashArray GUI of the original target, left click on Protection, left click on ActiveDR, left click the ellipses then left click Demote Pod… When the following window pops up, select (1) Quiesce and then left click (2) Demote. It is important to select Quiesce here if you value the data that has been written to this original target FlashArray while the original source was offline and demoted.
Next we need to promote the original source. In the FlashArray GUI of the original source FlashArray, left click on (1) Protection, left click on (2) ActiveDR, left click the (3) ellipses then left click (4) Promote Local Pod…

On the window that pops up, simply left click (1) Promote.
Once you’ve successfully promoted the original source, then you can connect the NFS mount again, register the VMs you are going to power on and finally power those VMs back on.
In the vCenter GUI, right click on the (1) Cluster object you want to mount the NFS file system to, hover on (2) Pure Storage and finally left click on (3) Create Datastore.

Select (1) NFS and left click (2) NEXT.
Select the (1) Cluster compute resource you want to mount the NFS datastore to then (2) NEXT.

Select the (1) FlashArray object that is the target for ActiveDR replication and left click (2) NEXT.
Select (1) Use a file system that has already been configured for NFS, select that NFS file system, then click (2) NEXT.
Note the (1) Datastore Name and left click (2) FINISH.
We’ll want to power on our production VMs on the original source FlashArray because we are reversing the direction of replication.
Find the Datastore Name from the previous window, right click on the (1) Datastore and left click (2) Browse Files.
Left click on the (1) Directory of a VM you want to power on. Find and select the (2) .vmx file for that VM and left click the (3) REGISTER VM hyperlink.
Populate a (1) Name for the VM, select the (2) Location you want this VM to reside in and left click (3) NEXT.

Select a (1) Compute Resource where you’d like this VM to live and left click (2) NEXT.
Finally confirm the details and select (1) FINISH.
Now that the VM is registered, we need to power it on and answer a question for vSphere about this VM. Right click on the (1) VM name, hover over (2) Power, then left click (3) Power On.
Before this VM can boot, we have to tell vSphere if we copied it or moved it. Navigate to the VM’s (1) Summary tab, left click (2) Actions and left click (3) Answer Question…

This VMware KB covers why you’d want to answer one way or another, so review this and make a decision about what makes sense for your failback. More than likely, you will be selecting “I moved it” for a production failback. Select the (1) option appropriate for your environment and left click (2) ANSWER.
Now everything is back to the way it was before our disaster occurred that took out the array and not the hosts. When using ActiveDR with FlashArray-backed NFS datastores, it can be very simple and easy to recover from a disaster that I truly hope you never have to recover from.