
Hello- this is part 3 in the series of blogs on ActiveDR + NFS datastores. In part 2, I covered how to connect ActiveDR to an NFS file system that’s backing an NFS datastore. In this blog, I’ll be covering how to connect the target NFS export in vSphere and how to run a test failover. The reason for covering test failovers before production failovers and failbacks is that I strongly recommend performing or scheduling a test failover immediately after configuring any disaster recovery solution. It is possible to not have the necessary requirements for a failover when it is critical that the failover happens quickly; testing failing over your environment before needing it in a production down scenario will reduce or eliminate this possible pain.
For the purposes of this blog, I am using Pure Storage’s remote vSphere plugin. In general, I strongly recommend installing and using this plugin to manage your FlashArray(s) more easily from the vSphere GUI. Additionally, I’ve made a demo video that covers the steps covered here. Here’s a table of articles in this series:
| ActiveDR with NFS Datastores Topic | Specific Topics (NFSD = NFS Datastores) |
| Overview | What’s ActiveDR? What are NFSD? |
| FlashArray Configuration | FlashArray NFSD and ActiveDR config |
| vSphere Configuration and Test Failover | vSphere configuration for ActiveDR; test failover |
| Production Failover and Failback | ActiveDR failover and failback in vSphere |
This environment already has a mounted NFS file system from the source FlashArray. The steps to mount the NFS file system from the source array are the same as the steps for the target array except you won’t have to promote the pod on the source array.
When you perform failovers, do test failovers or are cleaning up your objects from these operations you’ll want to ensure that you follow the steps outlined here.
Mount Target NFS File System as Read/Write
First, we’re going to promote the pod on the target side which in normal operations is demoted. In the FlashArray GUI, left click on (1) Protection, left click on (2) ActiveDR, left click the (3) ellipses then left click (4) Promote Local Pod…

On the window that pops up, simply left click (1) Promote.

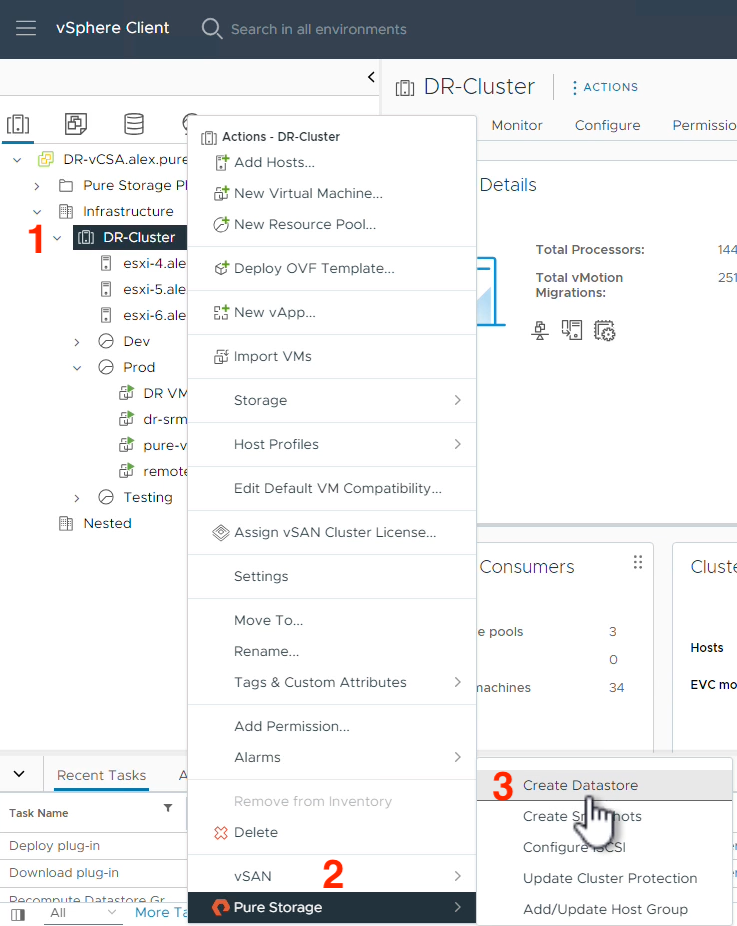
Now that the target side is promoted, we can safely mount the NFS file system in vSphere. As a reminder, when an ActiveDR pod is demoted, it is read-only. When an ActiveDR is promoted, it is read-write. After you’ve navigated to the vCenter GUI, right click on the (1) Cluster object you want to mount the NFS file system to, hover on (2) Pure Storage and finally left click on (3) Create Datastore.
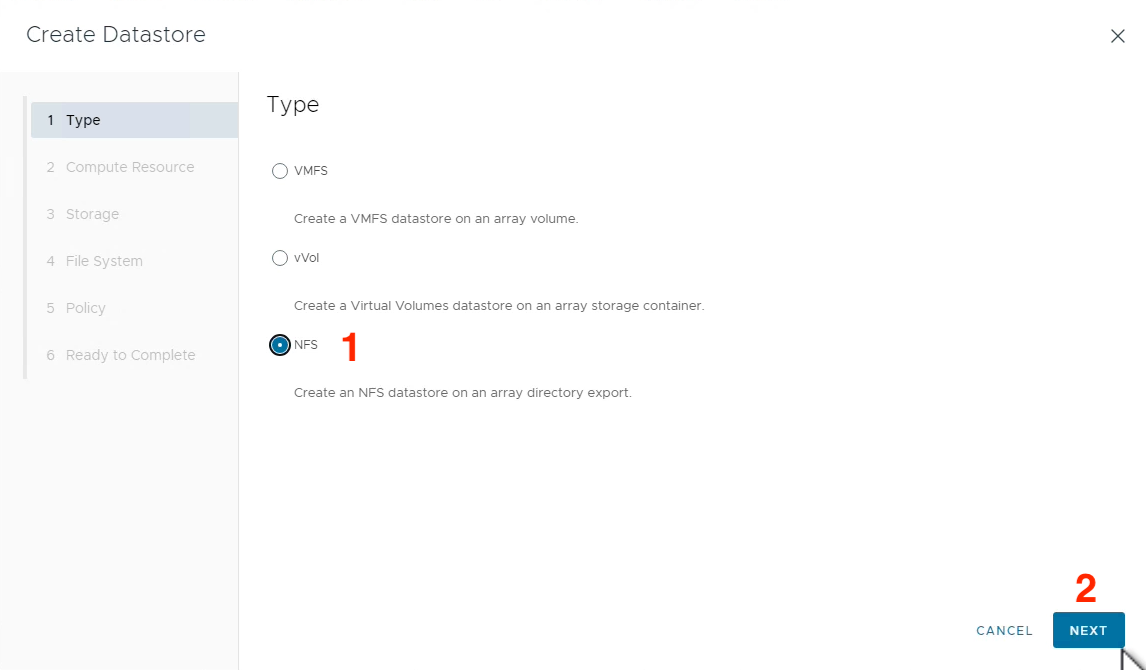
Select (1) NFS and left click (2) NEXT.
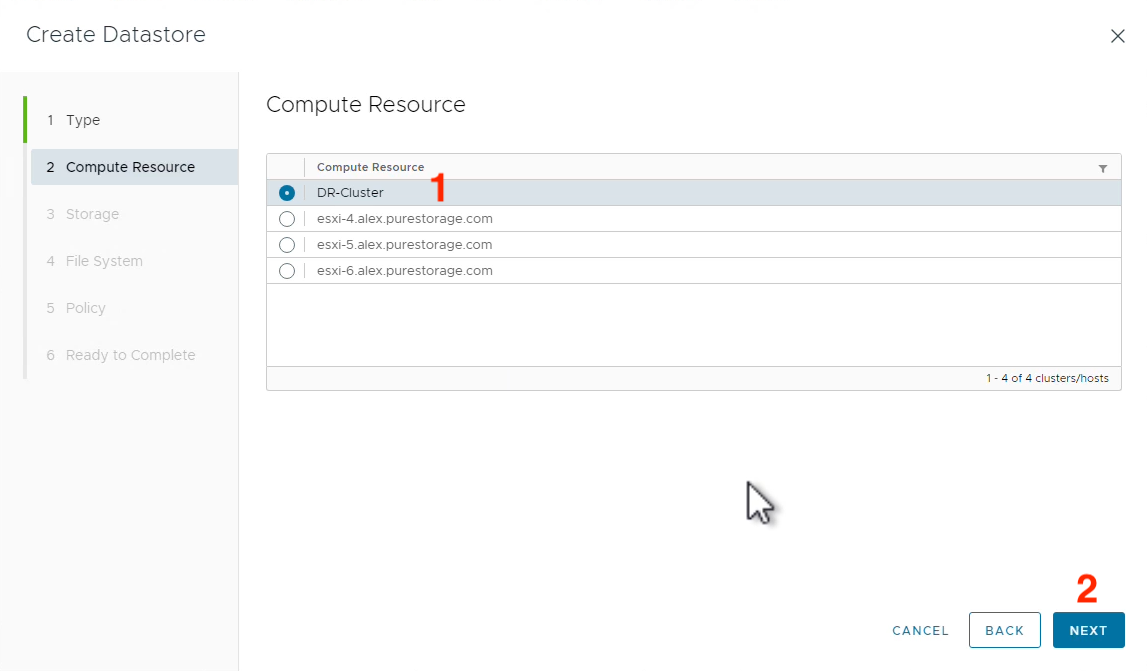
Select the (1) Cluster compute resource you want to mount the NFS datastore to then (2) NEXT.
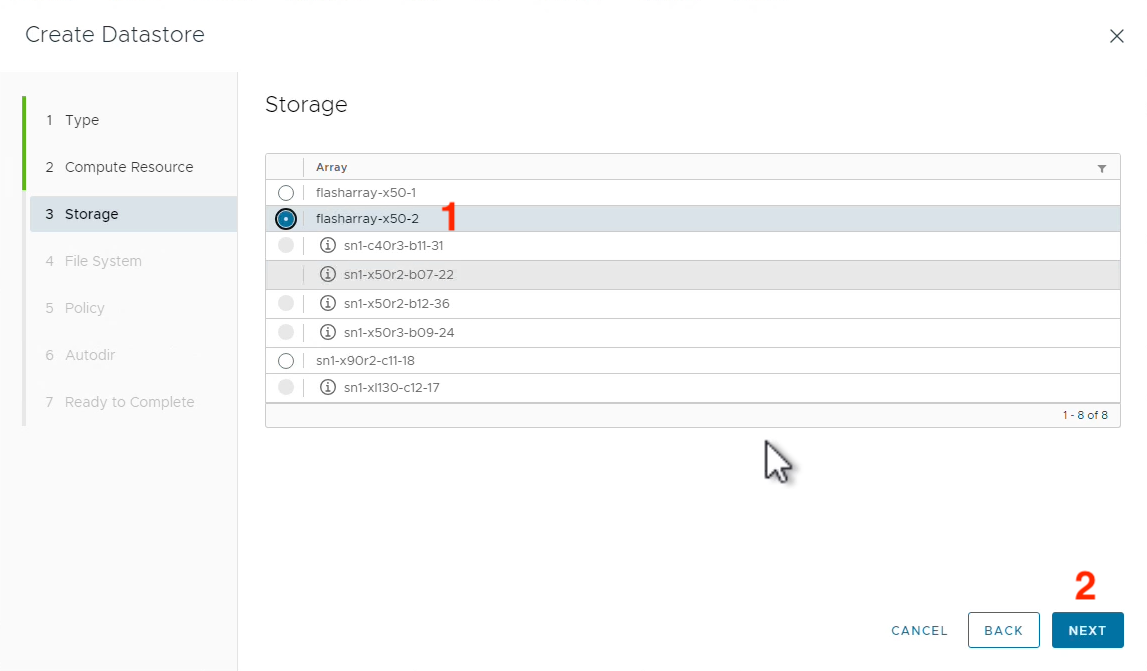
Select the (1) FlashArray object that is the target for ActiveDR replication and left click (2) NEXT.
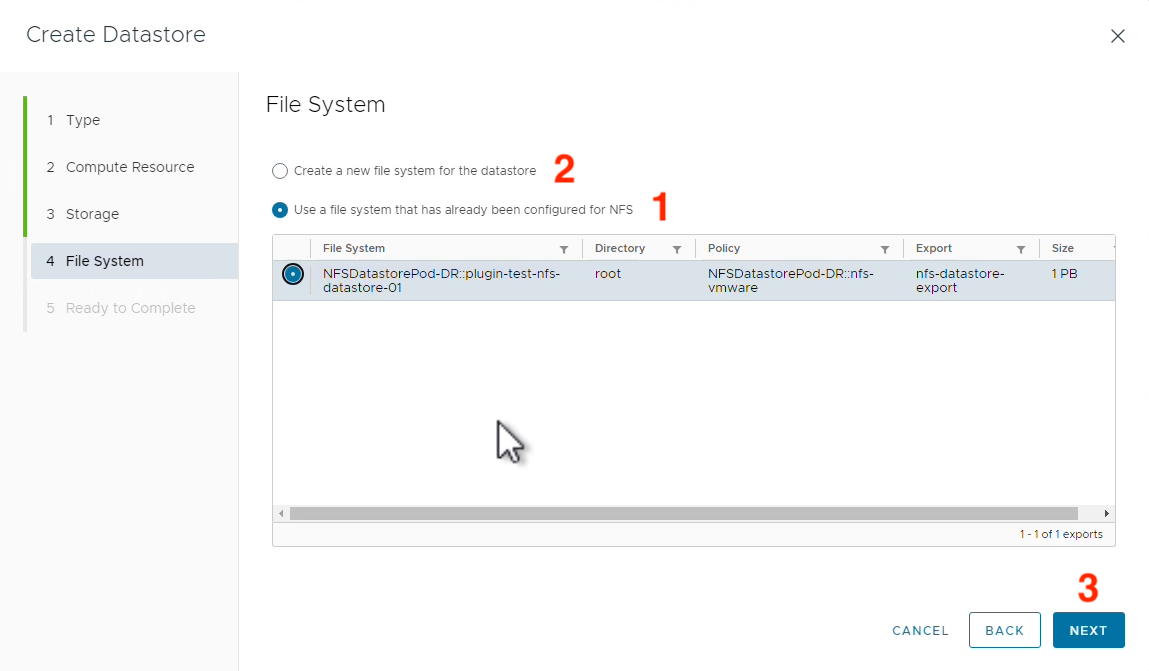
Select either (1) Create a new file system for the datastore OR (2) Use a file system that has already been configured for NFS then click (3) NEXT.
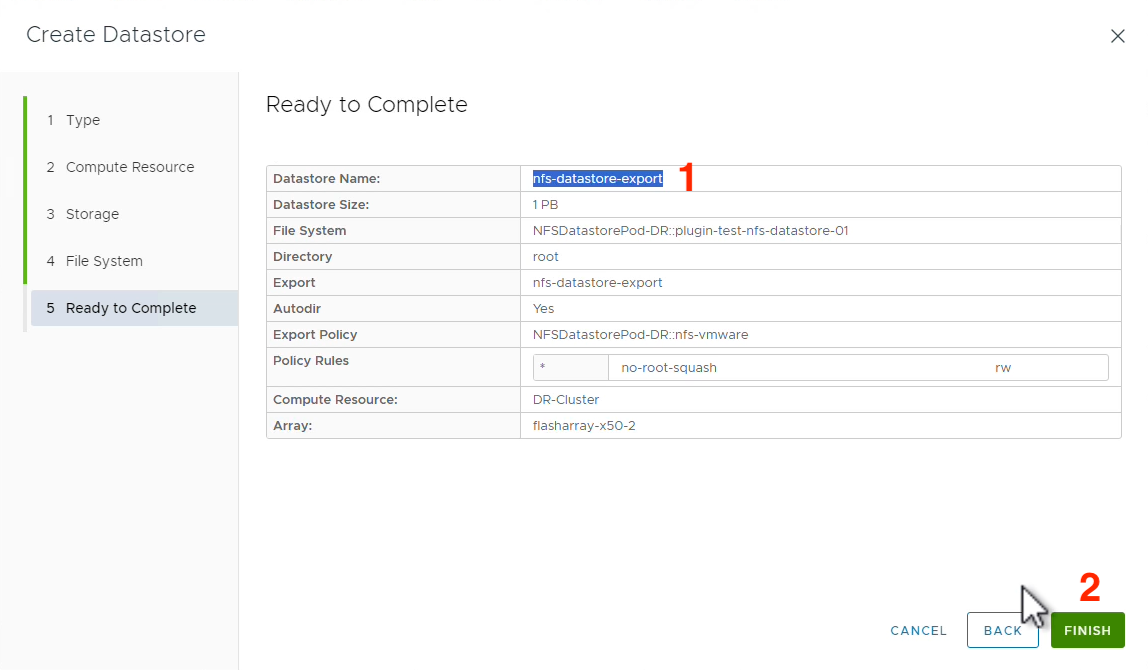
Note the (1) Datastore Name and left click (2) FINISH. Please note I did rename this datastore to make it more clear in my vSphere environment; the new name is plugin-test-nfs-datastore-01-x50-2.
Test Failover
Now we have two NFS datastores in vSphere- one for each FlashArray (source and target). Since both pods are promoted and can therefore read and write, we can power on the DR copies of our production VMs and check what we need to in order to validate the success of our test failover.
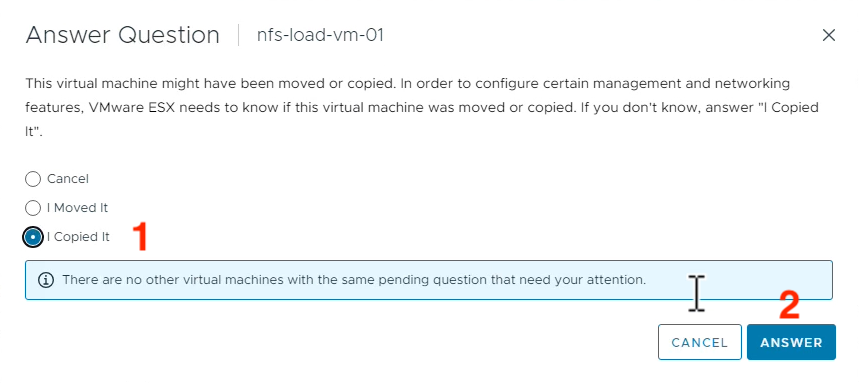
It is time to have some fun with testing ActiveDR failover scenarios. A benefit of ActiveDR is that you can promote both pods on the source and the target pods to test without impacting production even if you want to test production data. This can be dangerous, however, if static IP addresses and hostnames are critical to the operation of your production VMs so special consideration is needed depending on your environment. When powering on a VM, this prompt might come up and is worth your careful consideration depending on what the needs of your environment are. In my testing, I’m going to be selecting this VM was copied.
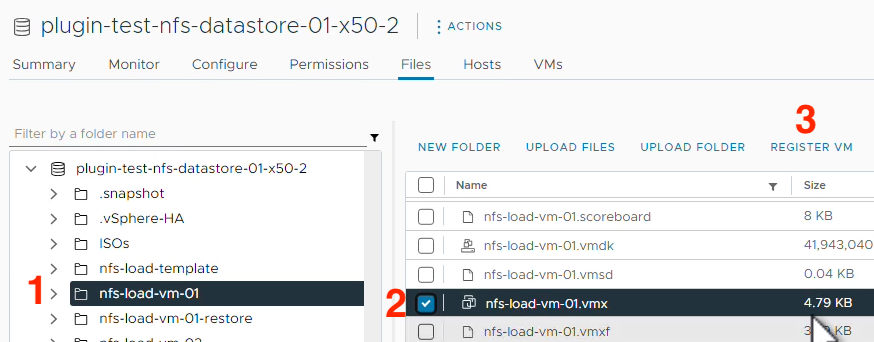
Find the Datastore Name from the previous window, right click on the (1) Datastore and left click (2) Browse Files.

Left click on the (1) Directory of a VM you want to power on and test. Find and select the (2) .vmx file for that VM and left click the (3) REGISTER VM hyperlink.
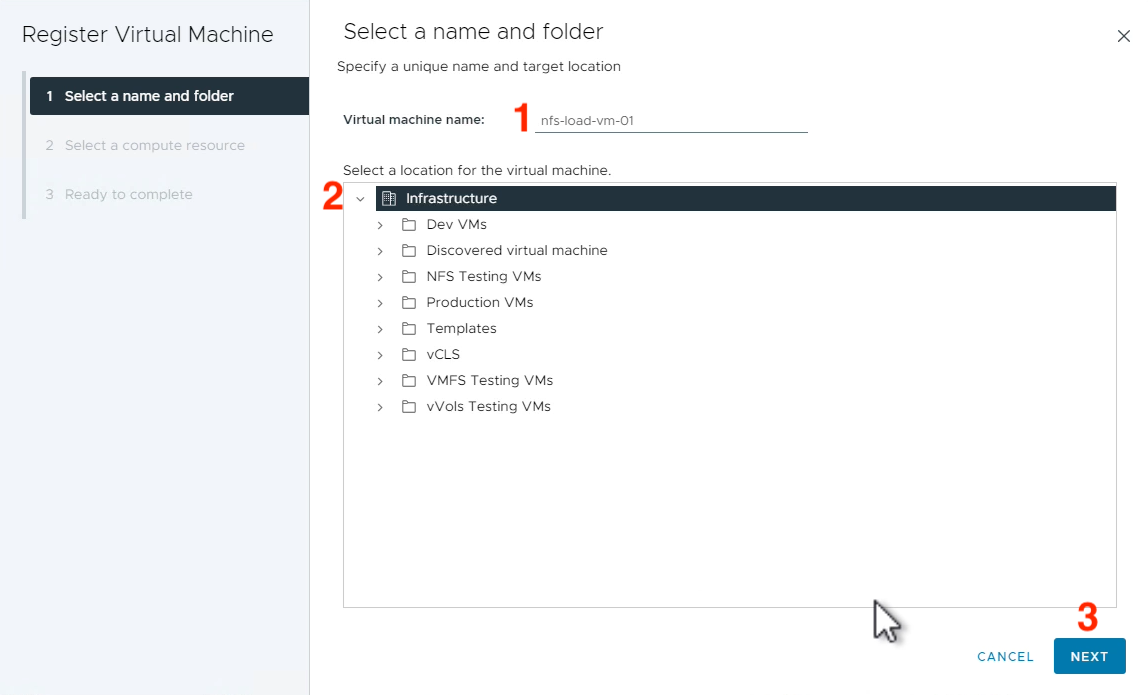
Populate a (1) Name for the VM, select the (2) Location you want this VM to reside in and left click (3) NEXT.
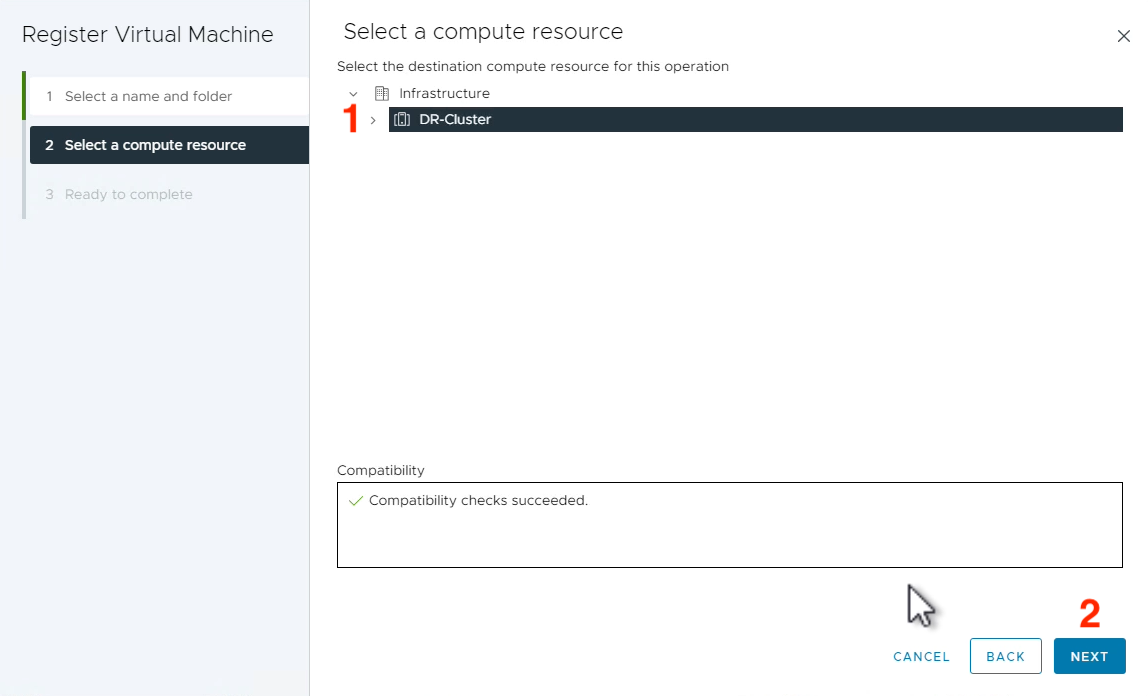
Select a (1) Compute Resource where you’d like this VM to live and left click (2) NEXT.
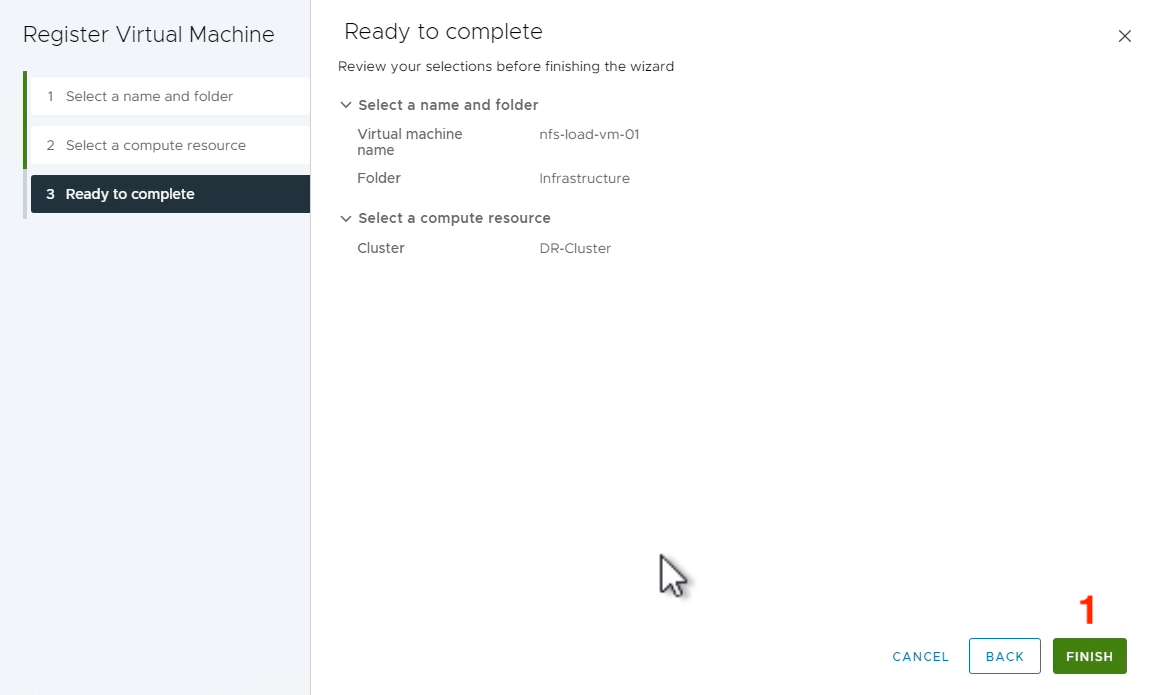
Finally confirm the details and select (1) FINISH.
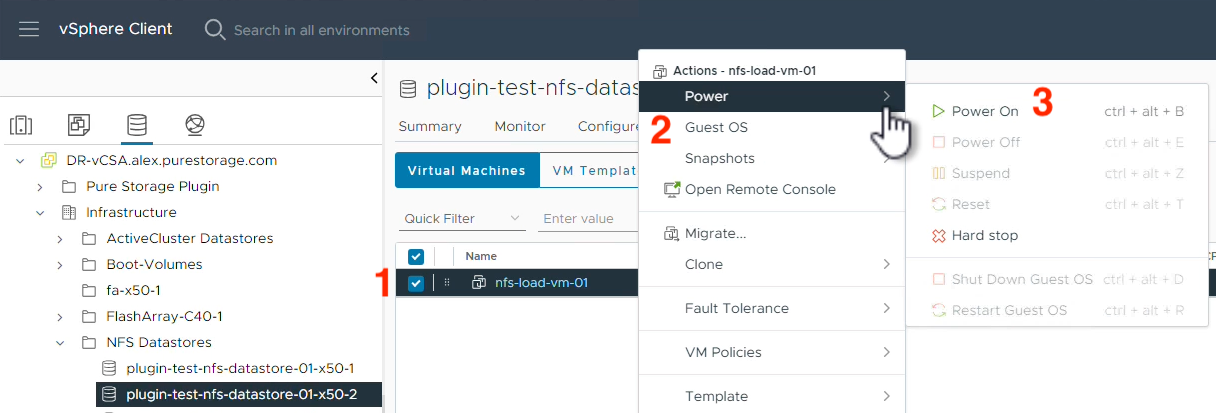
Now that the test VM is registered, we need to power it on and answer a question for vSphere about this VM. Right click on the (1) VM name, hover over (2) Power, then left click (3) Power On.
Before this VM can boot, we have to tell vSphere if we copied it or moved it. Navigate to the VM’s (1) Summary tab, left click (2) Actions and left click (3) Answer Question…

This VMware KB covers why you’d want to answer one way or another, so review this and make a decision about what makes sense for your testing. More than likely, you will be selecting “I copied it” for a test failover because you will be removing up the VMs shortly after testing them. Select the (1) option appropriate for your environment and left click (2) ANSWER.
The VM will now boot. Perform whatever testing you need to as part of your test failover workflow. Next, clean up and unmount the VM(s) and datastore(s) associated with your target array. Finally, demote the pod on the target array without quiescing the changes.

You’ve successfully completed a test failover with ActiveDR! In the event of a production failover, these steps are the same except the source array might not be accessible and the source array’s ActiveDR pod will need to be demoted when it comes back online. In the next blog, I’ll show how the failover and failback processes work with ActiveDR and NFS datastores.