
Not long ago I posted about our initial release of our vSphere Plugin that supports the HTML-5 UI–the main problem though is that it did not yet support the VVol stuff we put in the original flash/flex based plugin.
So accordingly, the most common question I received was “when are you adding VVol support to this one?”. And my response was “Soon! We are working on it”.
While our VMware integration engineering team was working on the 4.0.0 release (the first version of our plugin to support the HTML-5 interface) they were also working on the VVol features. Once it shipped they 100% focused on the VVol stuff. We recently hit feature parity with the flash VVol features, so we decided to release a check point in the 4.1.0 release so customers could fully move to the HTML-5 interface.
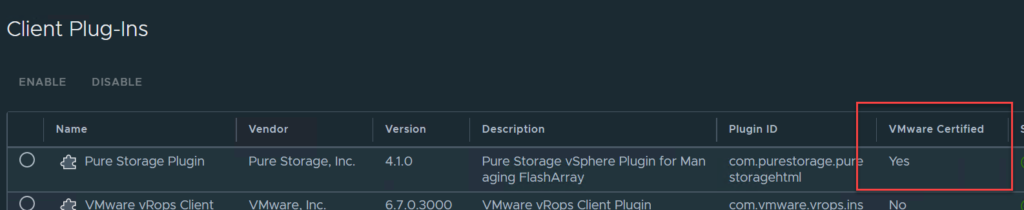
So, behold! The 4.1.0 release of the plugin. Yep it is certified by VMware.
This adds the VVol features you were accustomed to:
- Register VASA
- Import Replication groups as storage policies
- Mount VVol datastore/provision PE
- Undelete VVol VMDKs
- One-off snapshots of VVols
- Restore single VVol from an array snapshot
- Import a snapshot of a VVol to a VM
Let’s walk through these. But before we do, I will mention, we got some internal feedback from our UX team and also from VMware, specifically Vladimir Velikov, who has been a tremendously helpful on this process of moving to HTML-5 support. All of this feedback has not quite been implemented in this release, but I anticipate we will add it in the next release. We are hard at work on that one as well–we have a very detailed and exciting roadmap for the plugin. So stay tuned for new releases.
Installation
So like always, one of the standard options for installing the plugin is to get it loaded to your FlashArray and then install from our UI. Open a support ticket for that.
Orrrrr if you want to skip the middleman you can use the PowerShell command Install-PfavSpherePlugin. I talk about that in detail here.

Basically, just install the module, connect to vCenter, and then install the plugin:
install-module PureStorage.FlashArray.VMware
connect-viserver -Server <vcenter address>
Install-PfavSpherePlugin -version 4.1.0
Note that this does require that your vCenter (and the host you are running this from) can route out to the internet. If they cannot, then go the support route. There are other options though too, inquire within if you need them. Like I mentioned in the original HTML-5 post, we are changing how this is delivered in general, but that is still forthcoming work.
Register VASA
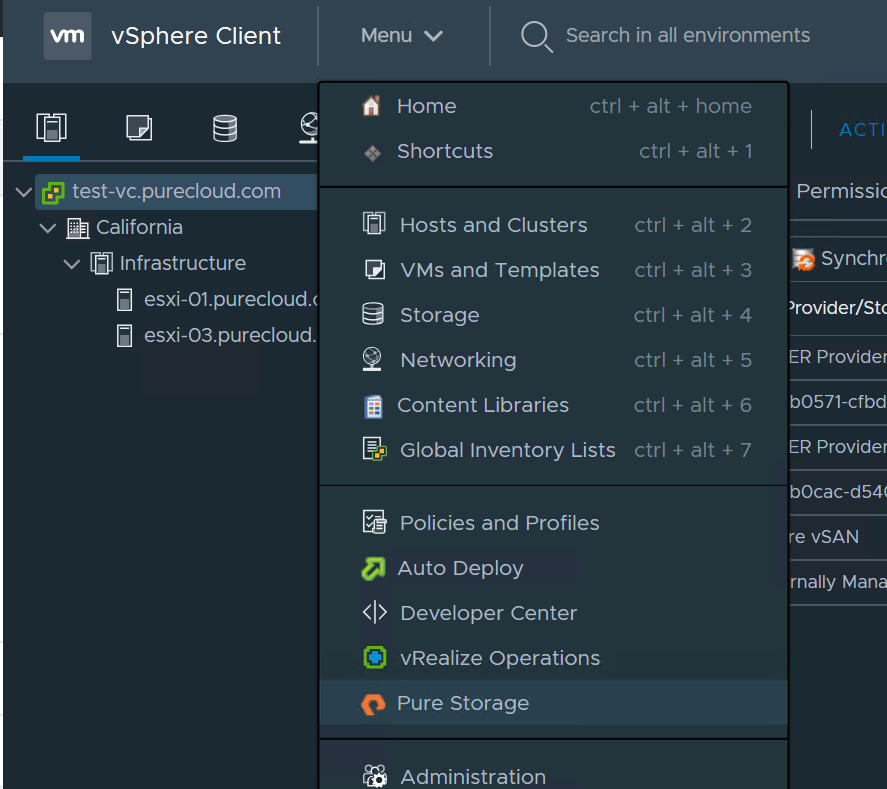
While this isn’t a feature that is used every day, it does help streamline the VVol setup process. Go the the Pure Storage home screen:
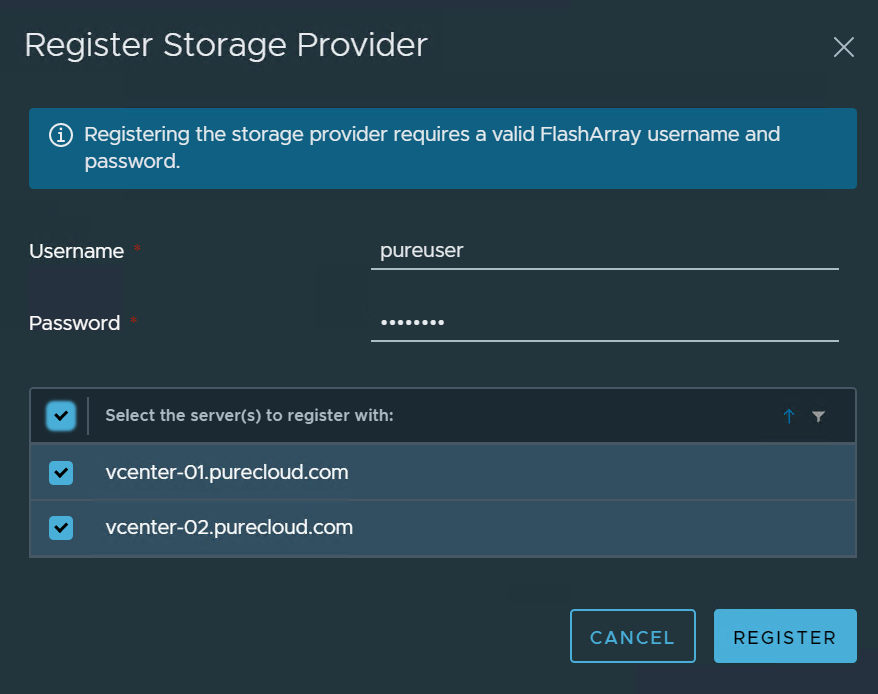
Choose your FlashArray and then click on “Register Storage Provider”.
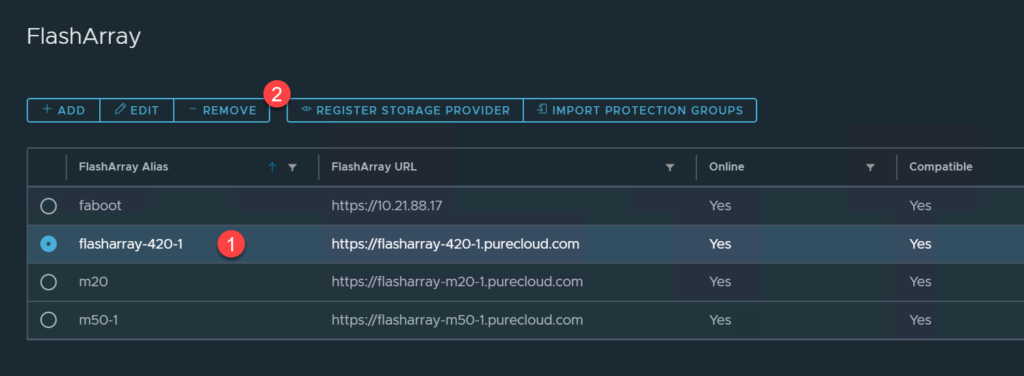
If you are logged into a vCenter in Enhanced Linked Mode, you will see the option to choose which vCenter(s) to register VASA with.
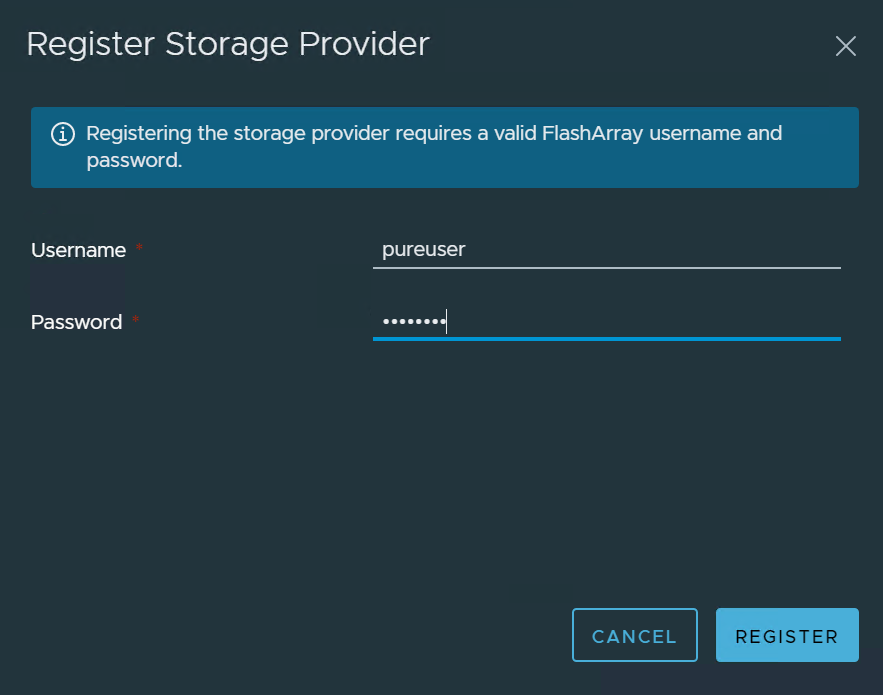
If it is just a single vCenter you will not see this option.
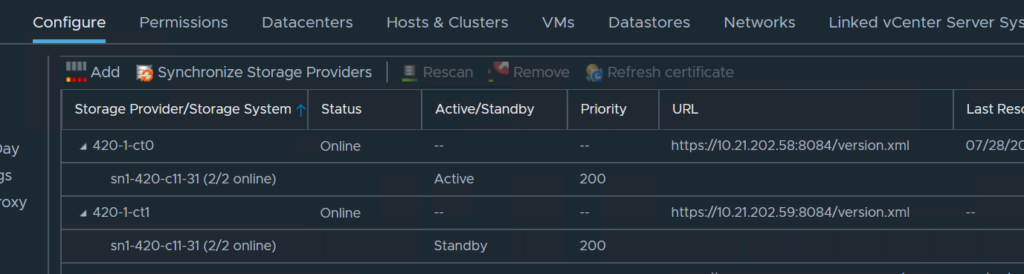
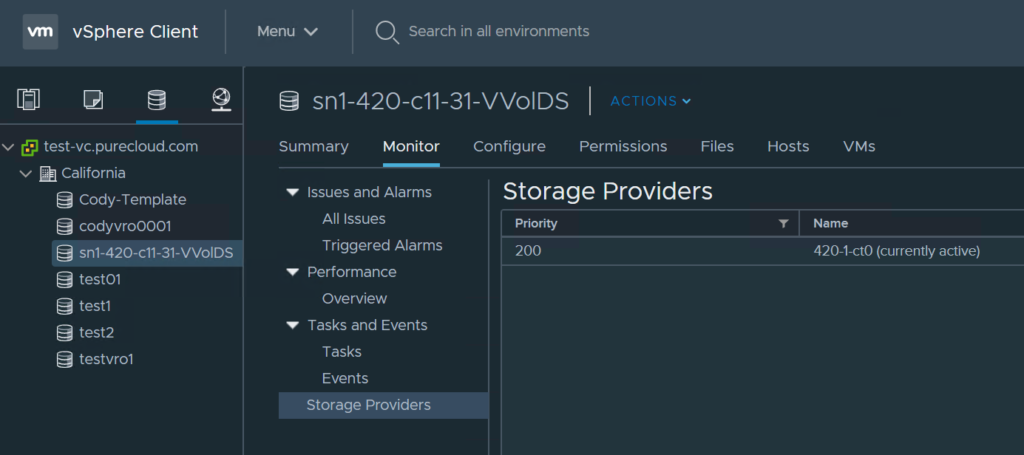
You will see both VASA providers registered with your selected vCenter(s):
Mount VVol Datastore
So step two is mounting a VVol datastore. This really is two steps, connecting the protocol endpoint and then mounting the VVol Datastore.
You can access this feature in two places, either by right-clicking a host or a cluster. In general though, just click on the cluster to do this.
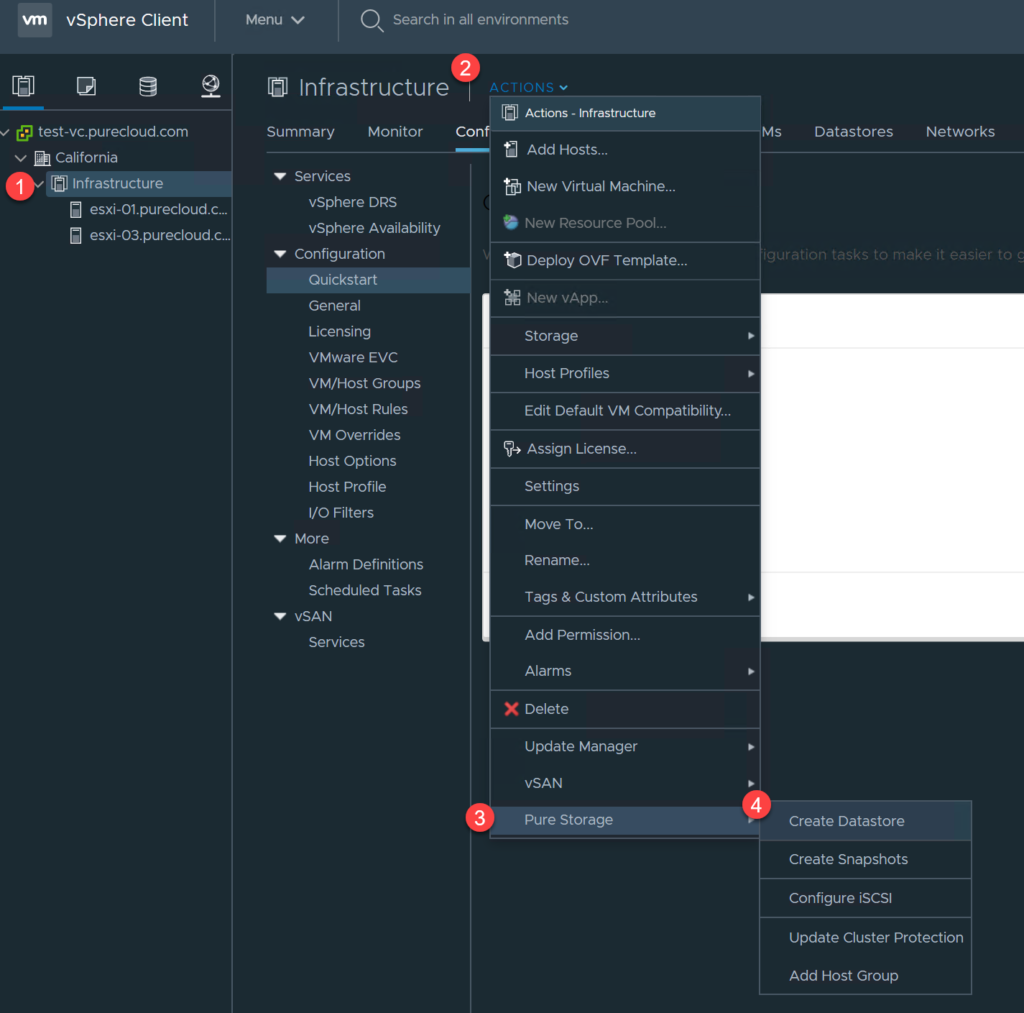
Choose VVol, a name, and a FlashArray.
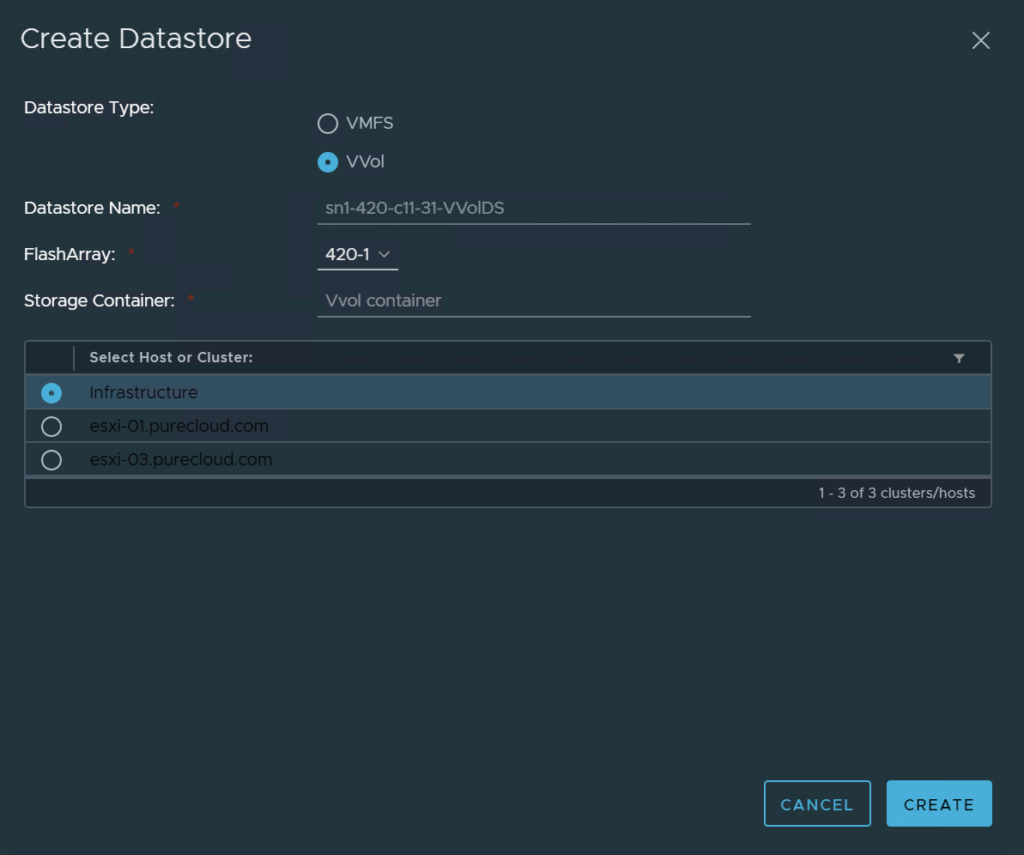
Note that if the datastore has already been mounted elsewhere (or in the past and not removed) the plugin will populate the name automatically when you choose the array.
This will connect the PE to the cluster, rescan, and mount the VVol datastore to all of the hosts.
If you run into failures, make sure the connectivity to the array is done (iSCSI targets or FC zoning) and that the hosts have TCP port 8084 access to the FlashArray eth0 network adapters. In older versions of ESXi/vCenter sometimes you need to refresh certificates. See this post for some help.
Import Storage Policies
One of the major benefits of VVols is that the configuration and feature management of your storage is integrated into vSphere via storage policies. Create a policy, assign it to a VM or virtual disk and it is configured as such. And VMware makes sure it stays that way and tells you if it isn’t.
You concoct storage policies based on whatever you need in as many variations as you want. When you go to assign the policy, the different arrays will say “yes I can do this, or no I cannot”. So it stands to reason it would be helpful to create policies that the arrays currently actually support. As of the authoring of this blog, we do not create replication policies on demand–they are created as needed and then we tell VMware if an array has that policy or not. This allows the array to control the available SLAs. This might change in the future, but this is how it is now.
So the import tool in the plugin reaches out to the array, figures out its replication policies, and create storage policies that match that configuration.
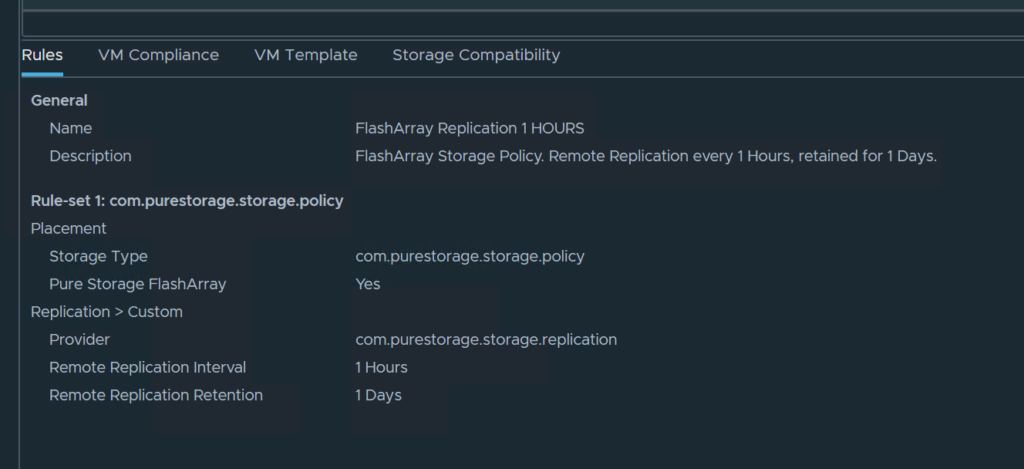
Take this replication group that replicates every hour:
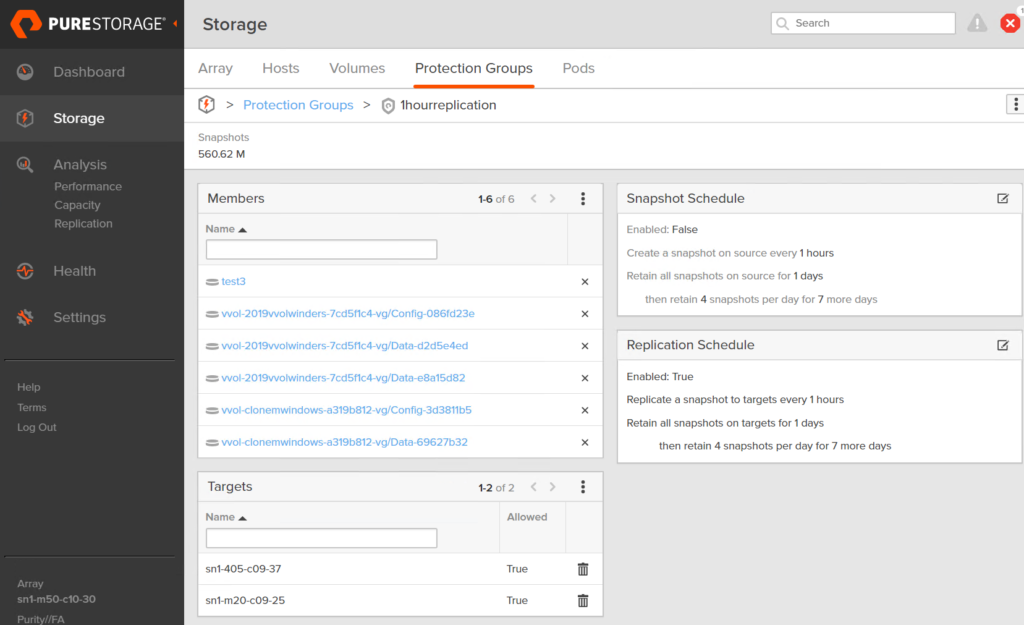
Go to the Pure Storage home screen and choose an array and click Import Protection Groups

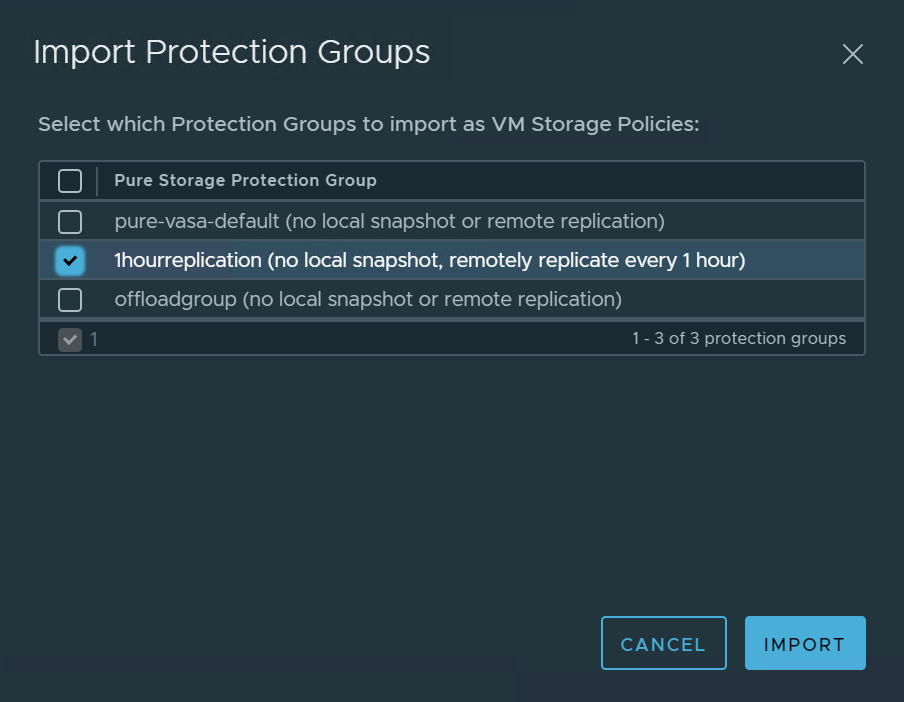
The import will take in the high level parts of the protection group (snapshot policy, replication policy) and convert it to a storage policy. It will not import some of the more specific things (exact target arrays, exact protection group name, etc). For those things you can edit the policy and make it more specific if you’d like. Though we do plan on adding more control over this behavior in the future.
Virtual Volume Tab
If you click on a FlashArray VVol VM, you can click on the Configure tab then the Pure Storage subsection and then Virtual Volumes.
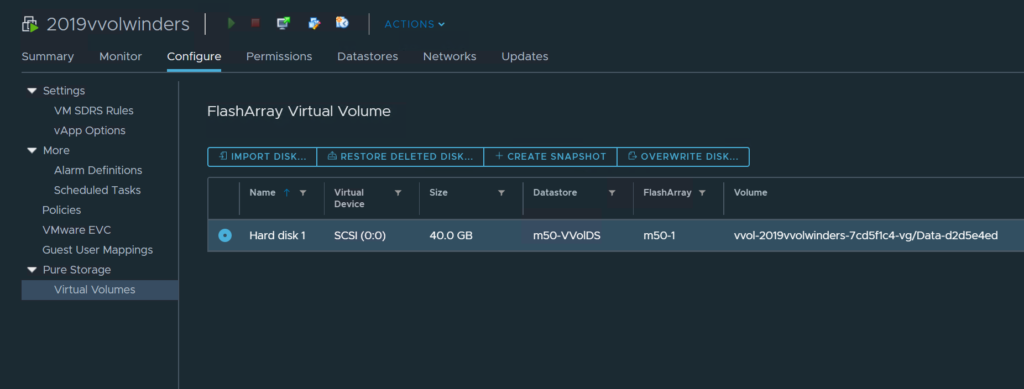
Under here, we will list all of the VVols for that VM and some information on the underlying volume. There are four features here:
- Import Disk
- Restore Deleted Disk
- Create Snapshot
- Overwrite Disk
Import Disk
This feature allows you to take a VVol (a virtual disk) or any snapshot of it and create a new VVol from it and present it to the selected VM. The process is that it creates a new VMDK VVol for the target VM and then goes to the array and copies the snapshot (or volume) to the new volume. This is targeted at the test/dev use case. Since this is entirely array-based copying, you can present any size volume to another VM essentially instantly (how ever many seconds it takes for you to click through).
So choose the VM you want to import a copied VVol to, go to the VVol tab and choose Import Disk.
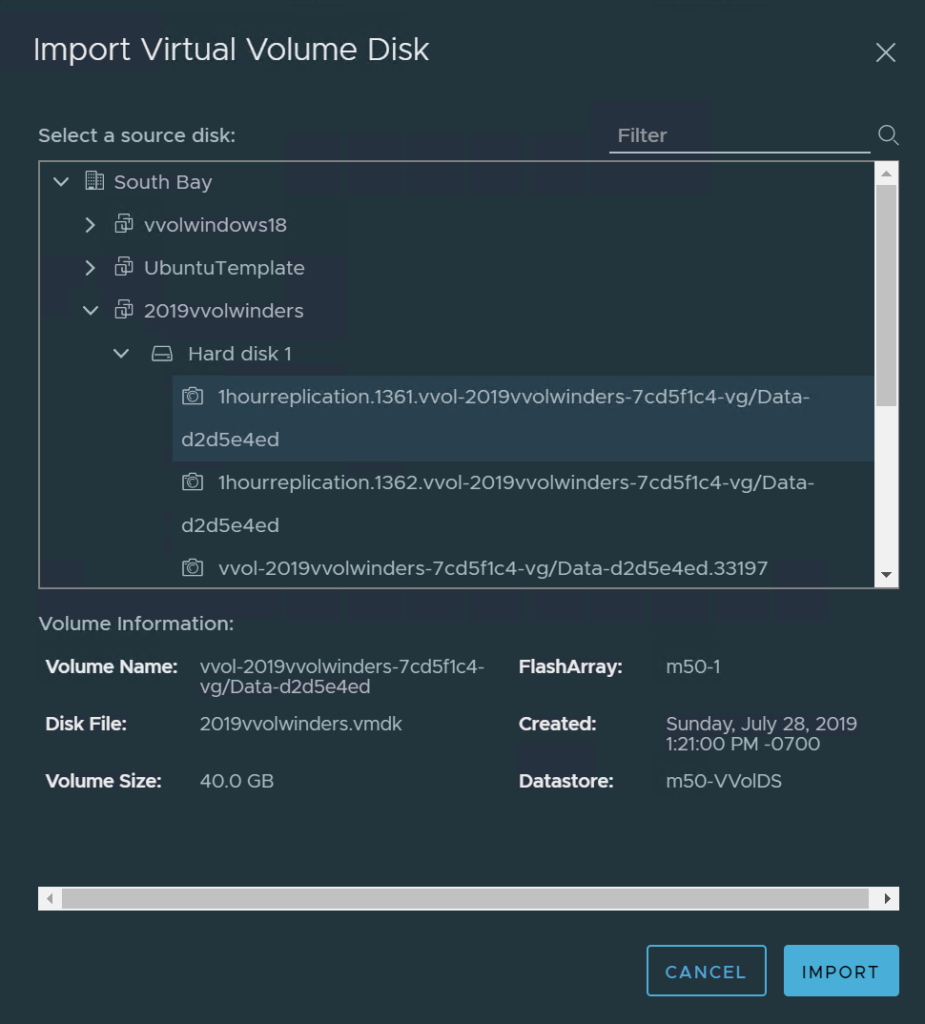
In there, you can navigate through all of the VVol VMs on that same array and either choose the VVol itself (the current point in time) or a snapshot on the array. Choose it and click Import. A copy will be presented to that VM.
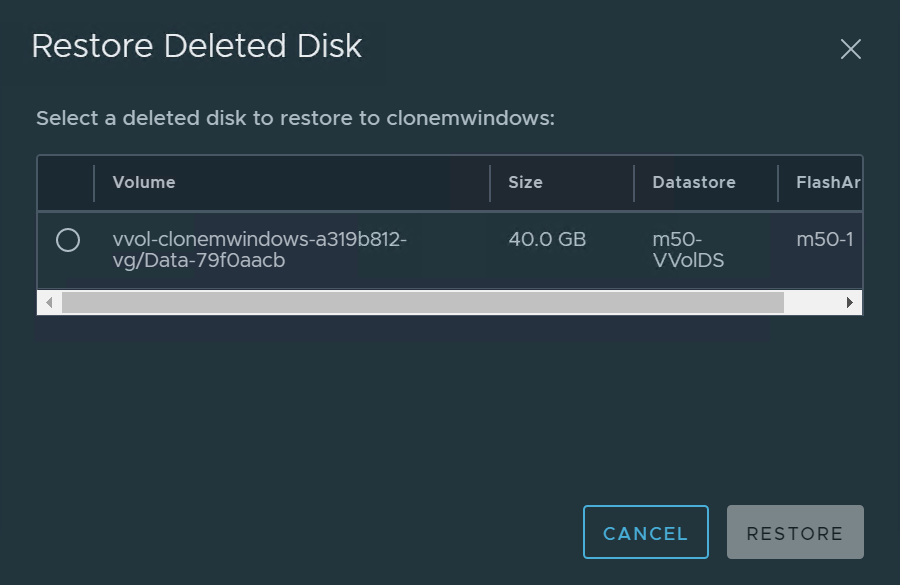
Restore Deleted Disk
Occasionally one might find themselves accidentally deleting a VMDK (or deleting it on purpose and realizing that was a mistake) and needing to restore it. If this VMDK is large, in particular, this restore from backup could take a long time. With VVols, we (Pure) give you 24 hours to undelete a VVol even if you never created a snapshot. The nice thing about this is that restore is very fast–we just move it out of the destroyed volumes folder. Takes a second whether it is 5 GB or 50 TB.
So go to the VVol tab, click Restore Delete Disk and we will report any VVols we find that belong(ed) to that VM and you can select it and we will restore it to that VM.
Create Snapshot
This one is pretty straight forward. If you use VMware to create a snapshot (like below):
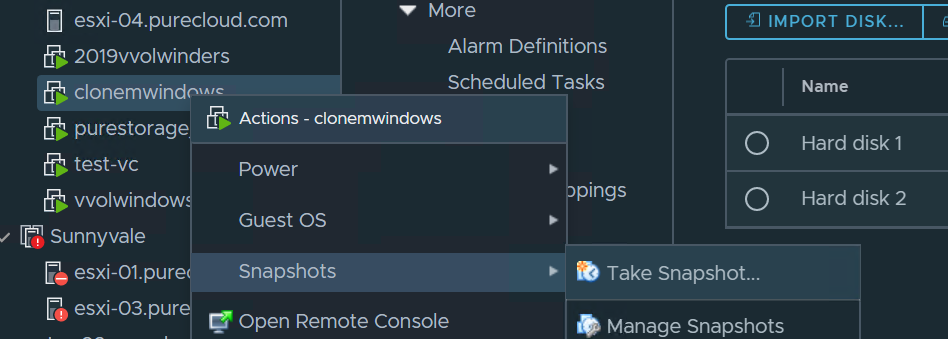
It will snapshot every single volume in that VM. That might be what you need, or maybe not. If you just want to snapshot one of those VMDKs (VVols) you can use this feature to create a one-off snapshot of just one. Currently, (unless you orchestrated something above) it will be crash-consistent. If the VM is powered off obviously it will be app consistent. With that being said, expect this to be enhanced in the future (hint, hint). Anyways this is how it is today (July 28th 2019).
Go to the VVol tab, choose a VVol and then click Create Snapshot. Optionally give it a name,
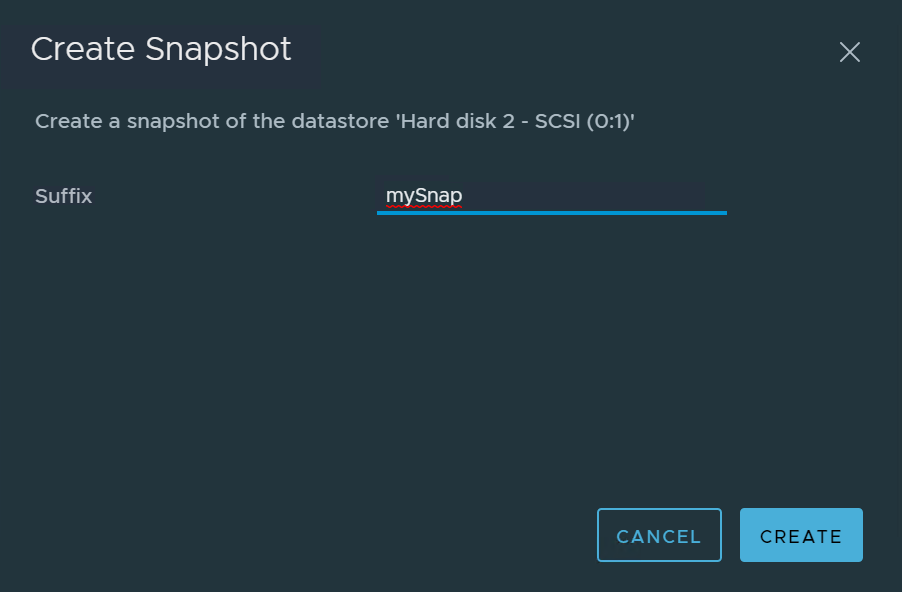
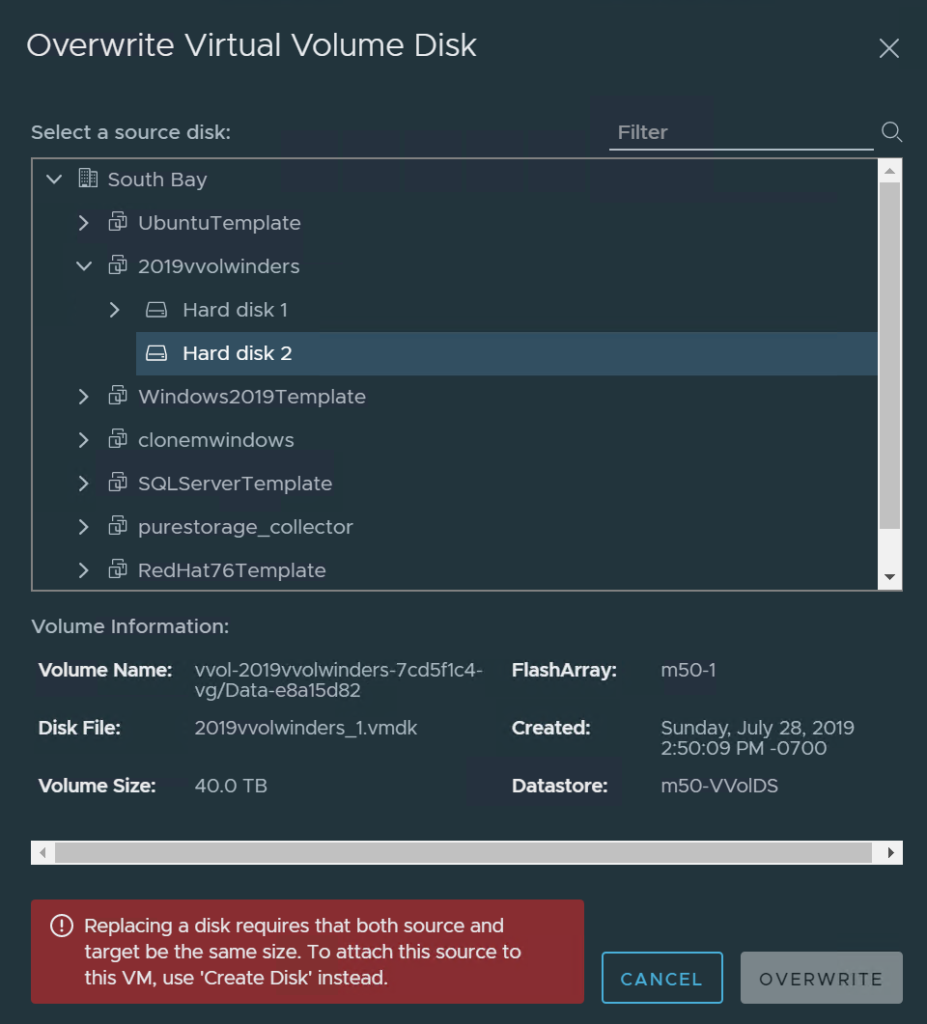
Overwrite Disk
So this is pretty similar to Import Disk. The main difference is that you are overwriting the selected disk with the VVol or VVol snapshot you chose.
Choose a VVol in the VVol tab that you want to refresh, and then choose the point-in-time you want to refresh.
Note that currently, the target VVol virtual disk needs to be the same size as the source. If it is not, you need to resize it to the proper size and then do the copy. This is not a FlashArray limitation, but more that the FlashArray volume copy would resize the target–VMware does not want volumes resized without VMware doing it. So in the future we will include a target resize operation first, then do the copy, but for now, you need to make sure they are the same size.
Next Steps
So we are now essentially at feature parity with the original plugin. The only thing that is missing is Role Based Access Control. We have a more sophisticated design around this, but it is dependent on our new delivery method. So we are working on that. We have A LOT planned for this plugin, but as always, feedback is welcome! Easiest way to provide feedback? Our Slack team. To contribute feedback and/or ask questions, please join our public Slack team, which can self-register for here. Join the #vsphere-client channel to discuss the plugin and stay up-to-date on new features and releases.
Thanks!!
One Reply to “FlashArray HTML-5 vSphere Client Plugin VVol Support”