
This is all very exciting for me, finally able to really start blogging about VVols in earnest. As you may or may not be aware we (Pure Storage) currently have our VVol implementation in beta. So I can finally start digging into some VVol work. Not going to get into implementation details just yet, but instead a quick walkthrough of importing a VVol snapshot with PowerCLI.
First, enjoy a poorly photoshopped Back To the Future reference:

Okay enough of that. First, some background. In a VVol world, when you use VMware to take a snapshot of a VM, it doesn’t create that delta VMDK that you are used to. Instead, it actually creates array-based snapshots. Here is a great post from Cormac that explains this concept:
http://cormachogan.com/2015/03/10/virtual-volumes-a-new-way-of-doing-snapshots/
So, creating and restoring from array based snapshots can now be managed inside of vCenter. But what if you want to take that snapshot and present it to another VM? A test/dev scenario of a database for instance?
Well there is an easy way to do this. There is a method called importUnmanagedSnapshot under the virtualDiskManager in vCenter that allows you to do this.
This method takes in three parameters:
- Virtual disk path. So datastore in brackets [mydatastore] and then the path folder/folder/mydisk.vmdk
- Datacenter. If you are connecting to a single ESXi host this is optional, but otherwise you need to specify this. The SDK call needs to MoRef (managed object reference) of the datacenter
- VVol ID. vCenter needs to know the actual VVol you want to import and you specify this via the VVol ID, which is a unique identifier for a given VVol.
So first, how doe call this from PowerCLI. As far as I know, there is no built-in cmdlet to do this, so we need to use the trusty get-view. This method is under the virtual disk manager, so once you connect to your vCenter, you need to pull that in like so:
$virtualDiskManager = Get-View (Get-View ServiceInstance).Content.virtualDiskManager
Then you can actually called the method. But first we need to populate the parameters. The first is you virtual disk path. This needs to be a virtual disk that does not exist. What this method does is basically:
- Imports that VVol into the VASA database
- Binds the VVol to the appropriate Protocol Endpoint
- Creates a new VMDK pointer file which references that VVol
This then allows you to add that VMDK which contains the point-in-time of that VVol to a VM.
So back to the disk path. A disk path looks like so:
[mydatastore] folder/folder/mydisk.vmdk
In the brackets is the VVol datastore (a storage container) and the rest are folders and the virtual disk file name. The VMDK should not exist yet–otherwise it will fail. You can put it on any storage container from the array this VVol is on. But it has to be a storage container, it cannot be VMFS, for instance. Furthermore it can be in any folder in there, but ideally you probably want to put it in the folder of the VM you plan on adding it to. I am going to add it to a VM called VVol-VM on a storage container called FlashArray-SC1:
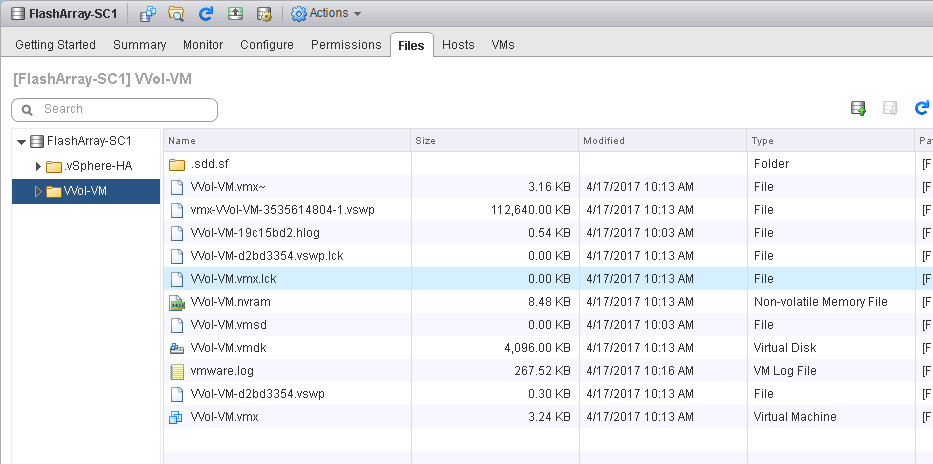
The vmdk filename can be anything that is just unique in that directory, so I will just called it “importedvvol.vmdk”. Making my path:
[FlashArray-SC1] VVol-VM/importedvvol.vmdk
So I will store that in a new variable $vvolpath:
$vvolpath = "[FlashArray-SC1] VVol-VM/importedvvol.vmdk"
Great. Now the next step is my datacenter. This can be easily pulled in via the cmdlet, get-datacenter <name>.
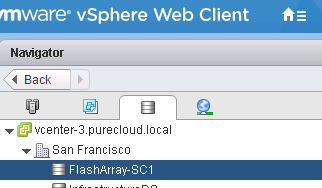
Mine is called “San Francisco” so I will run:
$dc = get-datacenter "San Francisco"
Lastly is my VVolID. I will get into the particulars for the FlashArray at a later date (still gathering feedback from beta so things might change by GA so not worth documenting just yet), but refer to your vendor on how to do that. My VVol ID is “rfc4122.bebdbe84-64f5-4c4b-9f50-13998ece64dd”. Which I have stored in a variable called $uuid.
One last thing to note, I do not enter the entire $dc object in for the datacenter, it only wants the MoRef, so that needs to be specified. So instead it will be:
$dc.ExtensionData.MoRef
So now I can make the call! Parameters in order: vvol path, datacenter MoRef, then VVol ID.
$virtualDiskManager.ImportUnmanagedSnapshot($vvolpath,$dc.ExtensionData.MoRef,$uuid)
![]()
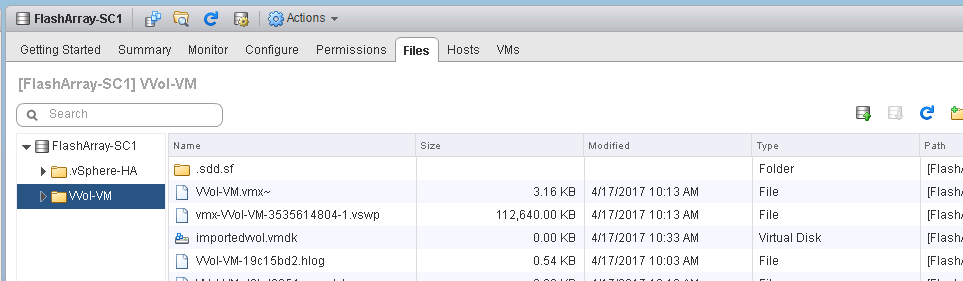
Now I can add the vmdk to a VM via PowerCLI:
$vm = get-vm VVolVM
$vm |new-harddisk -Diskpath $vvolpath
Or of course through the GUI or whatever.
Look for a lot more VVol-content to come!
Hi Cody,
im in the middle of the acquiring new all flash array for our vmware infrastructure, and design of vvols implementation is really important to me (as there is a lot of horrible implementation on the market). Could you probably share how Pure plans to deploy vvols? My main concerns are localization and amount of Protocol endpoints, vasa provider etc…
Thank you.
Hey! I will be putting out a lot of posts, but not until our conference in a few weeks. If you need it sooner, I would be happy to jump on a call and walk through our implementation (which is in the final stretch of beta) and demo it all. Let me know!
Thanks for the reply, i would really like to discuss this on call with you, if you can spare some time with me. Just let me know some times, when you are available [my timezone is gmt+1 so probably your morning would be best] . Thanks
Shoot me an email at cody AT purestorage DOT COM and we can figure something out
Hello,
First, thank you so much for the post, I’m finding a lot of really cool information on your blog! I was wondering if you know, or have a post on getting the VVOL ID with PureStorage, in this post you reference that you’re using a dummy one since it was beta. I’m trying to automate snapshots of Vvol disks and then attach them to other VMs.
You’re welcome! Glad you have found it useful!
Ah yeah I need to write that post. In short, we use tags for VVol information, like the UUID. Right now, they ar eonly available through the REST API. We are working on adding them to the GUI and CLI, but want to do it right, so we still have some work to finish before they are there. So they are semi-hidden now. In REST, you can do a GET call for a certain volume, or all volumes and add tags=true to the URI. This will return all tags or the tags for that volume. The tag key is PURE_VVOL_ID and the value would then be the VVol UUID. I will put a post together soon to clarify it further
Cody,
Is it possible to import a config vvol volume into a manually created vvol folder in VMware (I would like to add the VM to the cluster and need the vmx file)? Example: I have async replication from an onsite DC Pure to a Pure in a Colo. My onsite DC goes down and I want to bring my VM’s back online in the Colo DC using the config and data volumes that have been replicating. I am able to import a replicated data volume into an existing vvol vm folder or a manually created vvol folder but how would I import a replicated config volume?
Thank you,
Craig
You need to use the vVol replication API to do this. There is a failover, test failover, etc to do this. It is based on the replication groups. SRM can do this. https://blogs.vmware.com/virtualblocks/2020/03/10/whats-new-srm-vr-83/ You can script it with PowerShell https://www.codyhosterman.com/2018/12/powercli-and-vvols-part-vi-running-a-test-failover/ Or vRealize Orchestrator.
That is the only way to do it in Purity 5.x and is the preferred method for recovering replicated vVol VMs.
In Purity 6.0, there is a way to do it without using the vVol replication management features, but it is not something I have fully finished testing.
Great, I will give that a try.
Thanks,
Craig
Cody ,
quite helpful write up .. thanks
I was playing around with these VASA APIs and have a follow up query .
From FlashArray snapshot, how do we restore the entire VM ?
I see that we can import the data vvol but is there a recipe
to restore the whole VM ? (which would require importing
config vvol at some level )
Thanks !
Bala–you can follow this guide:
https://support.purestorage.com/Solutions/VMware_Platform_Guide/How-To's_for_VMware_Solutions/Virtual_Volume_How_To's/Web_Guide%3A__vSphere_Virtual_Volume_VM_Recovery_and_Snapshot_Workflows
Though in Purity 6.0+ this is a lot smoother, we are still testing some scenarios but we will put out some automation and instructions soon!
Hi Cody,
I’m missing something out here.
In our case I’m trying to P2V a server with a couple of large volumes that reside on purestorage flasharray.
I followed the procedure to try to manually create the vVol entry in vCenter, but its unclear to me how to create and set those uuid on the flasharray.
Can you help me out there?