
This is going to be broken up into two parts- first, a live migration where no VMs get powered off during the migration; second, a migration where you temporarily power off VMs attached to the SCSI datastore.
Why would you want to do it one way or another?
Pros of live migration:
- No VM downtime
- Simpler configuration changes and overlap. Less to go wrong or mess up
Pros of powering off VMs:
- The total migration time will be significantly less because no data will have to be moved. Currently VMware doesn’t support XCOPY (even on the same array) for NVMe-oF
Great, you’ve decided on a live migration for your VMs because you don’t care about how long it takes; you just want to minimize downtime of your VMs as much as possible. If you haven’t already, you’ll need to follow the guides Pure Storage has for setting up NVMe-oF in your environment.
Once you’ve configured NVMe-oF in your environment, you’ll need to create the namespace (volume), connect it to the appropriate host group, create the NVMe-oF datastore in vCenter and finally storage vMotion your VMs from the SCSI datastore to the NVMe datastore.
Create the Volume
From a FlashArray perspective, this is identical to SCSI except for the slightly different terms and labels. Cody wrote a nice article explaining the differences. Log into your FlashArray, select (1) Storage then (2) Volumes then click the (3) + on the right hand side of the GUI.

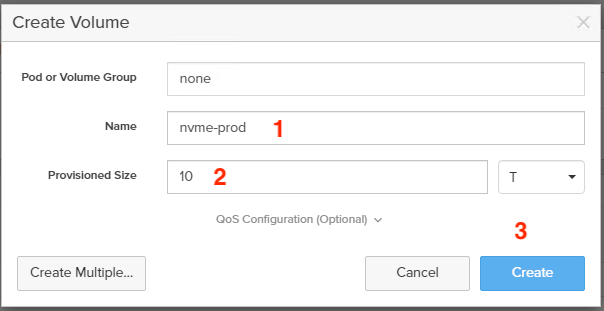
In the window that pops up, populate a (1) Name for the namespace (volume), give it a (2) Provisioned Size then click (3) Create.
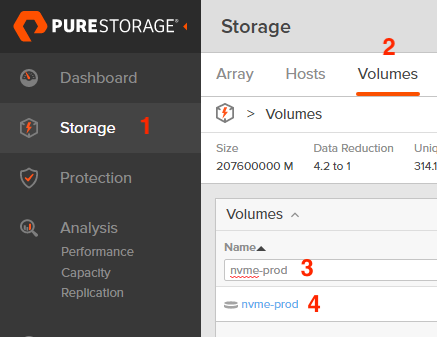
Note the volume serial number by going to (1) Storage then (2) Volumes, finding the name of your (3) Volume, then (4) clicking on the hyperlink name of it.
On the next window, note the Serial of the volume. We will use this later in vCenter to validate that we are connecting the right namespace.

Connect The Volume To the Appropriate Host Group
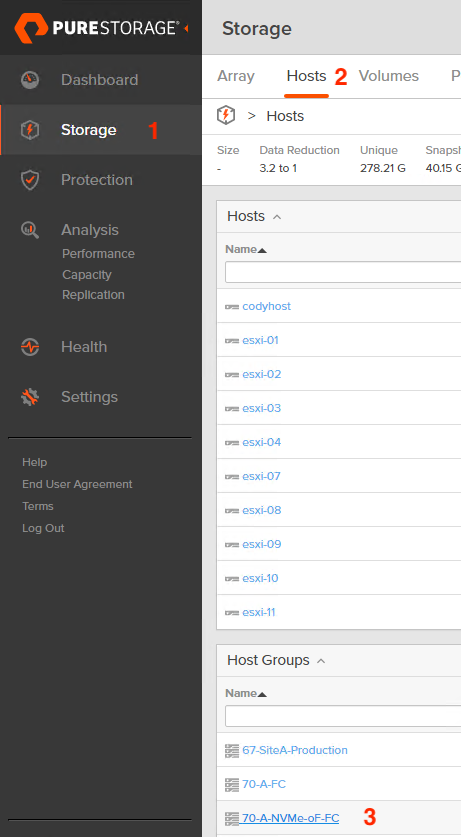
Still in the FlashArray GUI, go back to (1) Storage, select (2) Hosts, then select the (3) Host Group you have created for your NVMe-oF hosts. In this case, I am setting this up for NVMe-FC but the steps will be the same for NVMe-RoCE after you have followed the previously linked KB articles.
Next, click the three vertical dots (I think this is called a hamburger) and select Connect.
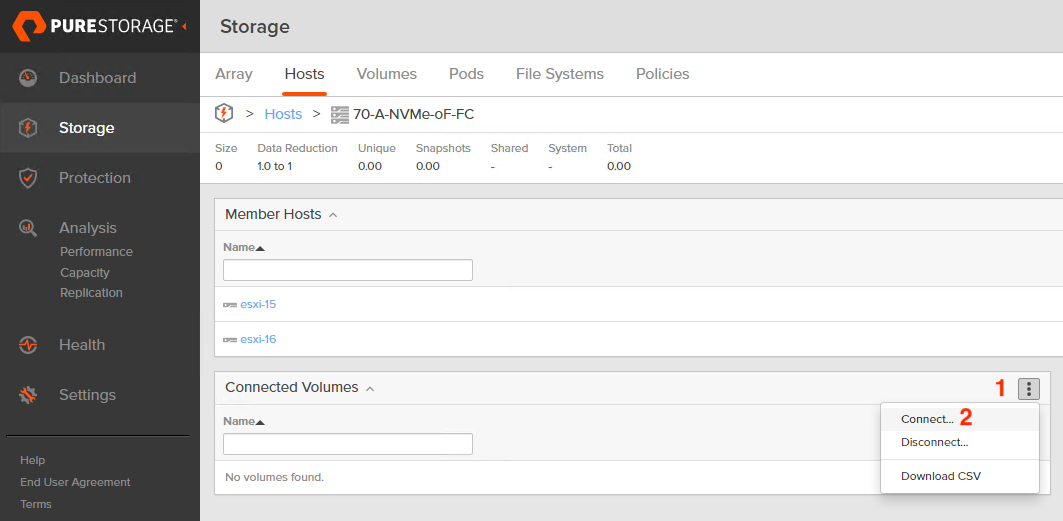
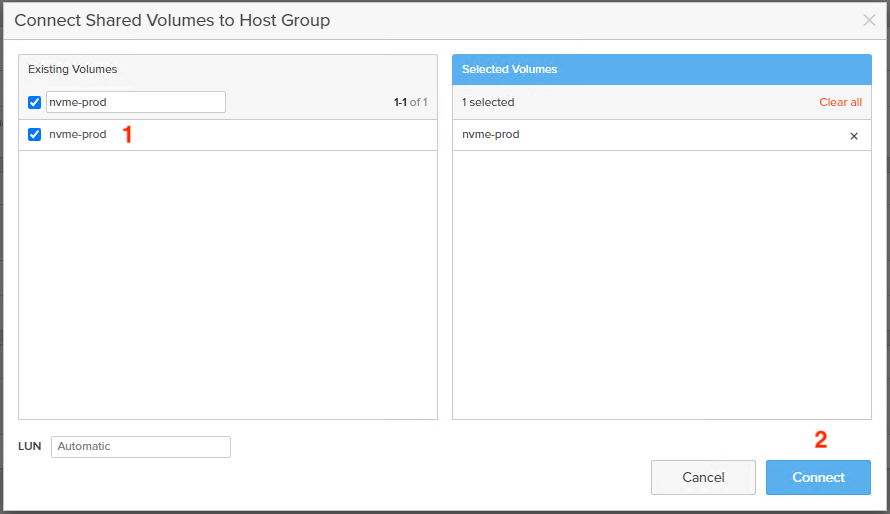
For the last step in the FlashArray GUI, select the (1) Namespace (volume) you created before then click (2) Connect.
Create The NVMe-oF Datastore
Switching over to vCenter, we’ll first want to create a datastore from the namespace that we’ve just presented to our host group. This process is easier than with SCSI datastores because you do not have to rescan the storage adapters- all you need to do is create a datastore on top of the NVMe namespace that is already present.
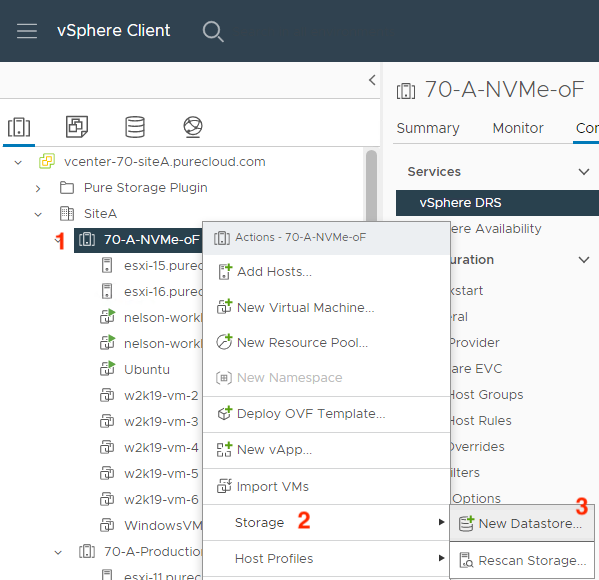
(1) Right click on the vSphere cluster you’ve presented the namespace to, hover over (2) Storage, then click (3) New Datastore.
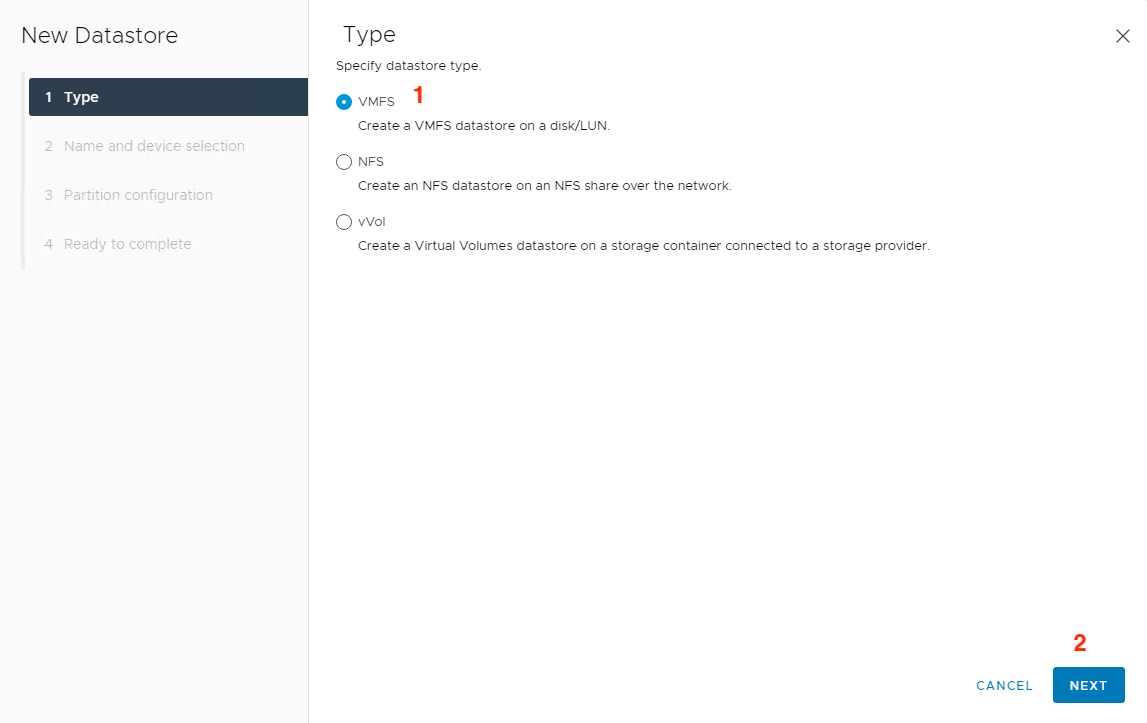
Select (1) VMFS (currently vVols is unsupported by VMware with NVMe-oF) and click (2) Next.
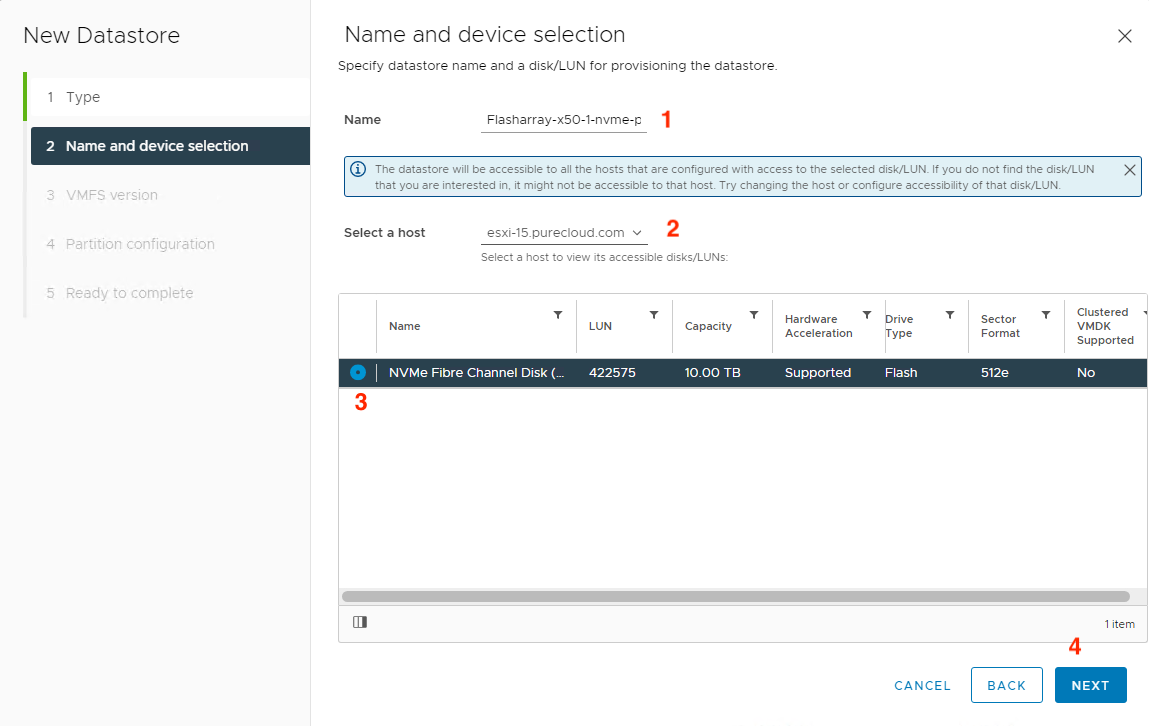
Specify a (1) Name for your datastore, (2) Select a host that the namespace was presented to, select the (3) namespace from the list and click (4) Next. Validate the serial number of the namespace (volume) from the FlashArray GUI before in the Name column.
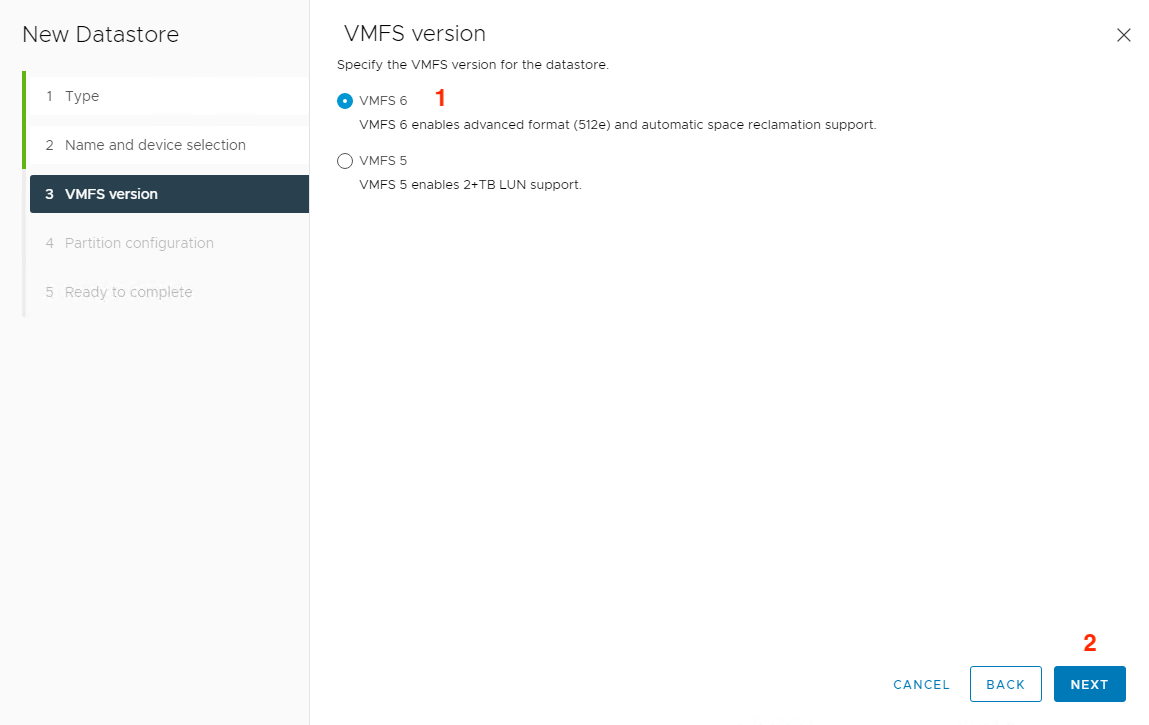
Select (1) VMFS 6 (who uses 5 anymore anyways?!) and click (2) Next.
Click (1) Next.

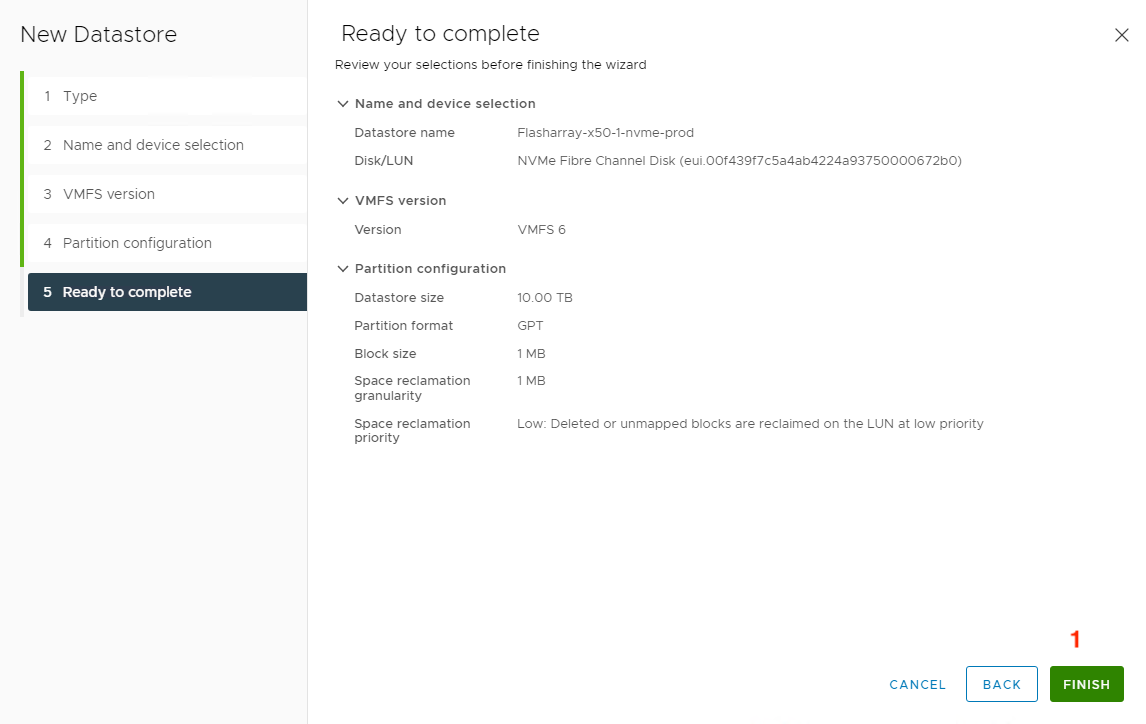
Review the details and click (1) Finish.
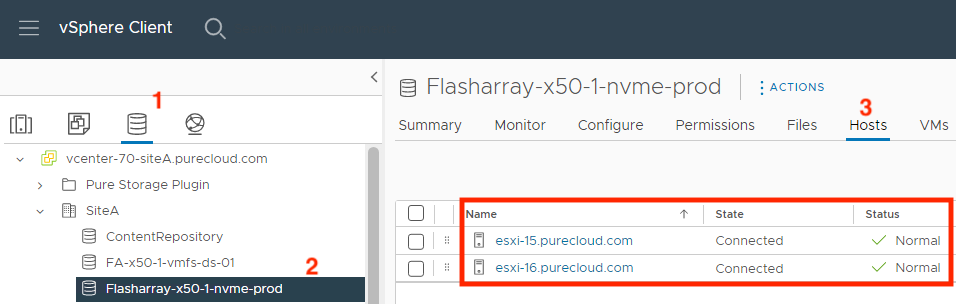
Validate the hosts are connected to your newly created NVMe-oF datastore by going to the (1) Storage tab, selecting the (2) Datastore Name and clicking on the (3) Hosts tab. If anything looks incorrect here (not all hosts from the cluster are connected, etc), please review your NVMe-oF configuration for issues.
Storage vMotion the VMs from SCSI-backed Datastore(s) to NVMe-backed Datastore(s)
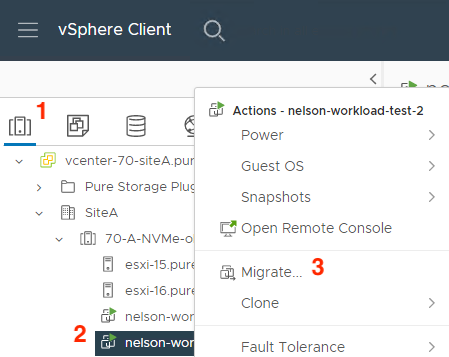
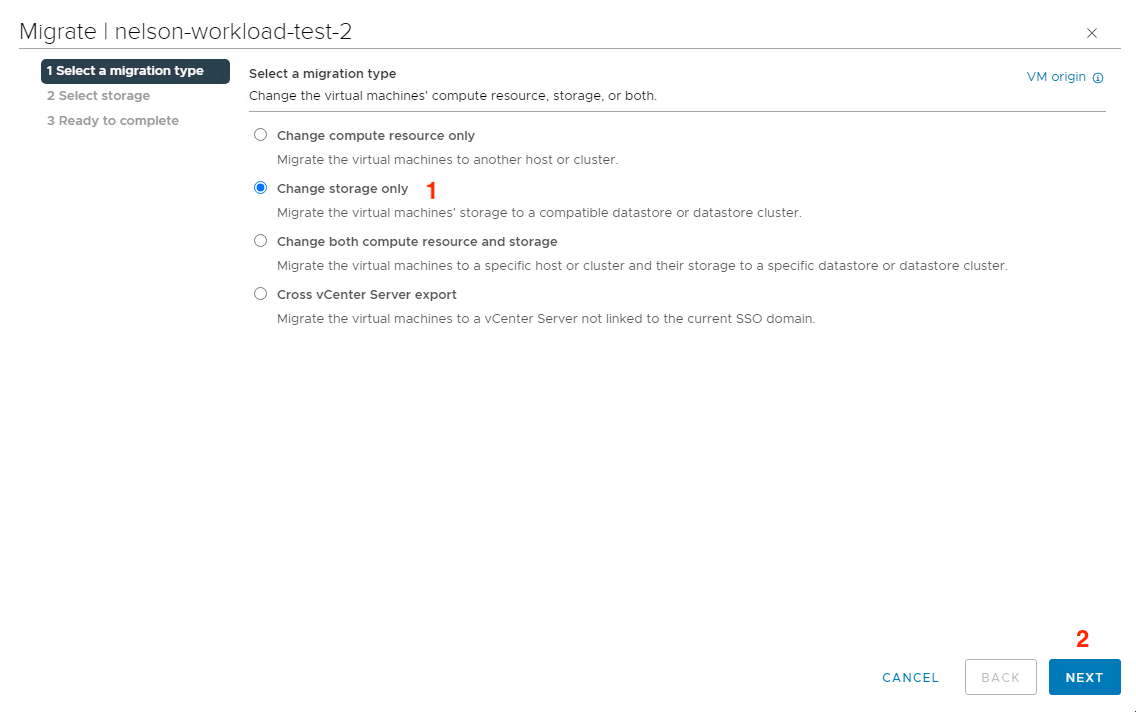
Staying in the vCenter GUI, select the (1) Hosts and Clusters tab, right click on the (2) VM you want to migrate from SCSI to NVMe then select (3) Migrate… from the list that pops up.
Select (1) Change storage only from the window that pops up and click (2) Next.
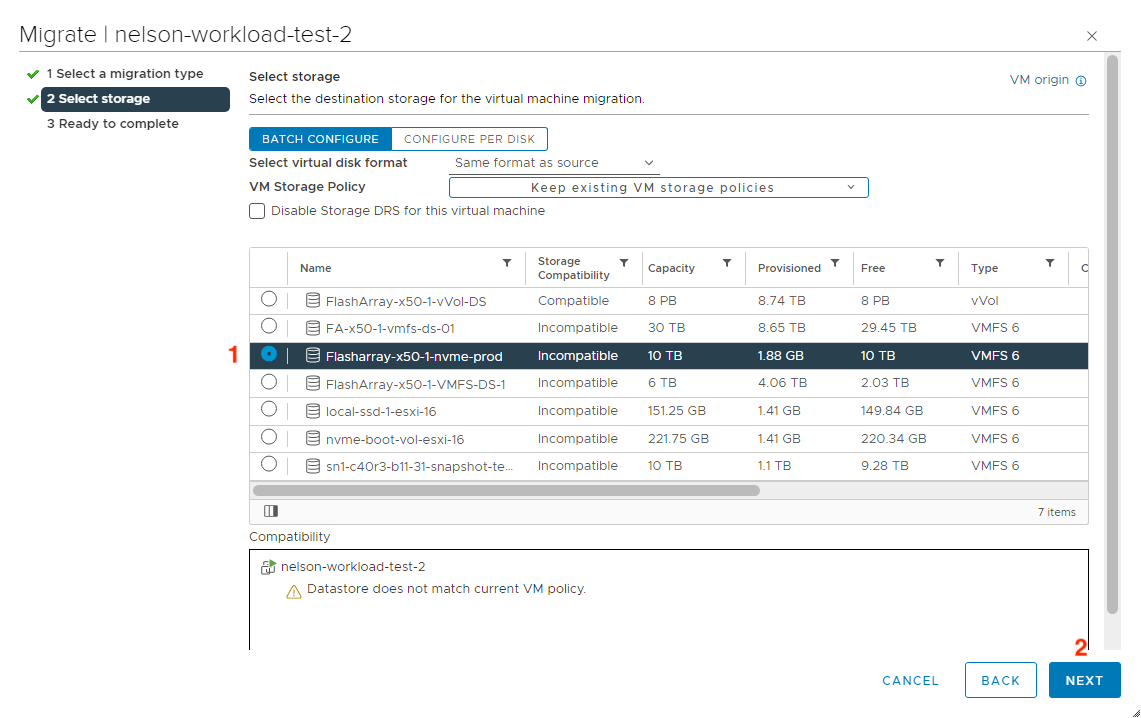
Select the (1) NVMe datastore you created before then click (2) Next. Optionally you can modify the storage policies for the VM and the virtual disk format.
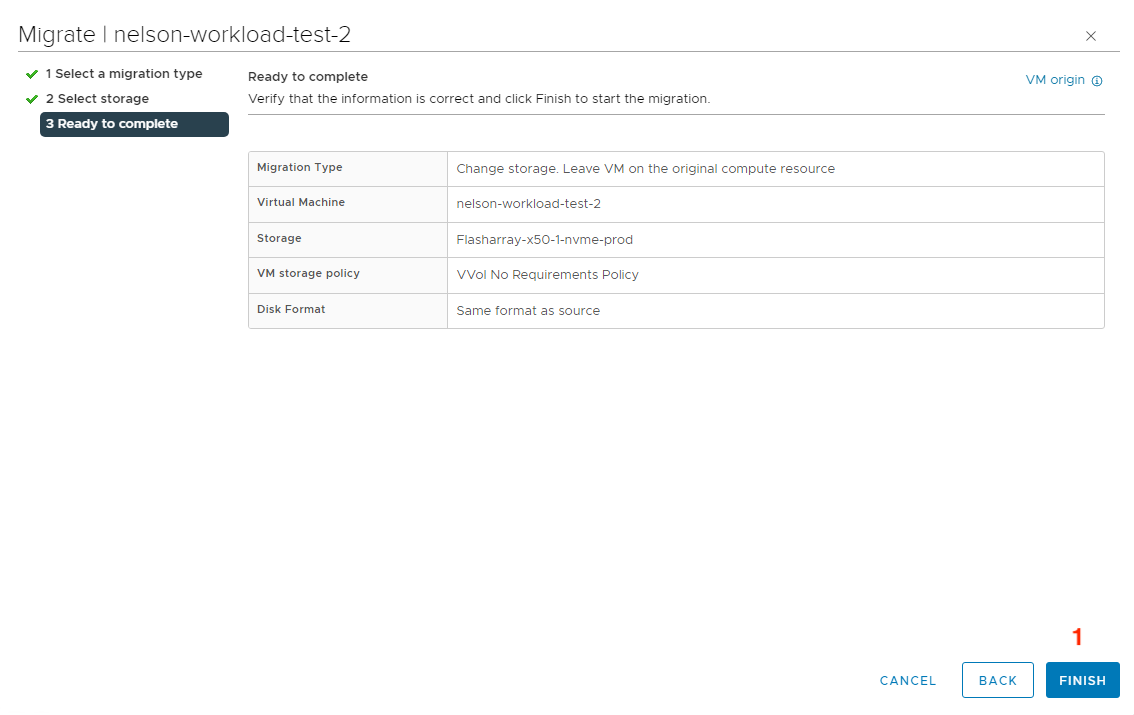
Finally, verify the details of the migration and click (1) Finish.
And now wait until the VM has migrated to the NVMe-oF datastore. Migrations in general can be very daunting, but luckily with NVMe-oF, it can be extremely simple. Hopefully you found this helpful.
vVols NVMeoF is supported within vSphere 8. Can you add this to the post?
Hello Burnz- everything in this post should apply to vVols the same as VMFS once FlashArray supports NVMe-oF with vVols. Currently FlashArray does not support NVMe-oF with vVols.