
Virtual Volumes provide a great many benefits, some large, some small. Depending on the VM, recovering a deleted VM could be either of those.
With traditional VMFS, once you have selected “delete from disk” restoring that VM could have been a process. Either restoring from backup or hoping you had a snapshot of the VMFS on the array. Either way, you are probably going to incur data loss, as the last backup or snapshot is unlikely to be from the time right before the deletion.
Let me be VERY clear here. Regardless to the rest of this post, I am not saying once you move to VVols you do not need backup! You absolutely still do. VVols just give you a nice way to do an immediate recovery of the latest point-in-time without having to lose anything, assuming your array support it.
“Wait, did you say delete VM “AD” or VM “80”?”
“Um… definitely not AD that’s our active directory…”

Quick Demo
So as usual, I don’t like to just show how it works, I like to explain how it works. But if you just want to see the process: watch this video:
Otherwise, read on.
Overview
So how does this work?
Well first let’s review some concepts of virtual volumes.
When you create a virtual machine that is comprised of virtual volumes, you get at least two VVols that are created:
- Config VVol. This holds the config information of the virtual machine. So the VMX file and other descriptor files. VMDKs etc.
- Data VVol(s). For every virtual disk you add, you get a new data VVol that is the size of that virtual disk.
One you power-on the virtual machine a swap VVol is created. When powered-off it is deleted.
Connectivity is automatically negotiated through sub-lun connections with a protocol endpoint.
Config VVol, the story.
So let’s look at the config VVol. You can look at your virtual machine files inside of the storage container (AKA a VVol datastore) just like before.

Here I created a Windows 2016 VM on a VVol datastore.
A VVol datastore is not a physical storage volume, at the most basic option it is simply an allocation limit. You can provision x amount of capacity of VMs. It is just a logical abstraction to manage your virtual machines. But, just like VMFS or NFS you can navigate it and see folder structures of your VMs.
In this case though, every top level folder is actually a pointer to the config VVols of your virtual machine. Each folder = a config VVol. In it you see the files of your virtual machines. This is because each config VVol is really actually a mini VMFS.
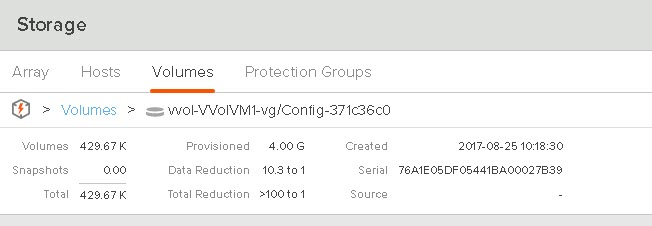
A config VVol, just like any VVol is an actual volume on the array. Above my config VVol is 4 GB in size. From array to array the size can vary from 2 GB to 4 GB, on the FlashArray it will always be 4 GB.
When created, the array VASA provider associates the config VVol with a specific storage container. This then allows anyone with access to that storage container to be able to navigate and use the contents of the config VVol. So any file created in the resulting folder will be stored in that config VVol.
Looking at the earlier image of the my virtual machine folder you might ask “um I thought there were no VMDKs anymore, aren’t virtual disks actually volumes on the array? aka VVols?” Well yes and no.
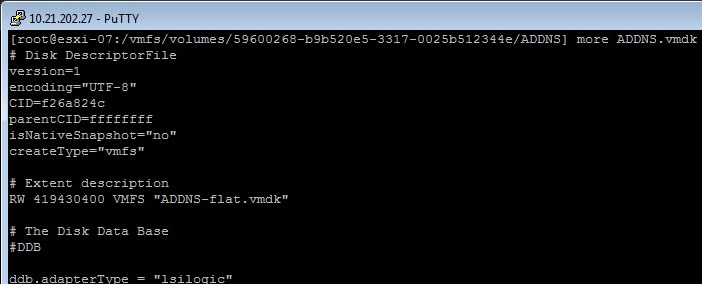
VMDKs are still required, but remember, VMDKs are not data files. They never really have been, They are descriptor files, or in other words pointer files. They point to the actual data volume. In VMFS, they point to *flat.vmdk files. This actual held you data.

If I look at the regular VMDK file, I see it points to the flat file:
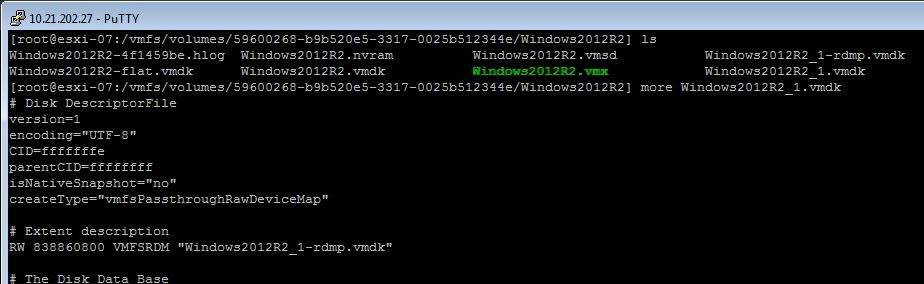
Same as with an RDM. A VMDK exists which points to a rdmp.vmdk file which is the mount point for the physical RDM.
This is no different with VVols. A VMDK file points to a physical volume on the array which is a VVol.
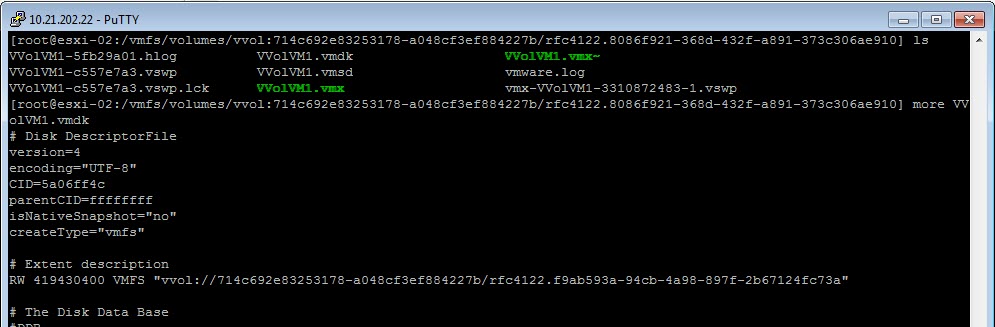
In this case it points to the array UUID then VVol UUID. This says what array it is on and also what VVol on the array it is.
The point here is that there is no direct connection between a VVol and a storage container. There is just a pointer to it. This allows for a VVol to be used in many storage containers if you want.
A config VVol, however, has a direct connection with a single storage container, because a VM should not and cannot be run more than once at a time. It of course can be moved though (Storage vMotion) to another storage container.
Restoring a deleted VVol VM
Okay so let’s walk through the process. Let me first state is that this might vary wildly depending on the array vendor. This is how it is done on the FlashArray. So certainly refer to your vendor for specifics.
So, I have a Windows 2016 VVol based VM with one virtual disk (data VVol).
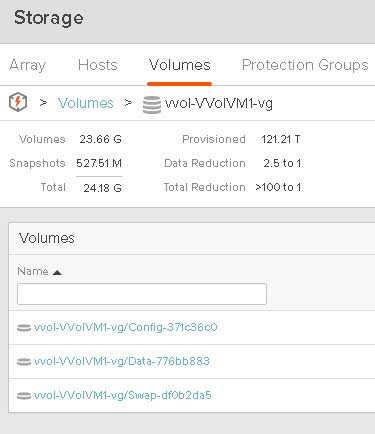
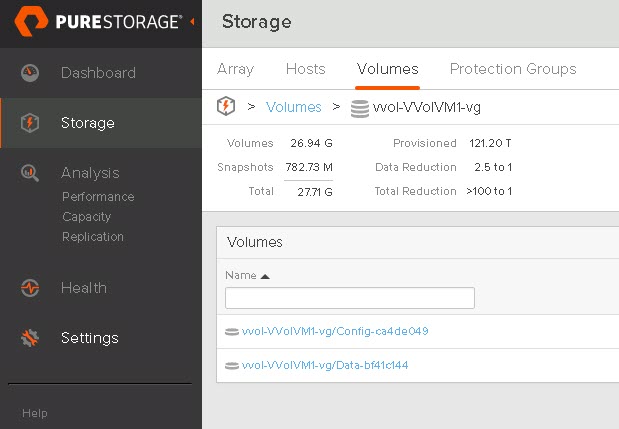
On my array this is represented by a volume group, the namesake of which is of course the respective VM. In that volume group are two VVols, my config VVol and my single data VVol.
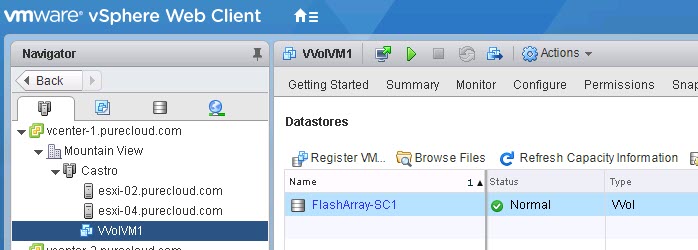
So right now, my VVol datastore (storage container) shows all of my files.
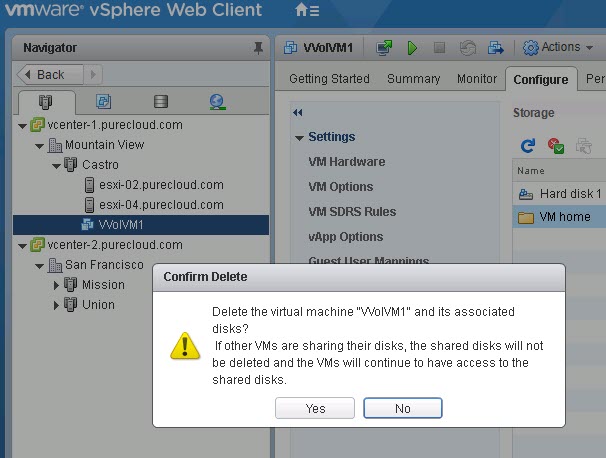
If I were to unregister the VM (remove from inventory) nothing would change there. But if I choose “delete from disk” the directory and all of its files are removed from the storage container.
Now if I look at my VVol datastore the folder is gone and therefore all of the files within.
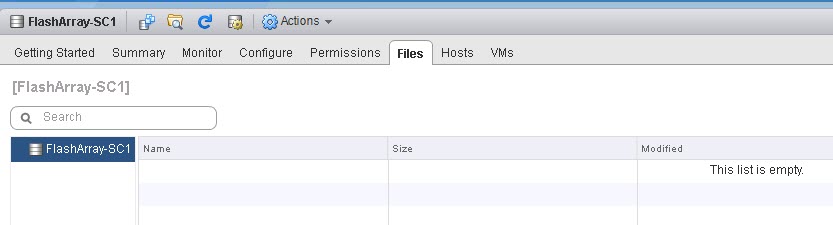
If I look at my array, my volume group and my contained config VVol and data VVol have been moved into their respective objects type’s recycling bin
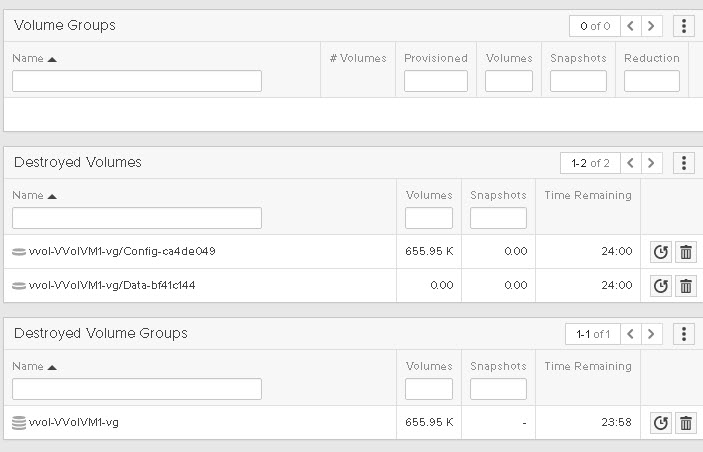
This is the first important point. The FlashArray does not just delete your volumes immediately when you delete a virtual disk or an entire VM. We put those objects into our recycling bins for 24 hours, then they are deleted permanently. This is what allows you to restore a VM or a virtual disk very easily in a VVol world on the FlashArray.
Also there is not special process to restore the VM on the FlashArray. The volumes and volume groups are treated no differently then “normal” volumes or volume groups. Just restore them from the recycling bin.

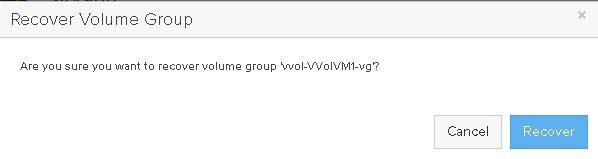
This restores the group.

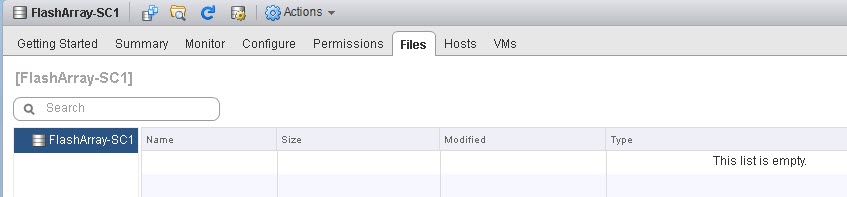
Note though, this only restores the group. The volume group on the FlashArray is just a logical construct to manage your VM with. It has nothing to do with the VMware environment directly. Only the VVols themselves do. As if you look at the VVol datastore, it is still empty:
So know I can go and restore the config VVol. I can search by the VM name and restore the config VVol:
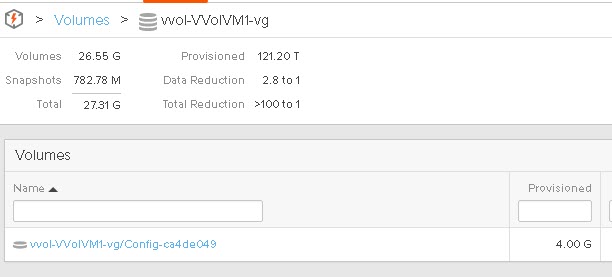
We now see the config VVol restored to the volume group:
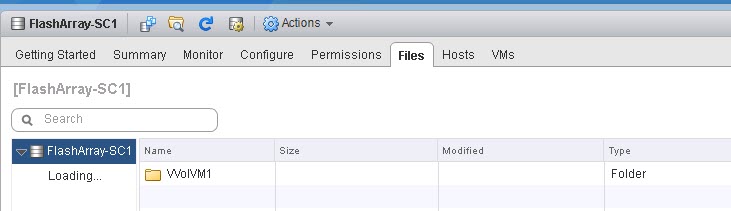
This automatically restores the folder:
This is automatically re-associated with the VVol datastore. This happens because this association is in the meta data of the config VVol. So no manual re-association is required. Our VASA provider picks this restored volume up and sees where it is supposed to be. Part of the stateless design of our VASA provider. The source of truth is the volumes themselves, not anything VASA has in memory.
Now let’s look int the folder. It is empty! Why?!
Well this has to do with VMware behavior of VM deletion. When a virtual machine is configured, VMware first deletes the files on the config VVols. Then it tells us to delete the VVols. So if we got a heads up, we would snapshot it first, but we do not know until it is too late (though we are working on some ideas around this 🙂 )
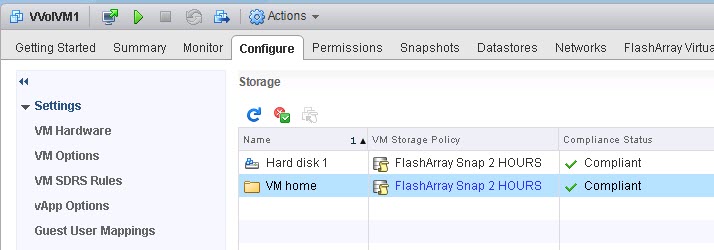
So you need an array based snapshot to restore the config VVol from. The nice thing about virtual volumes is that you can supply policies to the VM and the data VVols that dictate things like snapshot policies. So my VM home and virtual disk both have policies that have the FlashArray snapshot them on a two hour interval and also have retention policies to get rid of old snapshots.
I would generally recommend some kind of snapshot policy. Even if the config VVol snapshot policy is once a year (how often do you change virtual hardware dictates how often you might snapshot the config VVol).
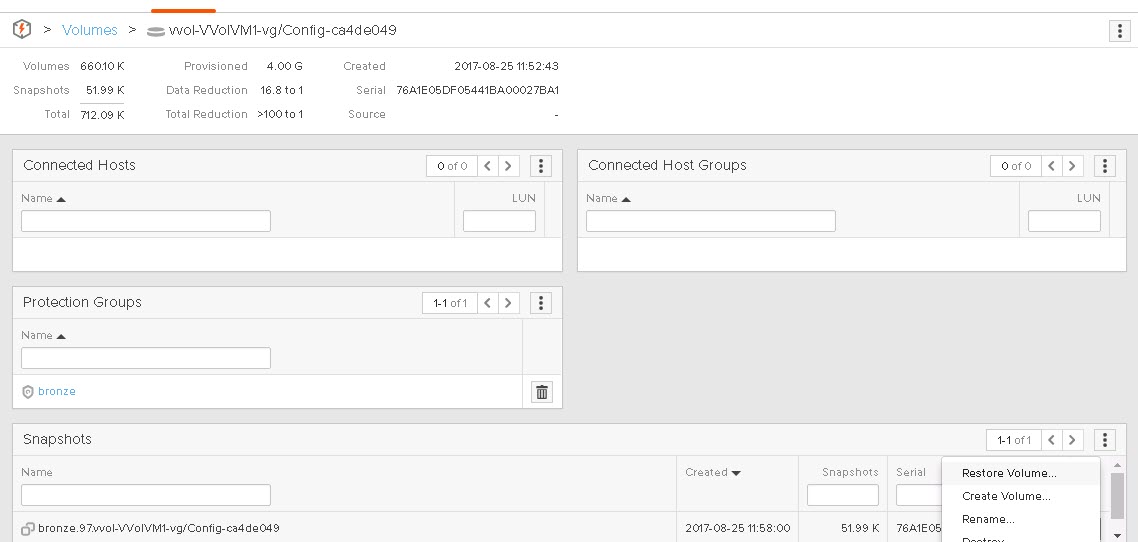
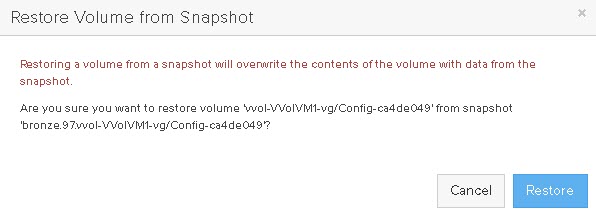
So I can get the snapshot of the config VVol and restore from it. This will return all of the delete files back to the config VVol:
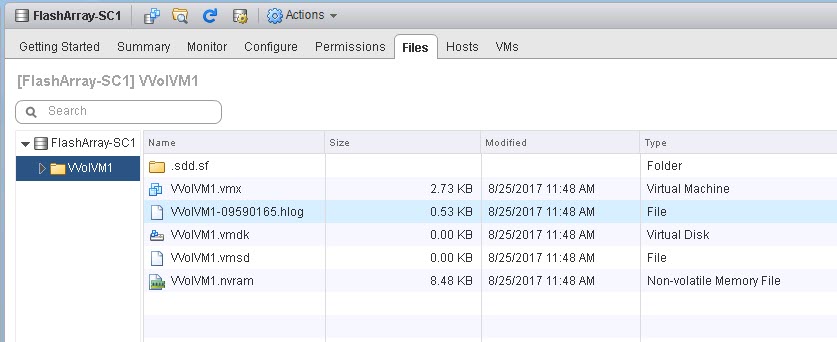
Immediately if I refresh my folder in my VVol datastore, the files are back!
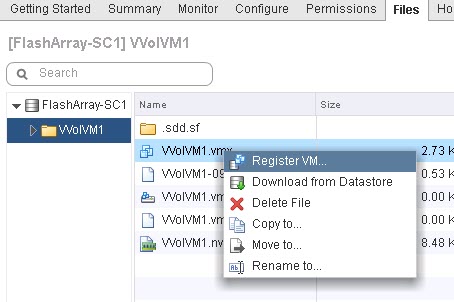
Now just register the VM back like normal. Right-click on the VMX file and add it back.
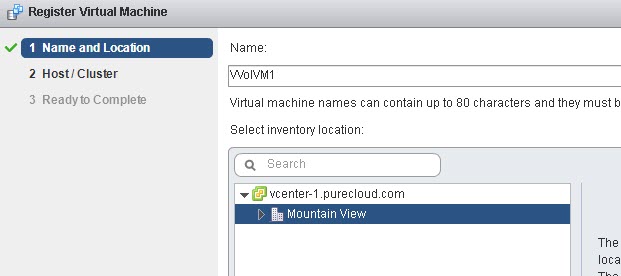
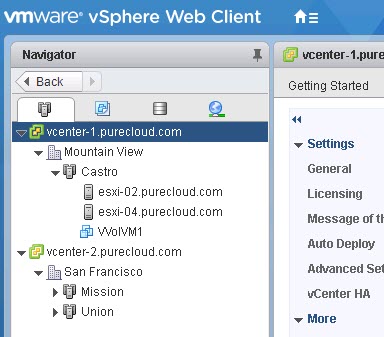
After you complete the wizard, the VM is back!
Now I can power it on.
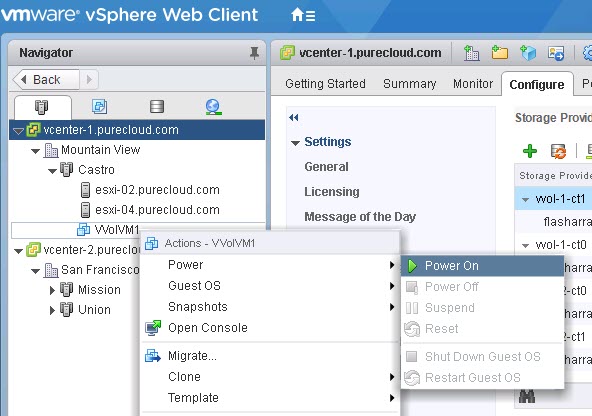
But we will see an error. Why?

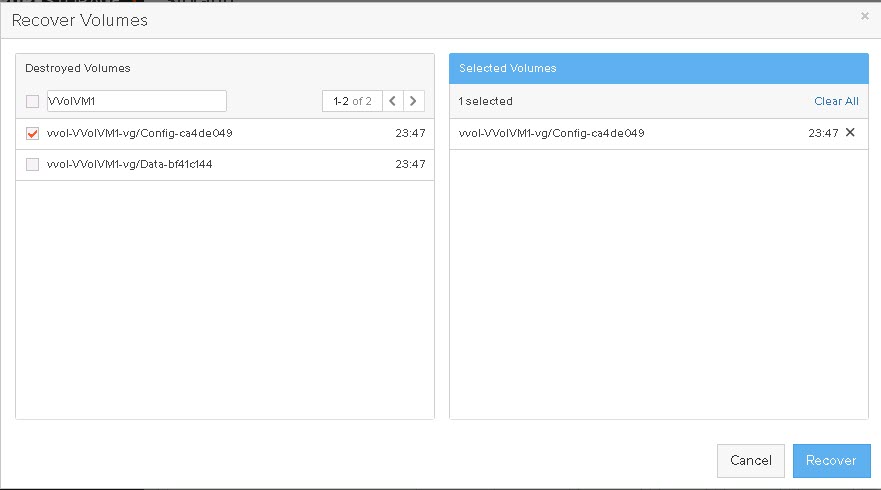
Well we didn’t restore the data VVols too. So if you want those data VVols, go restore them from the destroyed volumes folder on the array. If you want an older point in time for some reason too, you can restore them from a snapshot, but if you want it from the second you deleted the VM, all you need to do is restore them from the destroyed folder:
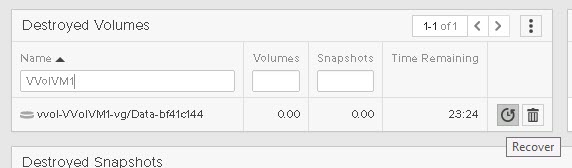
Now try to power it on again. Yay it works!
Just another example of how virtual volumes plus the FlashArray makes the use of array-based tools in a seamless and simple manner.
2 Replies to “Recovering a Deleted Virtual Machine with VVols”