
Another quarter, another vSphere Plugin release from Pure! This is the release I have been really looking forward to as it sets the stage for a lot of the future work I want to build into the plugin. To recap:
- 4.0.0 was our initial release of our plugin that only had the basic configuration support and VMFS management.
- 4.1.0 was the 2nd release that added vVol support back into the plugin.
- 4.2.0 enhances the plugin to add more vVol stuff into it as well as Pure1 Integration! So we are finally to the point where we are adding features into it that were never in the previous flash plugin. Yay!
So what are the new features?
- Pure1 authentication
- FlashArray fleet registration
- Load meter integration
- Pure1 tag integration
- Intelligent provisioning
- Full VM-undelete
Pure1 Authentication
Pure1 has a lot of really great information about your environment. A lot. A little over a year ago, Pure1 added a REST API–making all of this goodness available in whatever tools you use. Once we added REST to Pure1, I began integrating it into some things that I built. I wrote a PowerShell module and we then took advantage of it in our vRO plugin.
But what is our most used integration (well I think)? Our vSphere Plugin! So a logical next step. This is the first release of the plugin that is able to not only use the FlashArray REST API, but now also the Pure1 REST. So the first step is of course adding a way to authenticate to it. The Pure1 REST API has a different authentication mechanism than your FlashArrays (well the 1.x FlashArray REST–our 2.0 version is much more similar to Pure1).
So make sure you update to 4.2.0 first. Either have it loaded to your array then push it from our GUI, use PowerShell or vRO. PowerShell is the fastest and my preferred method, but choose your own adventure.

So go to the Pure Storage home screen:
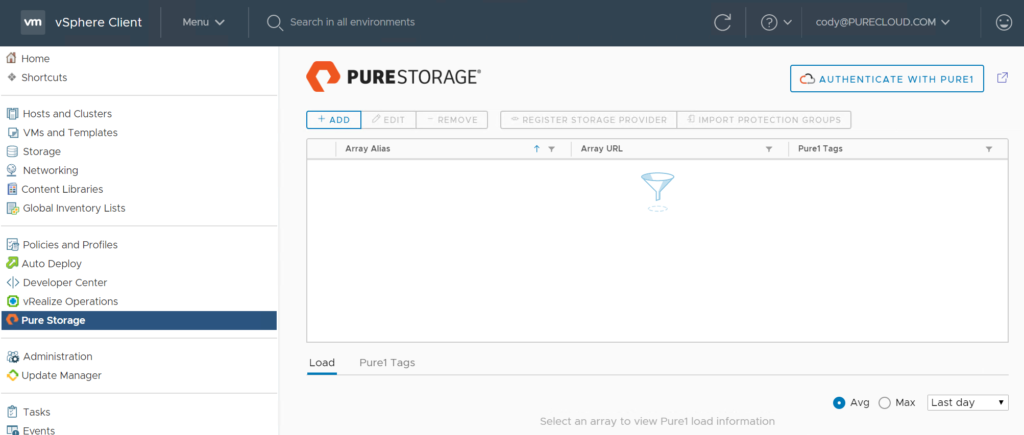
You will see some new stuff. Also something is missing… We removed the iframe that pulled in our full FlashArray GUI. I know some of you liked this, but we REALLY felt it was a crutch for us. “Hey we don’t really need to add that feature, the GUI can do it”. We have a pretty fast cadence now for enhancing the plugin, so hopefully the need for that will be a distant memory.
Anyways, one new thing that you will see is in the upper right of the home screen:
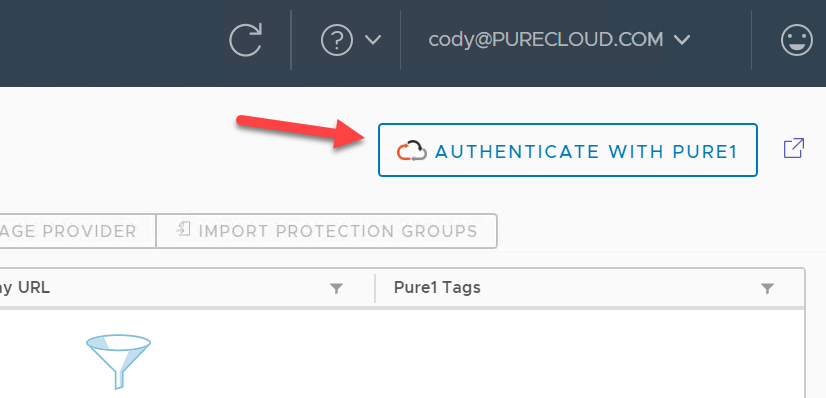
This is where you authenticate with Pure1. Do you NEED to do this? No. All provisioning features only rely on talking directly to the FlashArray REST. But connecting this will provide the plugin a lot more information (and of course you) and will be important moving through. So if you can, whitelist the Pure1 ( https://api.pure1.purestorage.com ) TCP port 443.
Anywho, click on the Authenticate with Pure1 button.
Note that the box with the arrow to the left of the authenticate button will take you to Pure1.
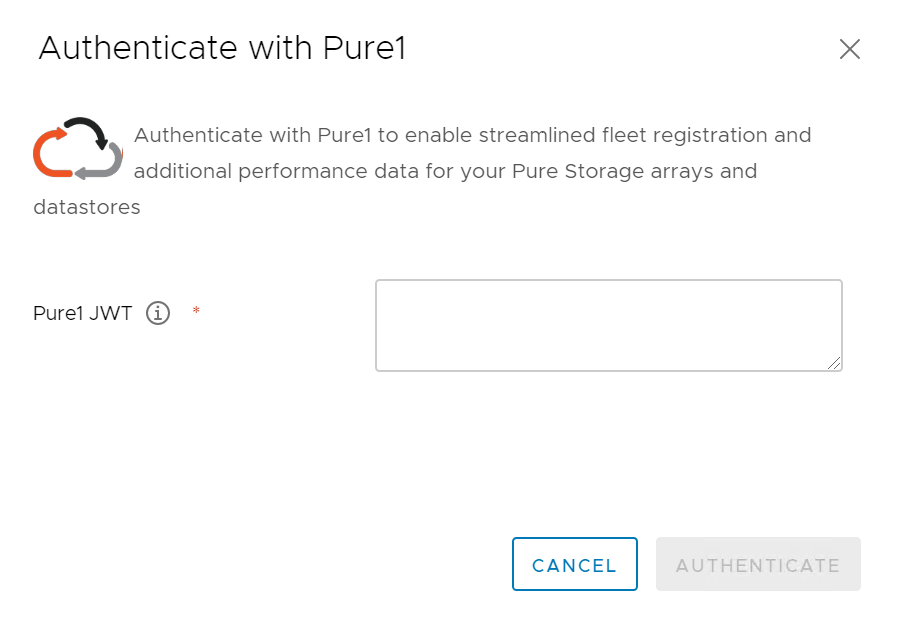
What is a JWT? Well check out the post I linked above to Pure1 authentication. Pure1 uses a public/private RSA key mechanism. There are a variety of ways to generate this:
- The JWT.io way: https://www.codyhosterman.com/2019/01/introducing-the-pure1-rest-api/
- The Windows way: https://www.codyhosterman.com/2019/12/pure1-rest-api-authentication-made-easy/
- The Linux/Python way https://www.codyhosterman.com/2020/02/generating-a-pure1-rest-jwt-with-python/
Quick note about your JWT. In the JWT you define how long it is valid for in the IAT property in the JSON payload. So depending on how long you set this for in the future will dictate how long the vSphere Plugin will be able to use this to JWT. So if you don’t want it to “expire” set it for years in the future. There are methods in Pure1 to also disable it too by deleting the API registration.
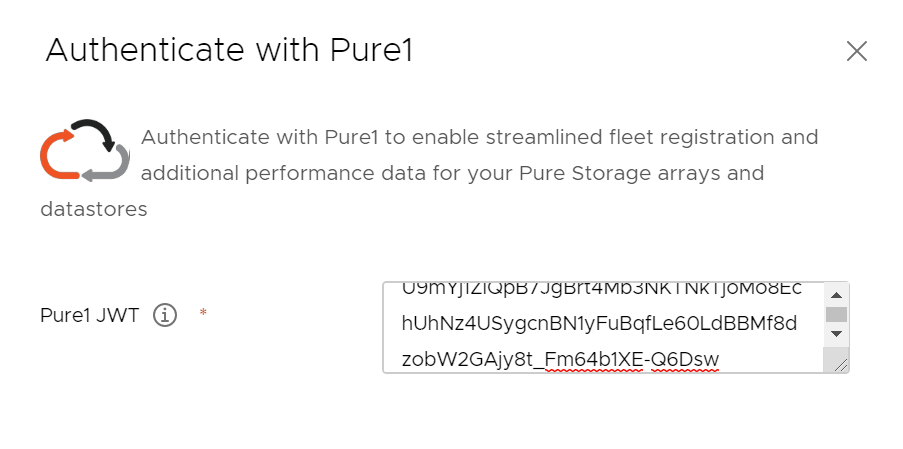
So whatever method you choose, take that JWT and paste it into the authenticate window.

Register FlashArrays
The next step is to register your FlashArrays as management target. Remember the Pure1 REST is about metrics and data, it cannot control your FlashArrays. So if you want the plugin to be able to control your array, you need to also authenticate them individually. If all of your arrays are registered then you can skip this step now. But if one or more are not, follow along!
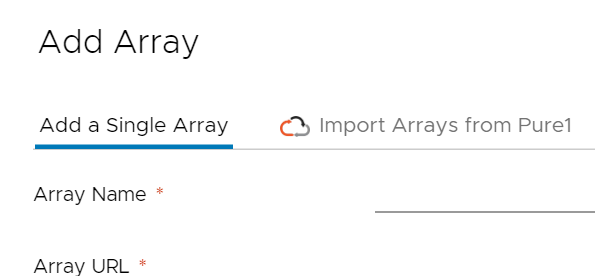
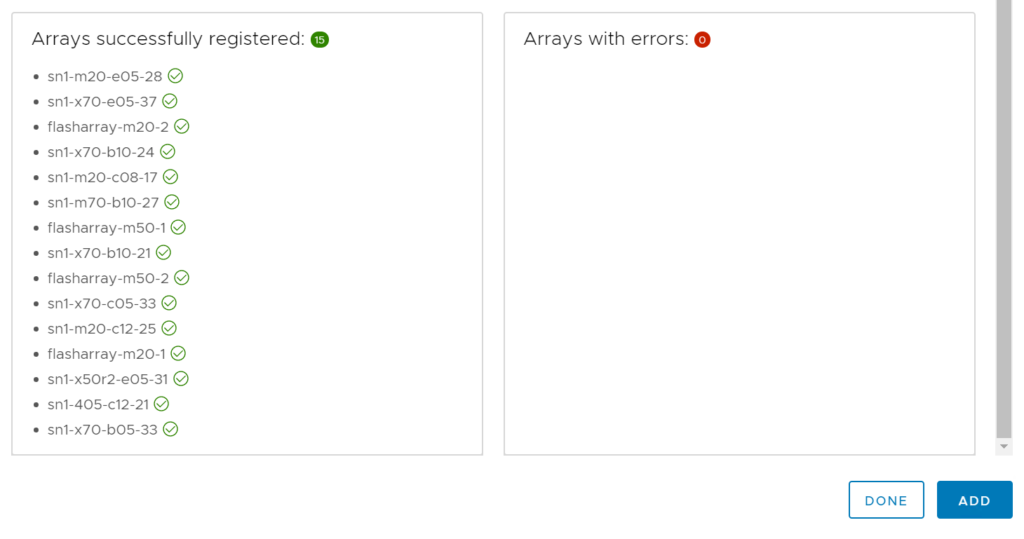
Now previously, you needed to register each array one by one. Now that we have access to Pure1, we can automate this a bit. Click on the Add button in the plugin home screen.
You can add them one by one here if you want or you can click on “Import Arrays from Pure1”.
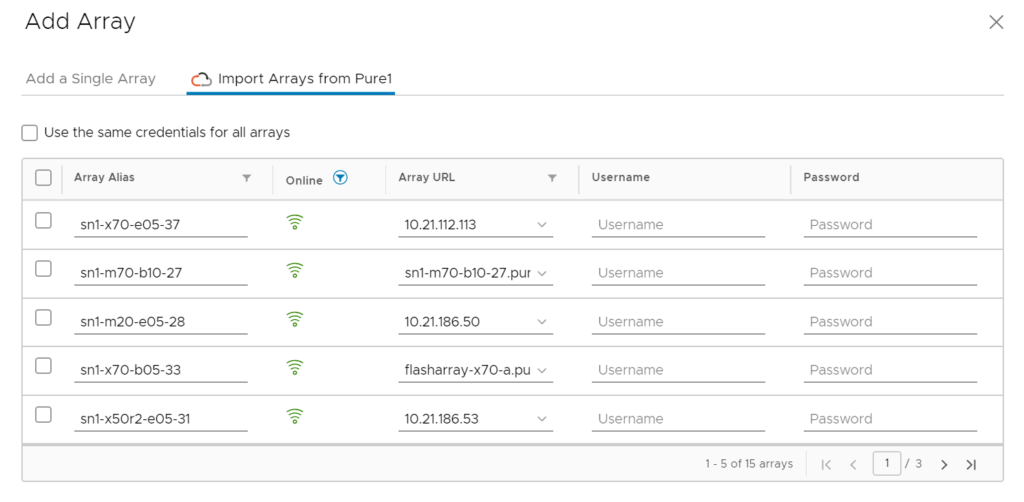
Once you do that, the plugin will reach out to Pure1 and find any arrays in your organization that are not yet registered. It pulls down the virtual IP (from vir) and will then ping it and also do a reverse lookup to see if it can find the FQDN. If it can ping it will show as Online. If it can do a reverse lookup we will list the FQDN, otherwise it will just show the IP.
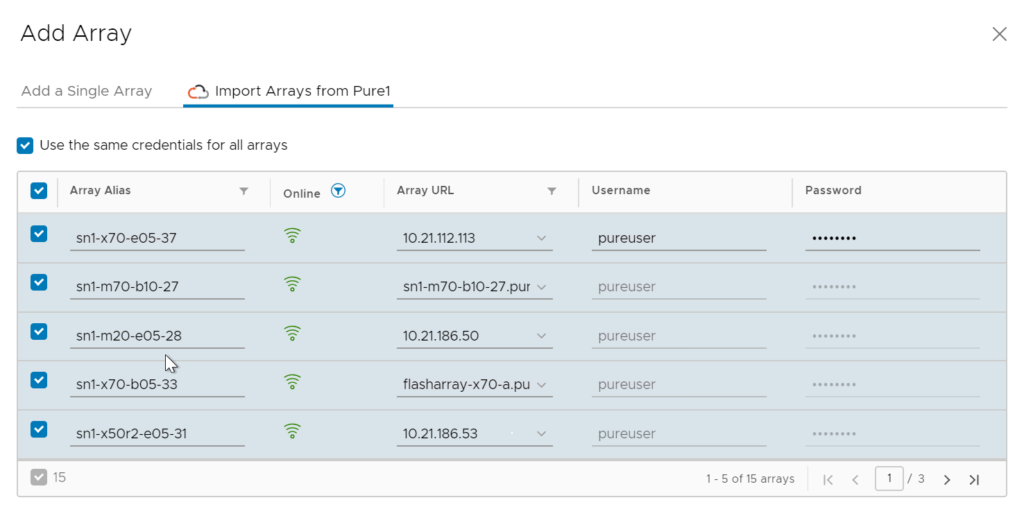
Now select one or more arrays you want to add. You can enter the credentials for each one, or choose “Use the same credentials for all arrays” and just enter them once. This is modeled after the “Add hosts to cluster” wizard. Just enter the creds then to the first array you want to add.
Hit add when you are ready.
Note that if you have more than 5 arrays you need to page through and hit the select all option on each page if you want to add them all at once.
Pure1 Array Tags
So the first thing you might see is that we now show tags for each array:
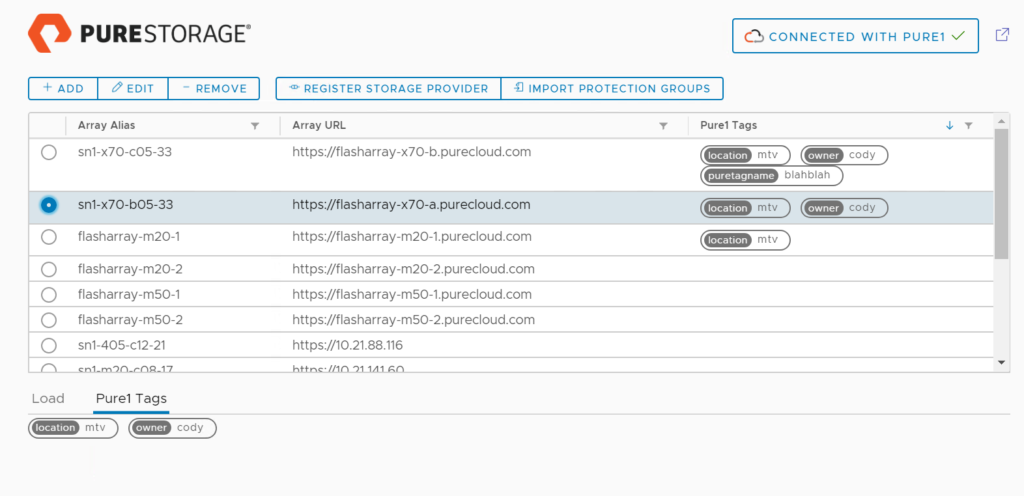
In the column and under the sub-tab of Pure1 Tags. What can you do with them in here? For now? Nothing. Just see them. Creation is still in Pure1 (though the REST does allow you to create them). This is NOT the end of our plans for using these tags in vCenter. I am sure if you think about it for a few seconds you can see where we plan to take this. This is just step 1 for tags.
Pure1 Busy Meter
Ah the busy meter. Also known as total load. Or total busy. This is a very important number. I’ve told customers many times, there are really only two numbers that matter for the FlashArray. How full it is capacity-wise, and how busy it is. Everything else is essentially trivia.
How full the array is from a capacity perspective is a fairly obvious metric. But what is the busy meter? Well it basically says how busy your array is in the form of a percentage. 50% busy. 90% busy. Etc. This metric is a combination of all of the stuff going on inside of the FlashArray that contributes to its load. Simply looking at CPU usage tells you nothing–if you are not using it we (Purity) are. From this metric we can do A LOT of intelligent trending, analysis, and reporting. How will a hardware NDU to a more powerful model affect your total busy? Etc.
Anyways, using those two metrics you can have a pretty good idea of how and when an array might tip over (from being full or busy).
So when you click on an array you now see a chart that shows the busy meter in graph form:
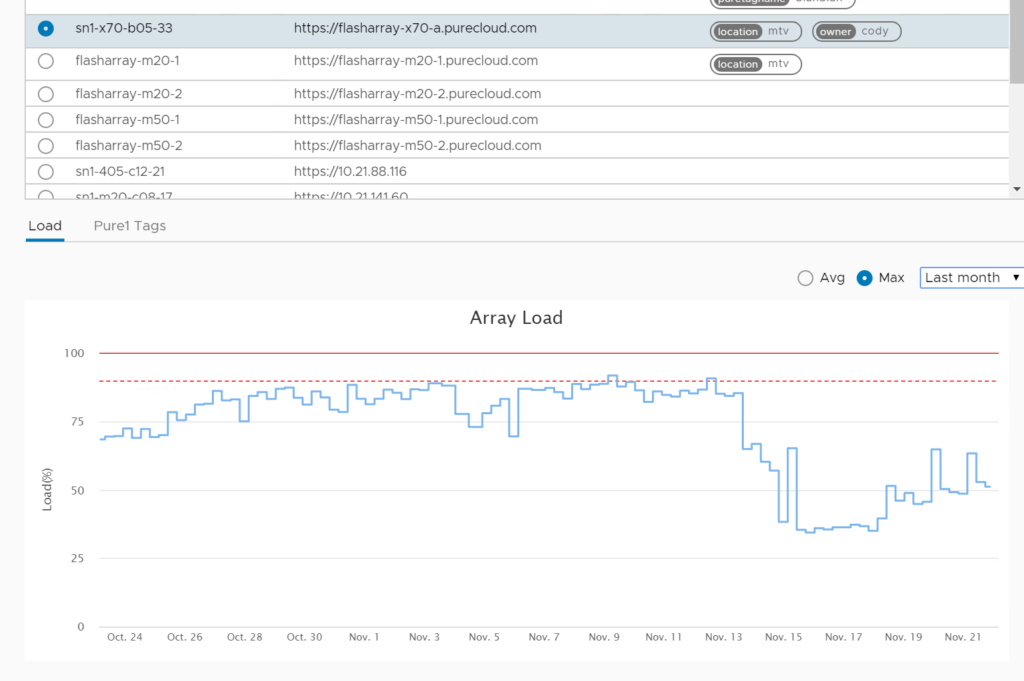
We keep this metric for 30 days in Pure1 and you can choose last three hours, last day, last week, or last month in the plugin graph. Also average or maximum. For the most part what matters is the maximum–if the array only hits 98% for a few minutes a day, that is still probably not an array you want to put more workload on. The average is useful to see if the average and maximum differ a lot, if they do, that array workload is super bursty. Might want to look at rebalancing to other arrays.
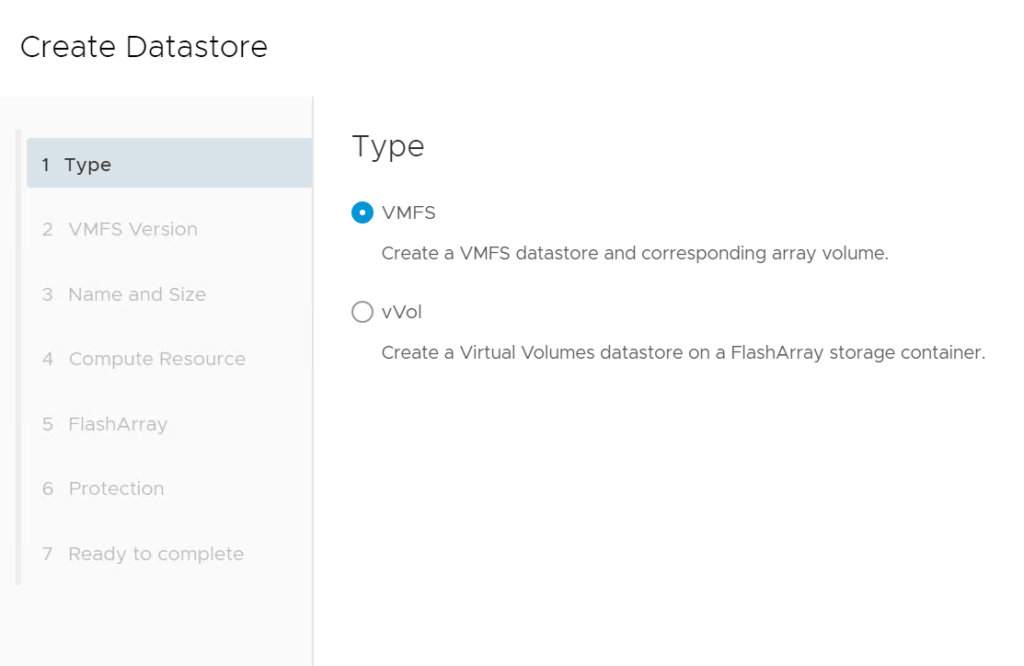
Intelligent Provisioning
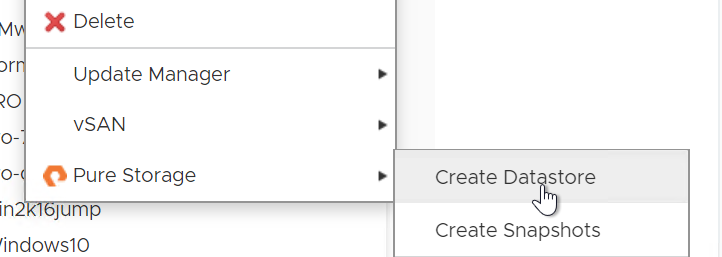
We took this metric a step further but including it in our Create Datastore wizard. Previously our datastore creation window was one screen. Now it is an interactive wizard. Right-click on a cluster, then Pure Storage, then Create Datastore.
Choose vVol or VMFS. Currently “intelligent provisioning” of datastores is only for VMFS as it doesn’t make nearly as much sense for vVols when it comes to creating datastores, it makes MUCH more sense for creating VMs which is when storage is actually provisioned. Stay tuned on that front.
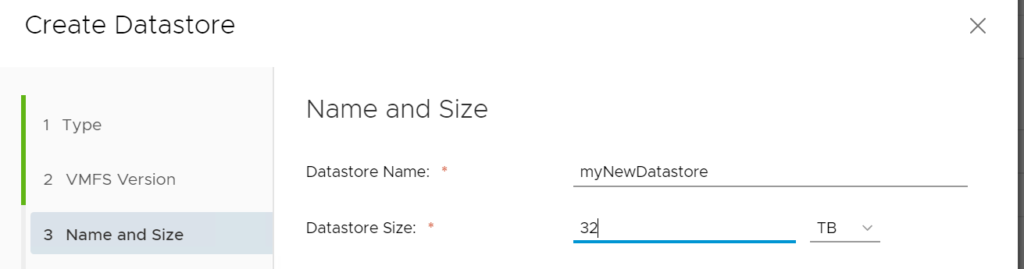
So enter in details as needed
In the next screen the default behavior will be for use to choose an array for you:
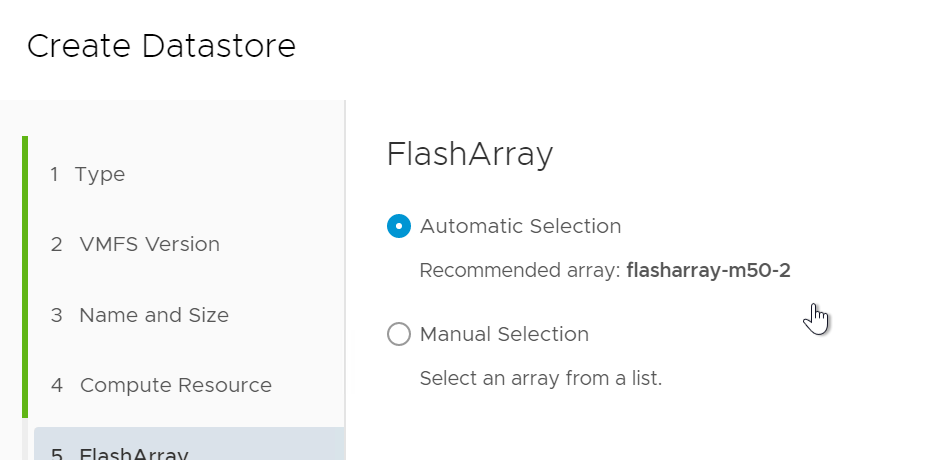
We look at the busy meter and capacity full. We favor for the busy meter, but if the least busy array is more than 75% full we will look for the next least busy array. We will also only list arrays that have connectivity (host groups) for the selected cluster. If you see this:

It means you didn’t create any hosts groups on the registered FlashArrays.
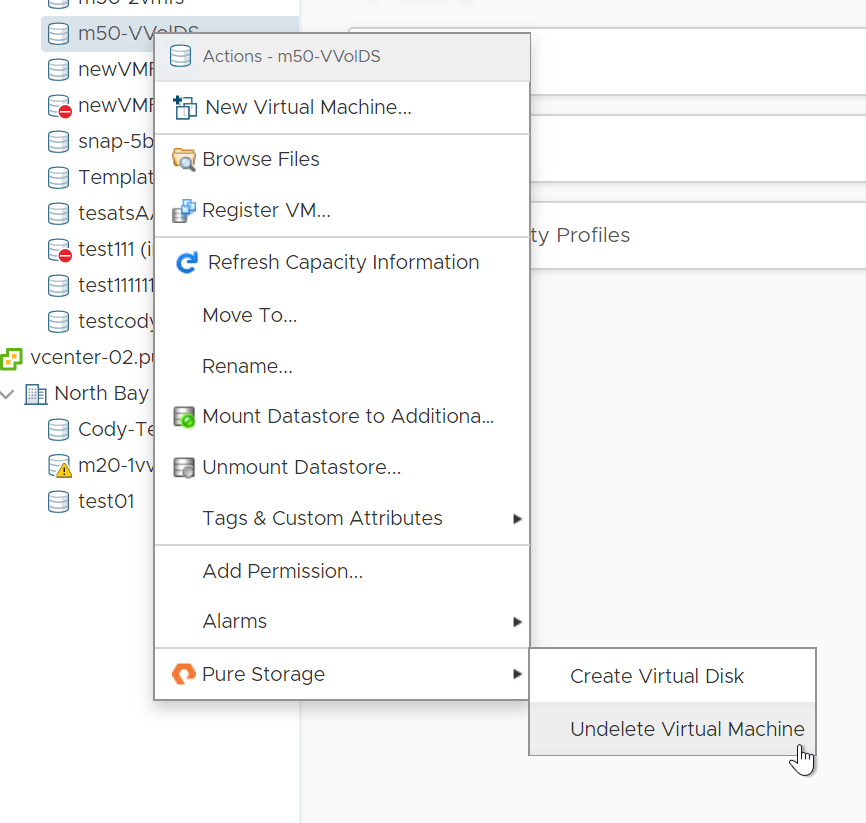
Virtual Machine Undelete
In the 4.1.0 release we added vVol support. One of those features was “undeleting” a vVol virtual disk.
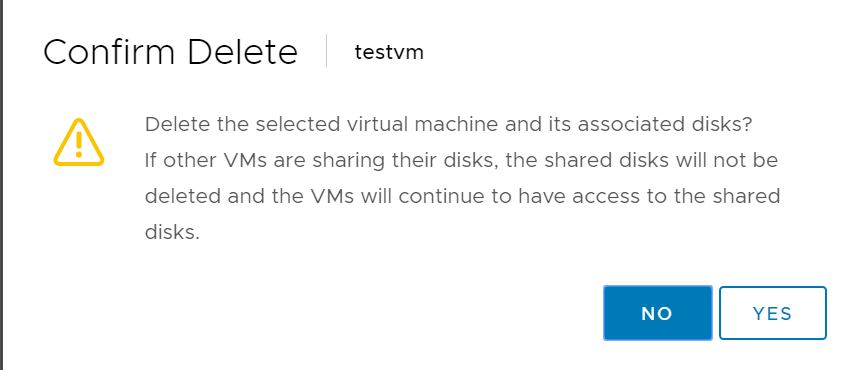
Cool. But what if I accidentally delete the ENTIRE VM? Good question. Well in this release we added that feature. As you may or may not know, when you delete a volume on the FlashArray, we actually put it in the destroyed volumes folder for a day. Then we permanently delete it. So if you delete a vVol virtual disk you have a day to bring it back, whether or not you had a snapshot or a backup.
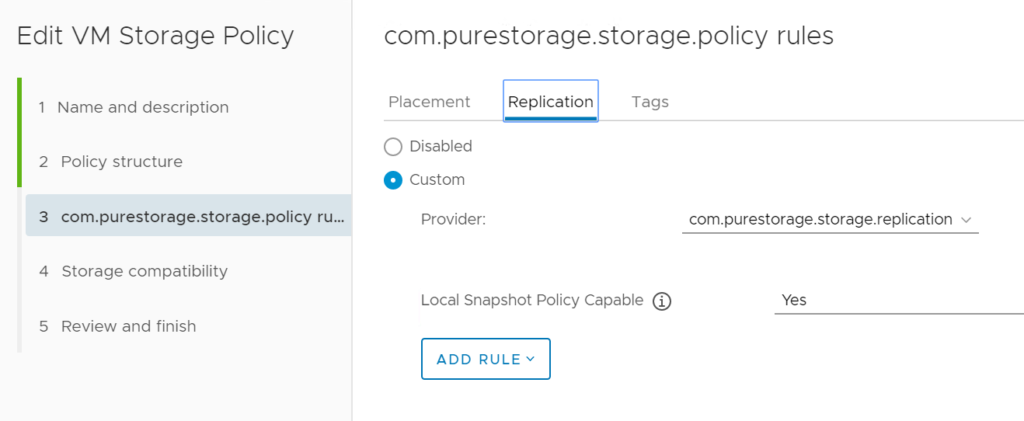
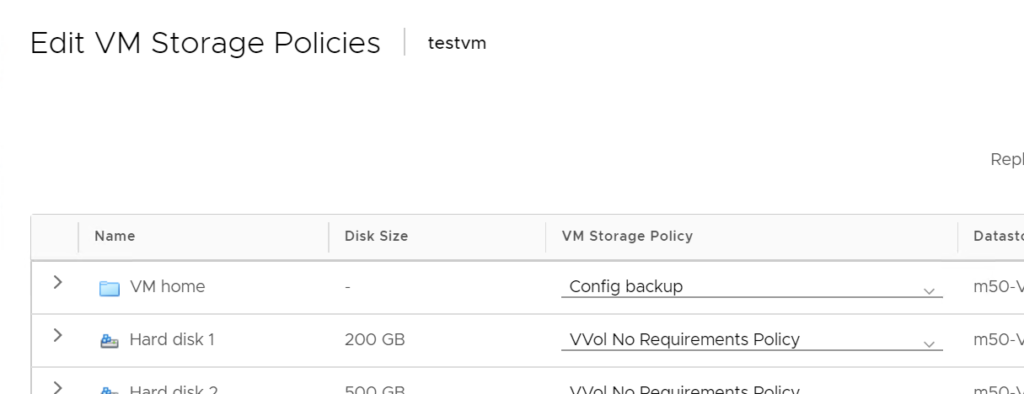
An entire virtual machine is a bit different though. When you delete a VM, ESXi first deletes all of the configuration files in the config vVol and then tells us to delete it. So we can restore the data vVols (virtual disks) just fine and we can even bring the config vVol back, but it will be empty. There were no files on it when we were told to delete it. So to protect against this, we recommend having at least a snapshot policy assigned to the home of the VM:
Assign it to the home:
That way the config vVol and its data is regularly backed up via a snapshot. So if you accidentally delete it:
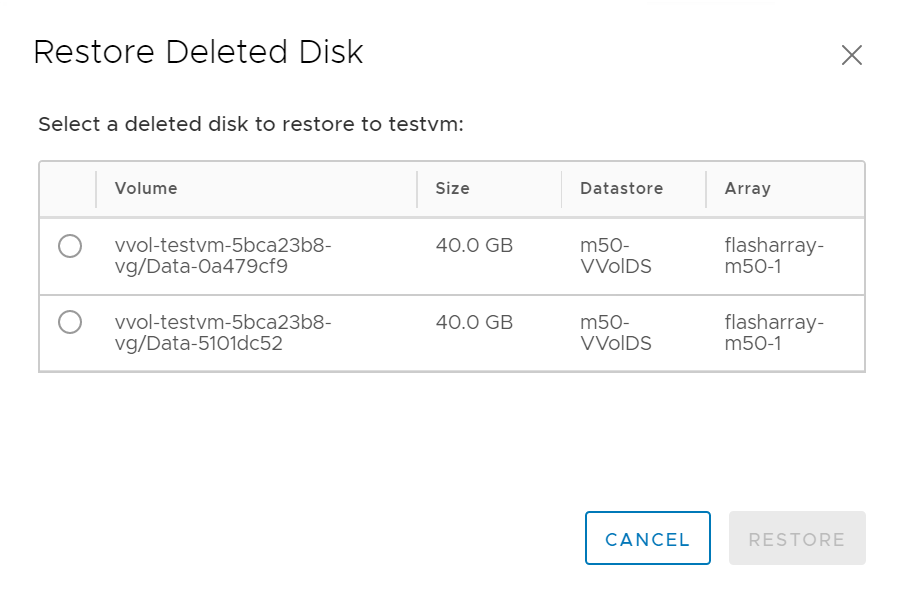
You can right-click on the vVol datastore, then Pure Storage, then Undelete Virtual Machine:
You will see all deleted VMs:
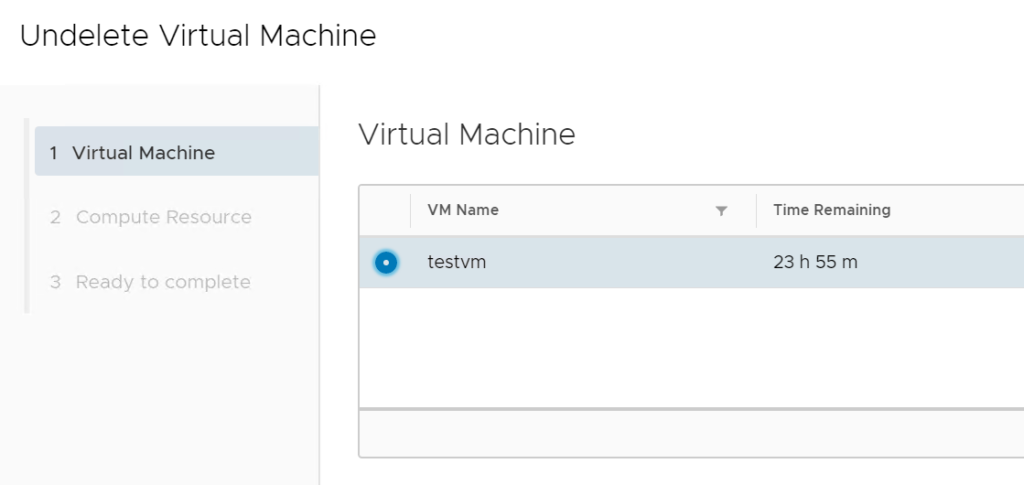
Choose it and finish the wizard. The VM will be back in seconds. We pull the config vVol and data vVols back from the destroyed volumes folder and restore the config vVol from the latest snapshot so the files are back.
We will also note for you on the home page if we detect the VM is not currently protected by a protection group snapshot:

Stay tuned on this feature too as we are just starting. We are already hard at work on 4.3.0, so send any feedback along!
Hi,
Isnt there an automated way to register flash array to vSphere plugin?
There is a way to do it, but it is undocumented as the process would change release to release in the backend. I’ll add it to a feature request for a future release